fall inside a hole
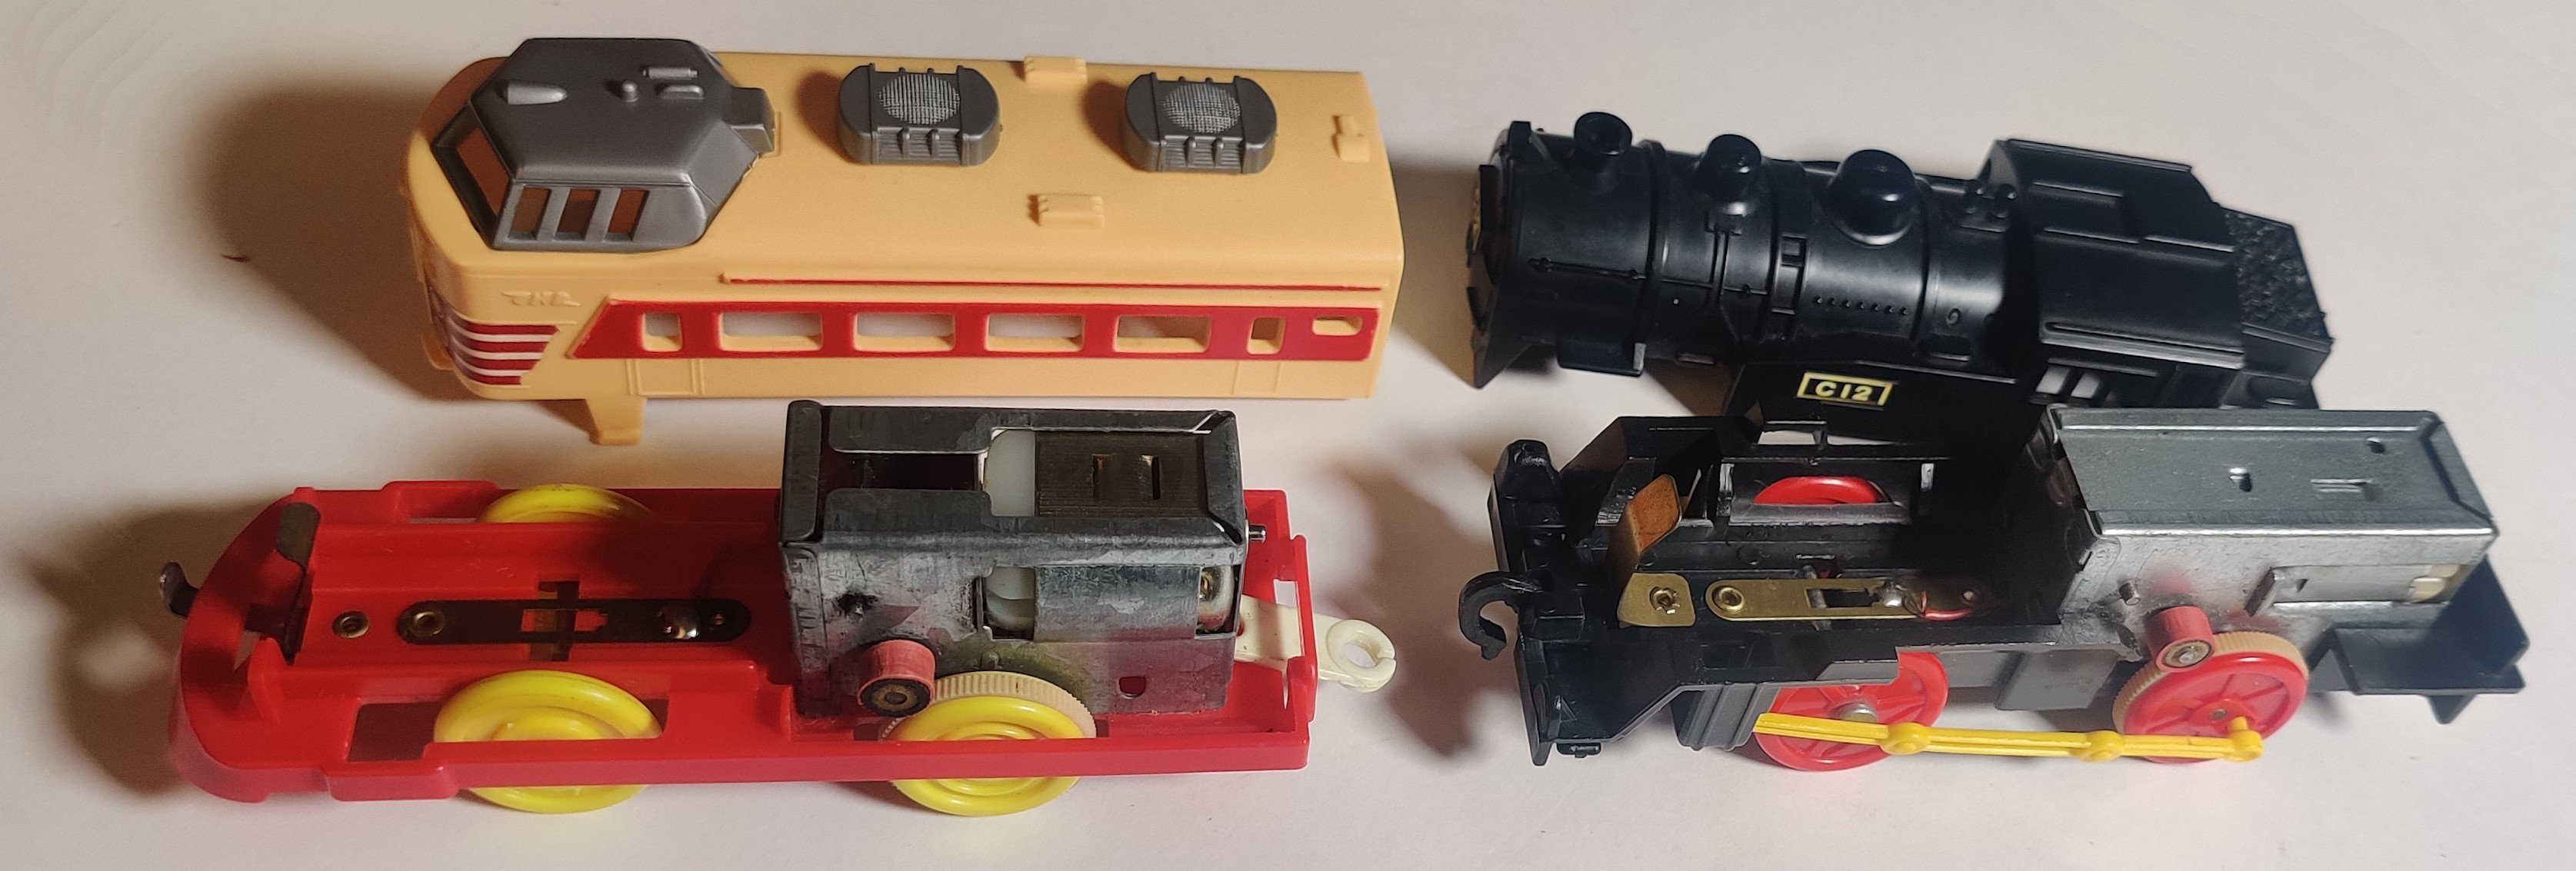
Old Power Gearbox Repairs
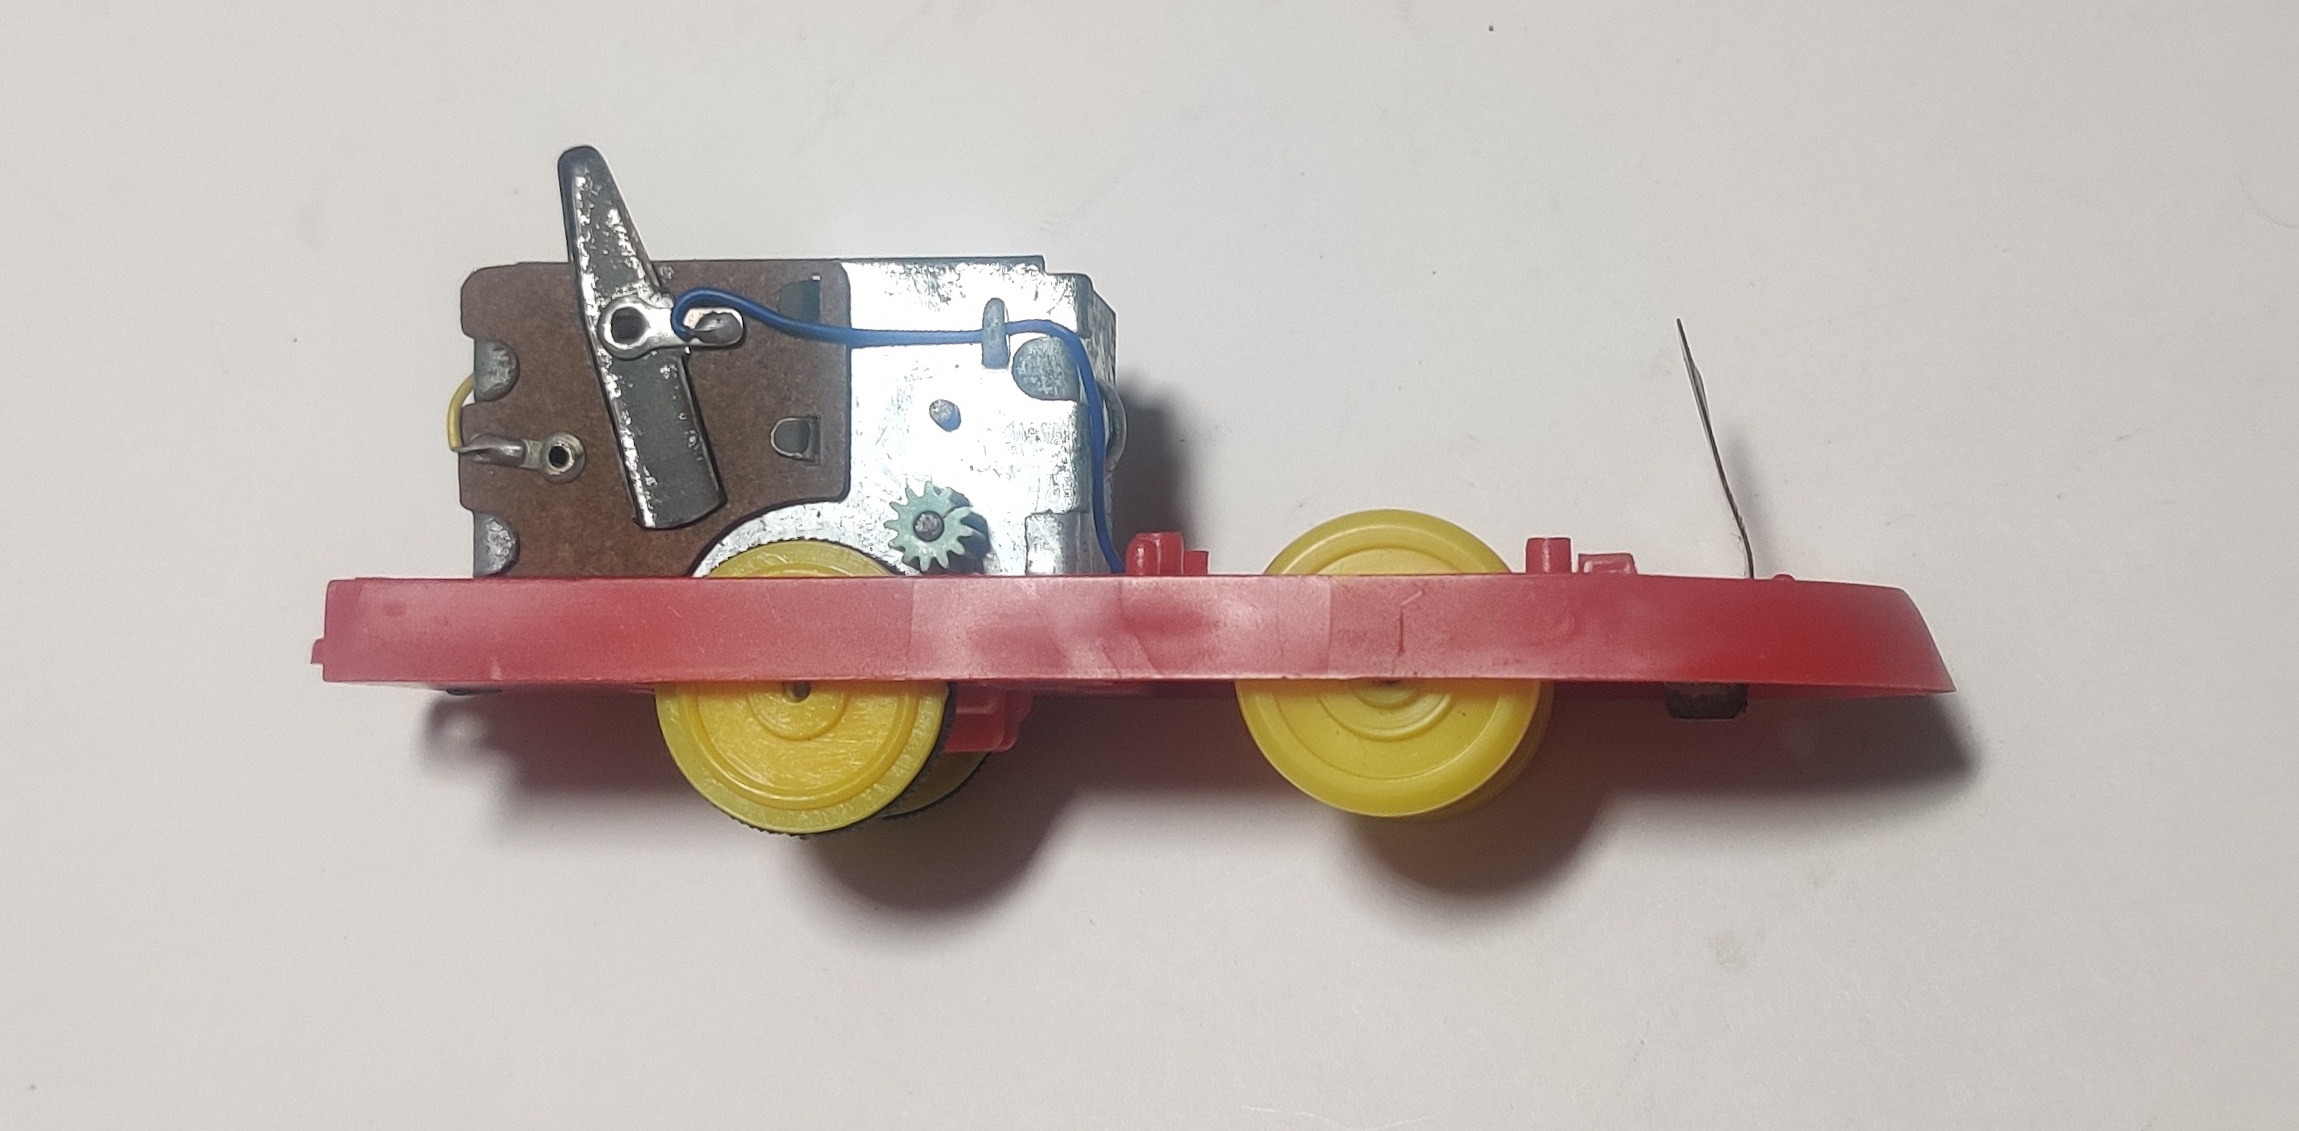


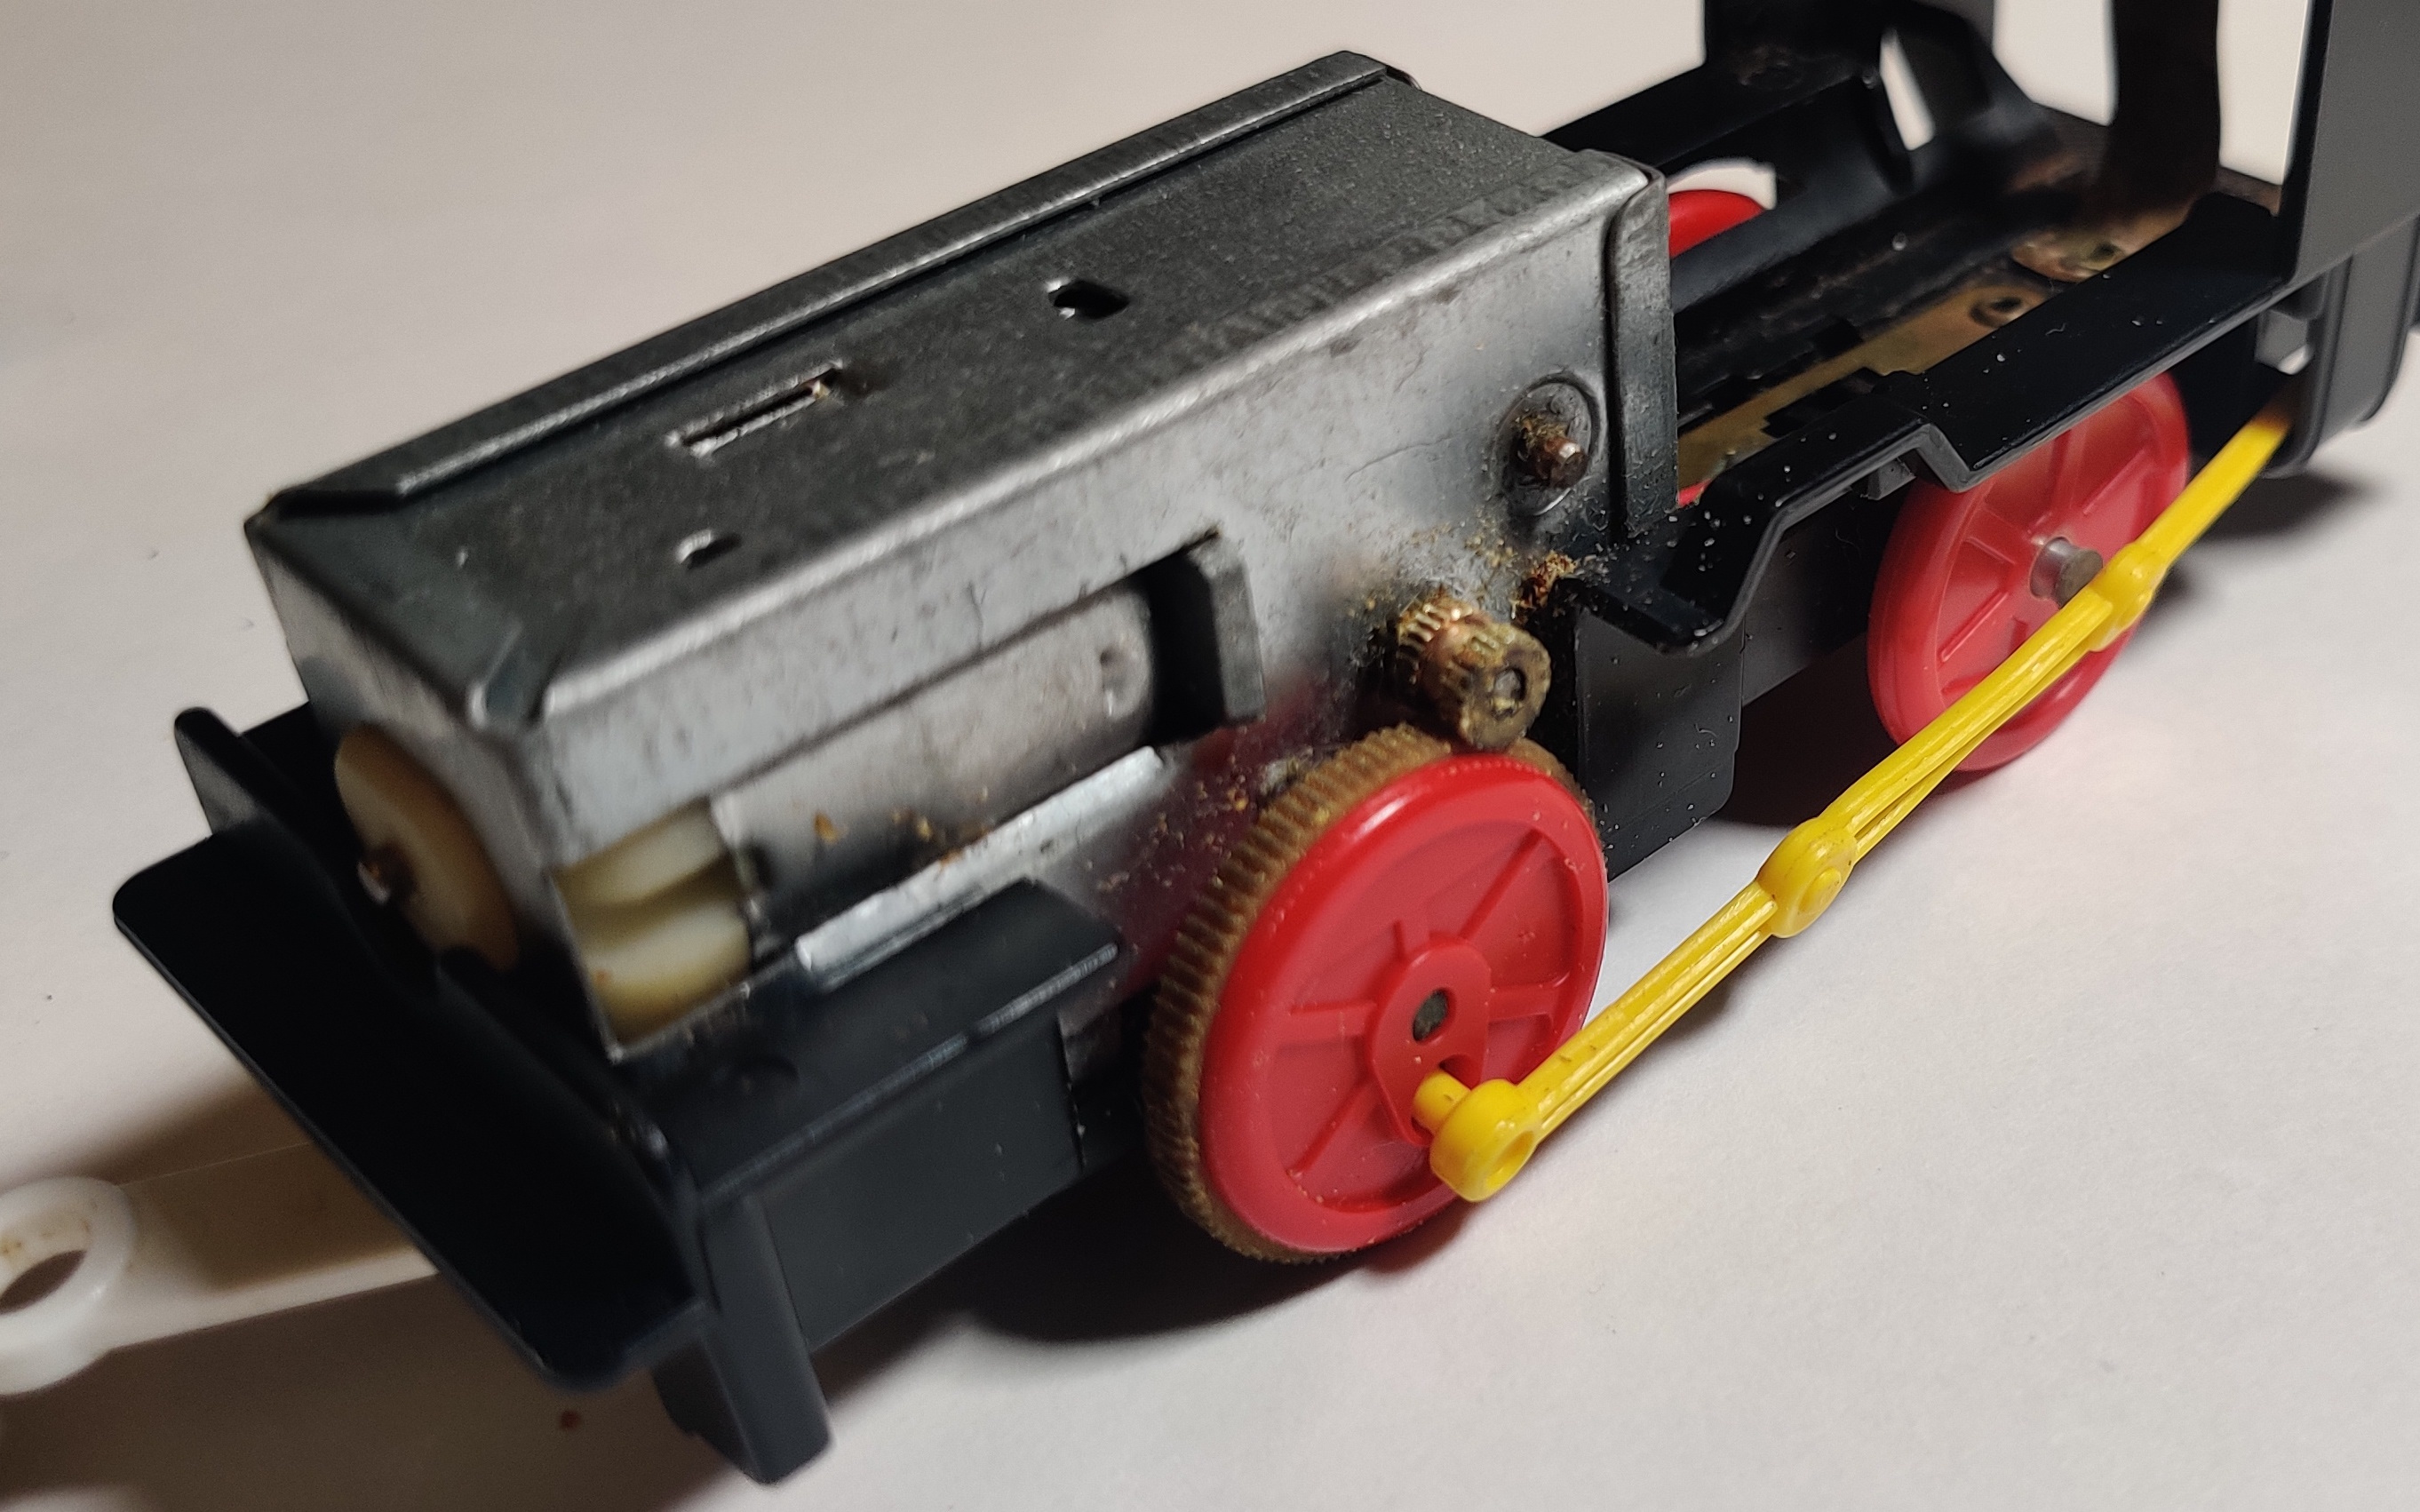
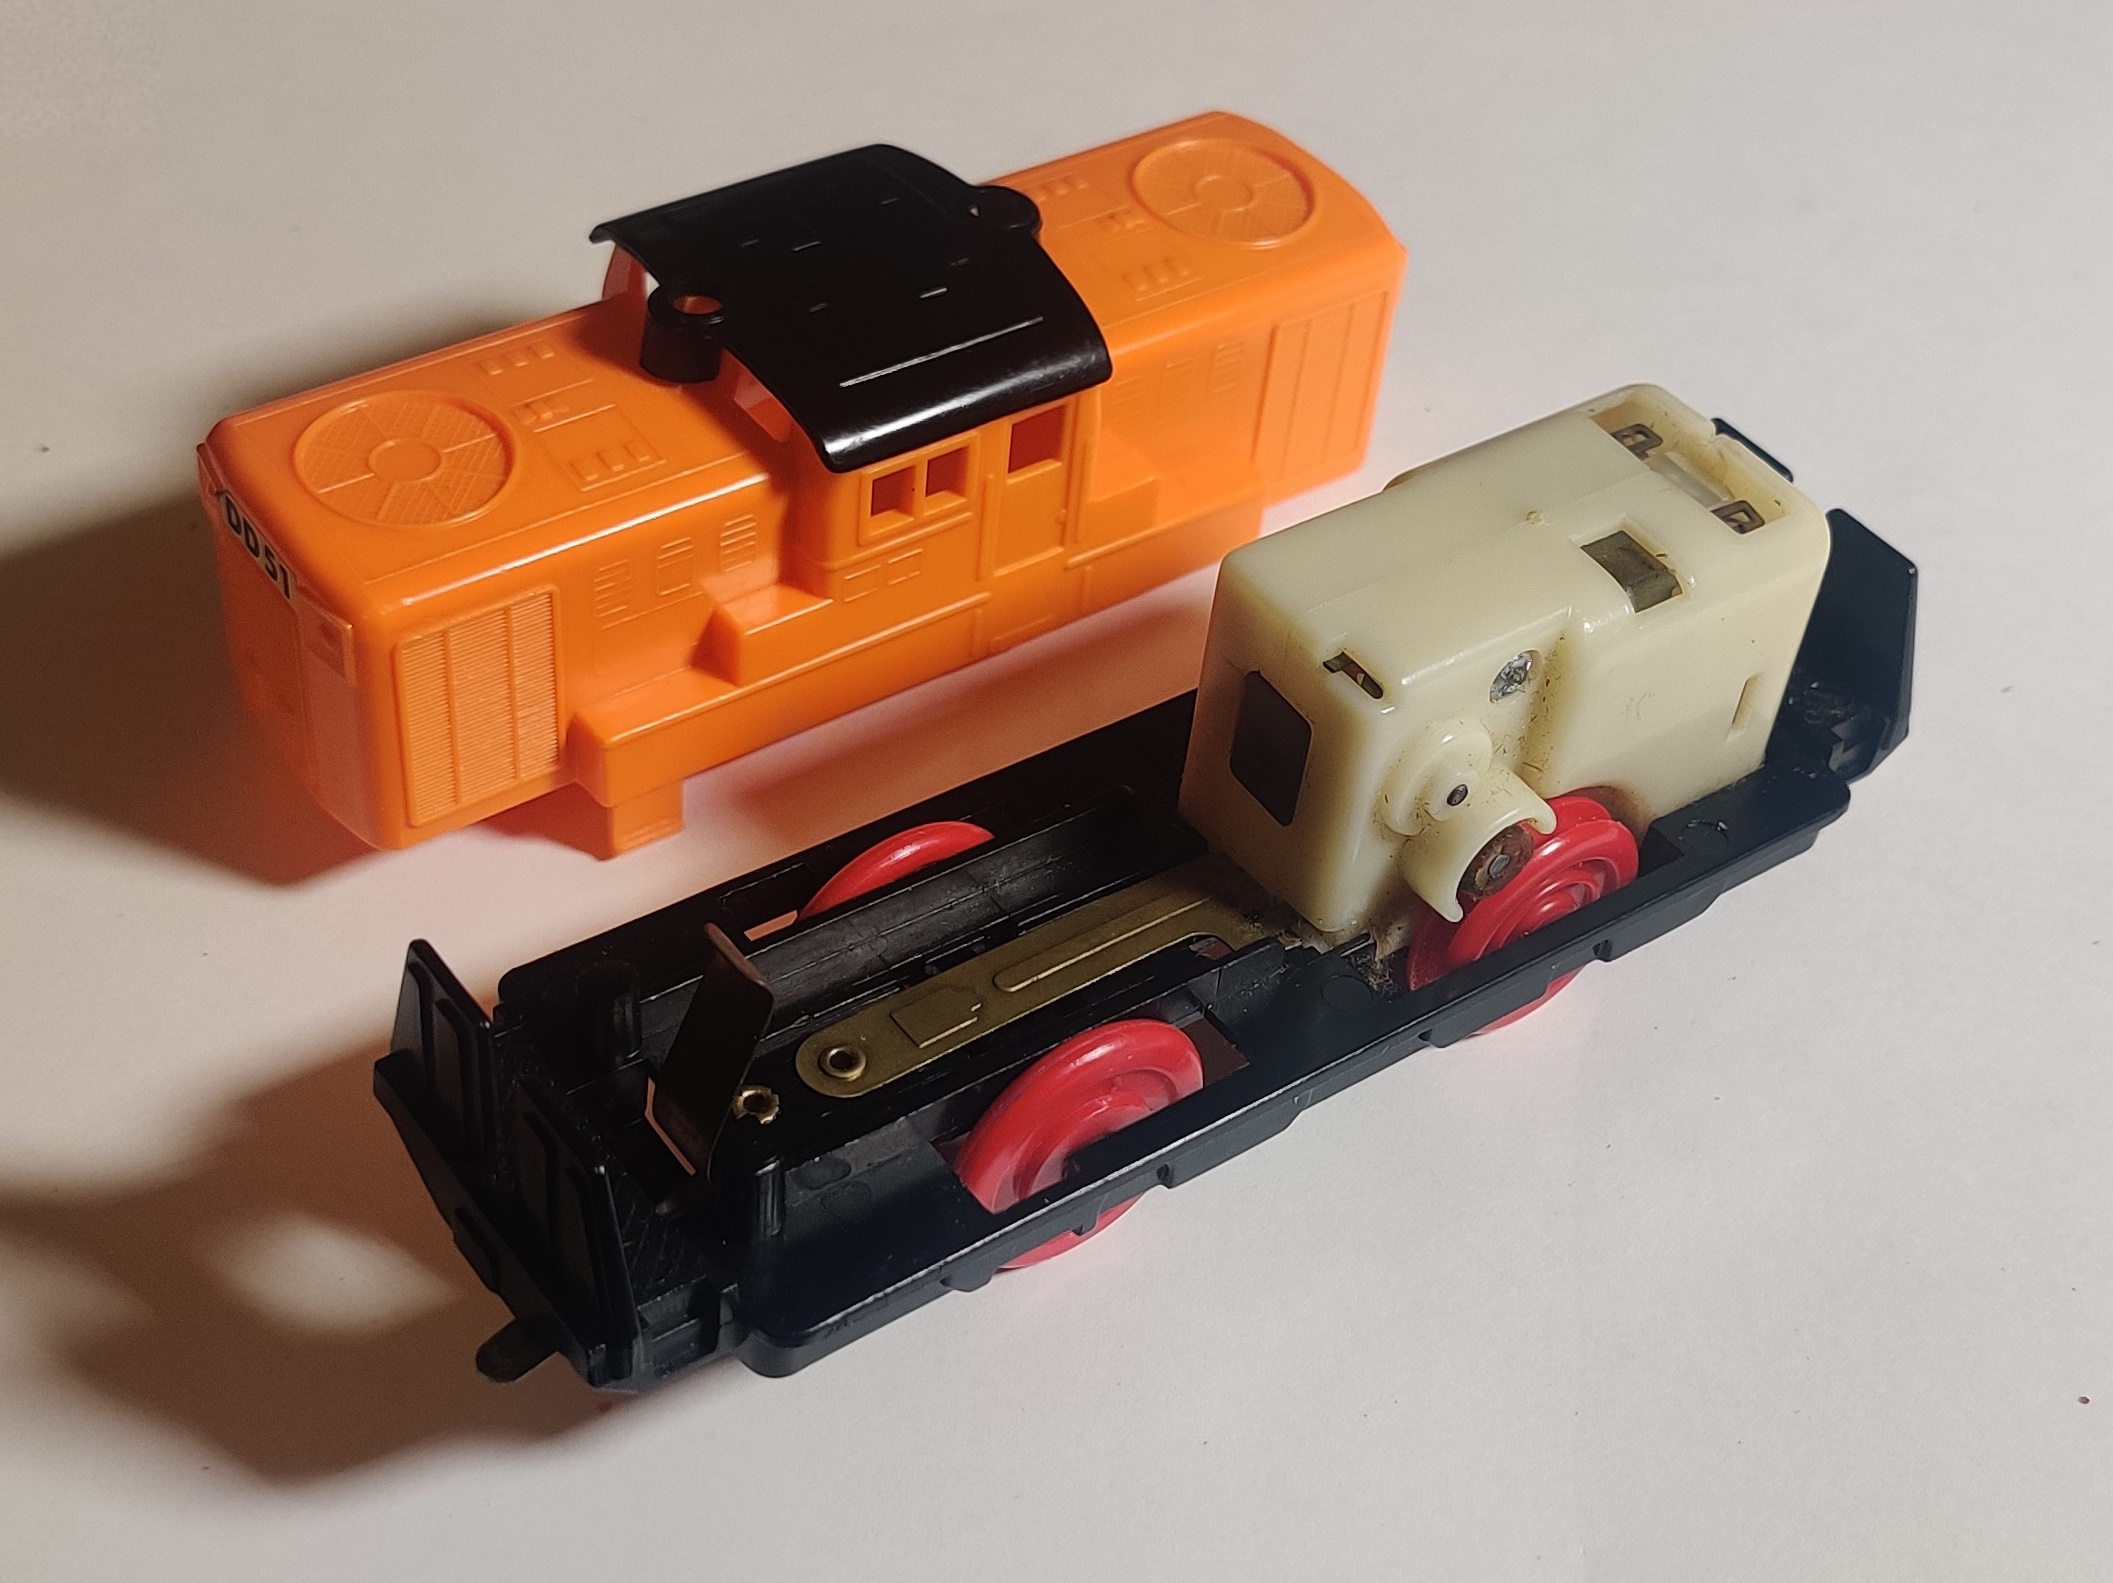
The "old power" (旧動力) gearboxes are friction-drive gearboxes used on early Plarail that used two rubber tires (or, in very early trains manufactured before 1970 or so, two plastic gears) that drive against the rim of the traction tire on the driving wheel. These gearboxes came into use in the 1970s with the push to represent more real engines in Plarail and remained in widespread use until the late 1980s on many models.
The first Plarail gearbox, used in the original Electric Plastic Train, the Highway Bus, and the earliest Hikaris (including the Child Guidance export version pictured) was direct-drive with a power switch at the front, but this was followed relatively quickly by the first friction-drive gearbox, which had an upwards-mounted power switch that stuck up through train roofs and was only used on mid-late 1960s Hikaris and early commuter Trains. These gearboxes used plastic gears sticking out the side to run against thinly-tired drive wheels.
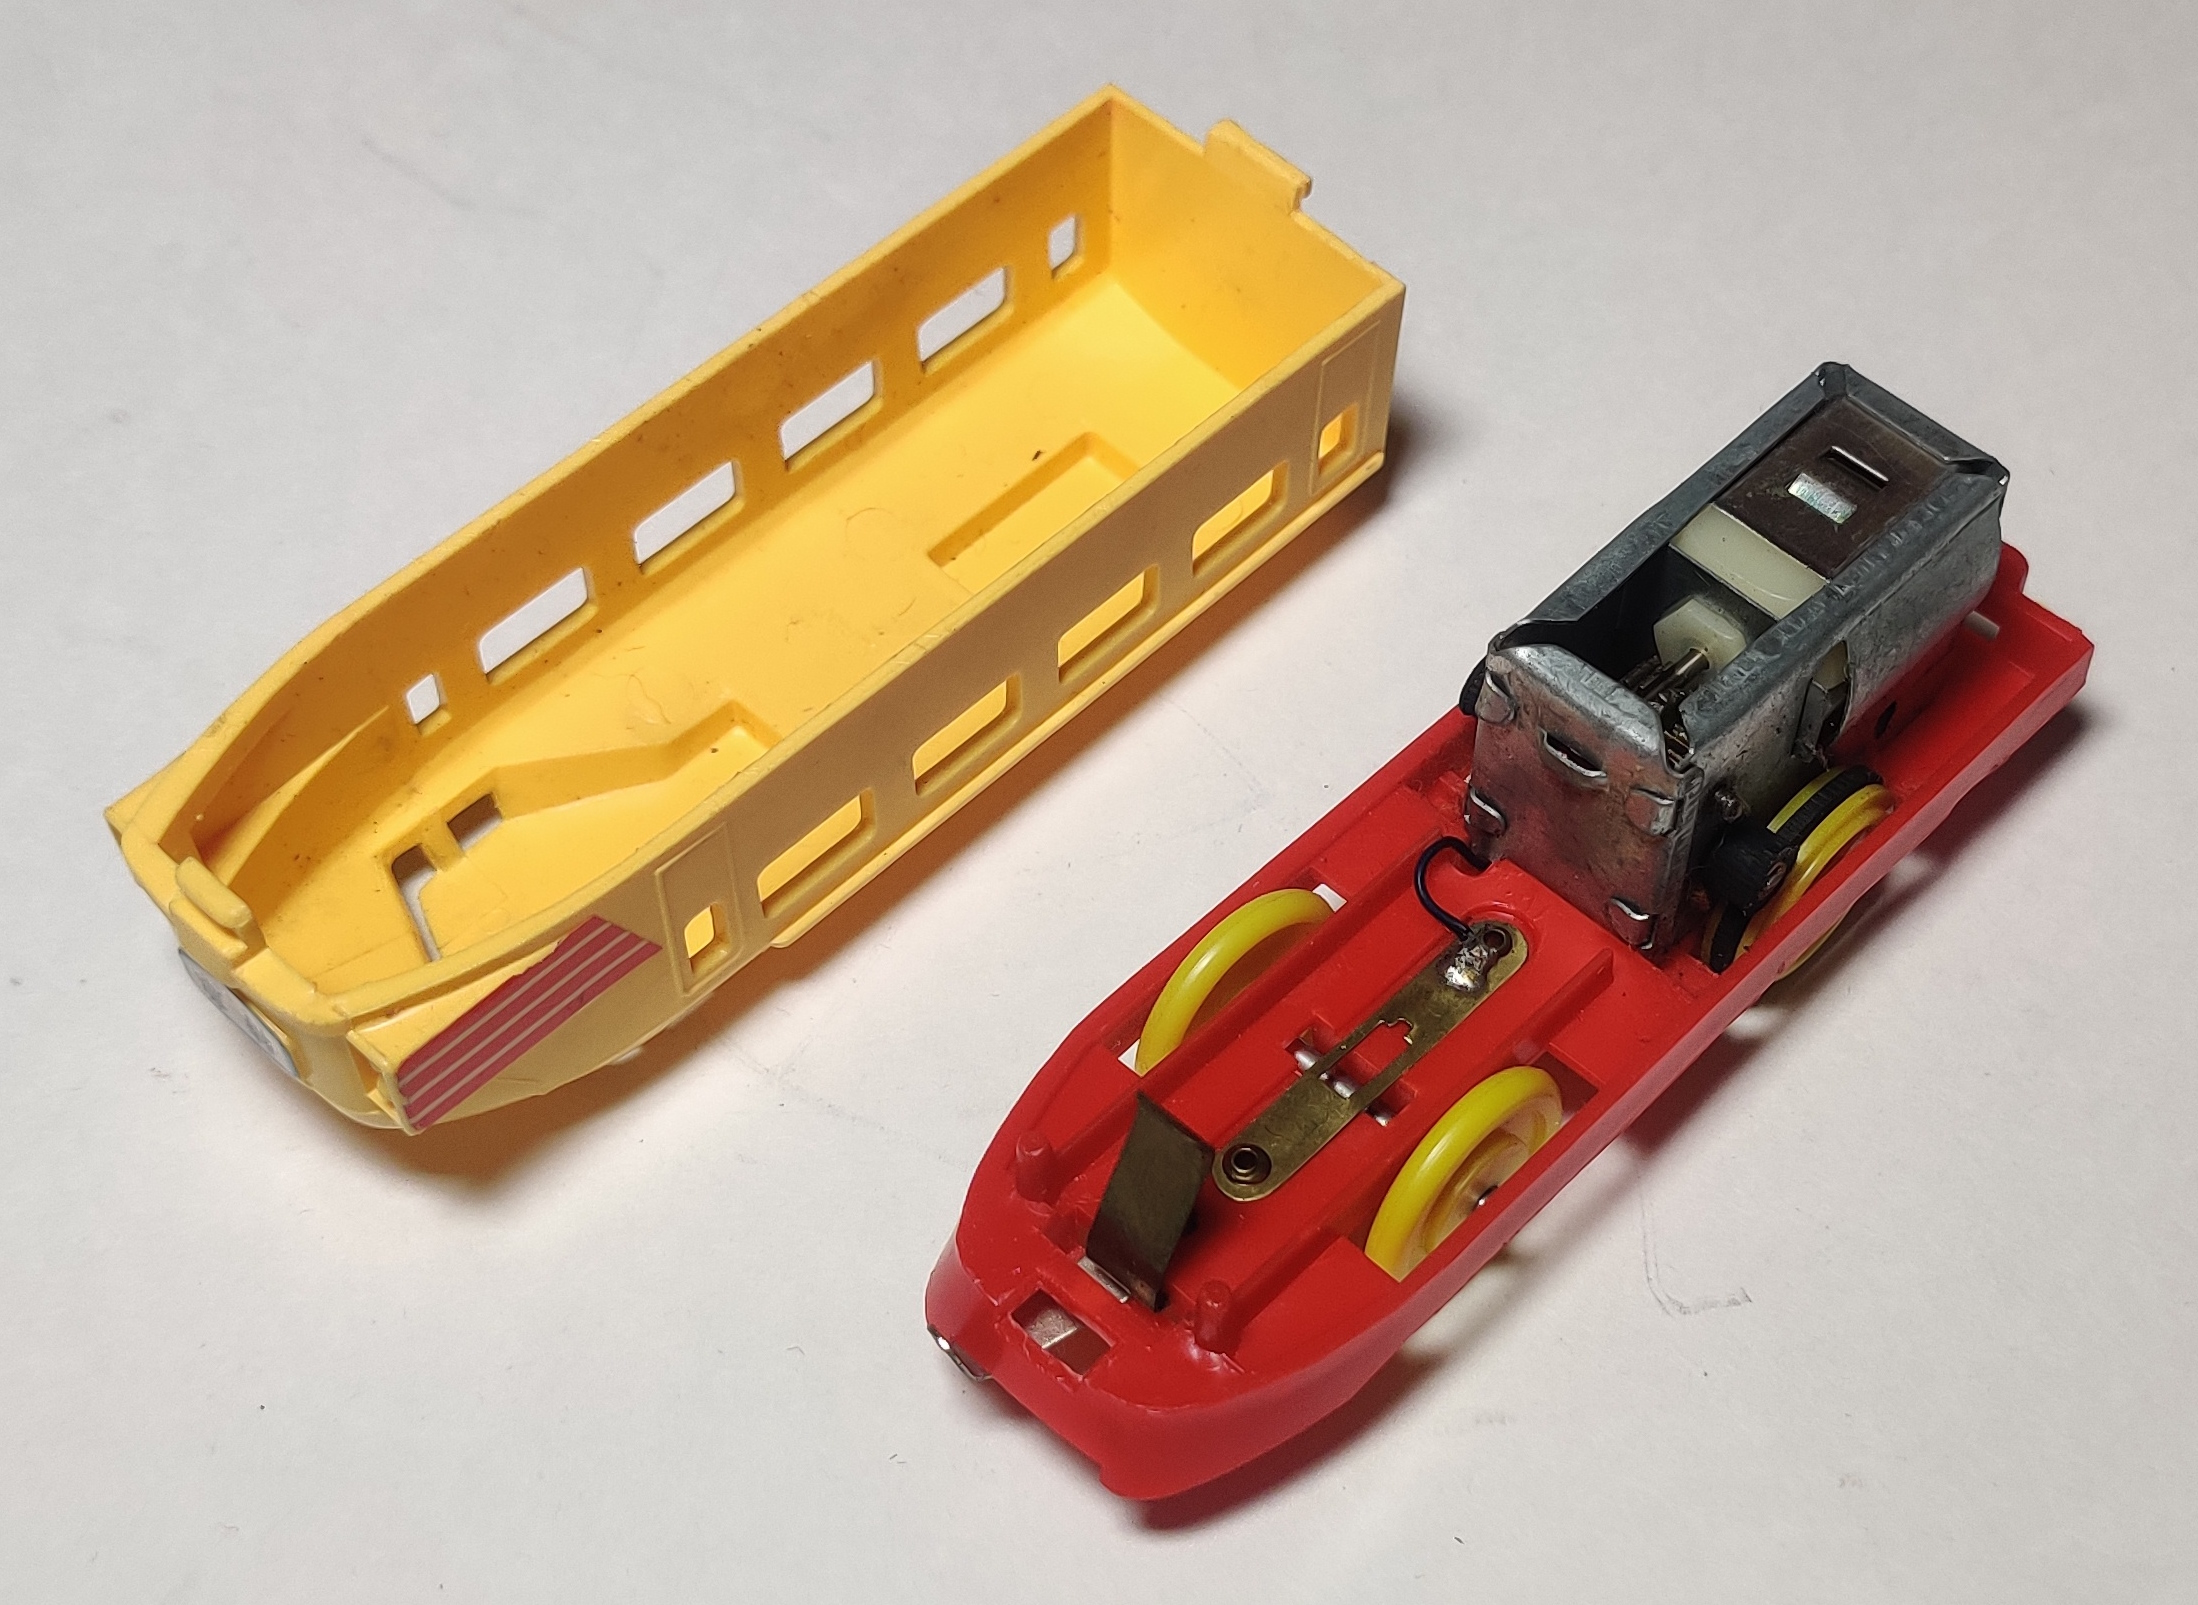
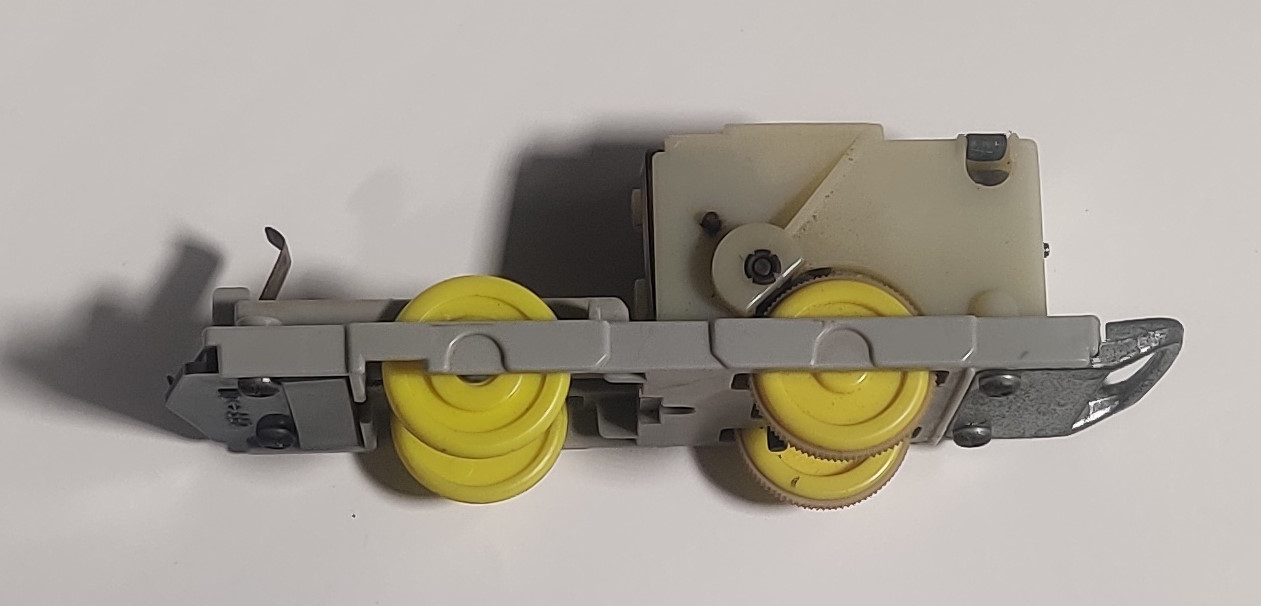
In the early 1970s the first wide-spread rim-drive gearboxes were built into all of the new trains Tomy released. Steam locomotives like the D-51 had larger gearboxes with an integrated clicking "chuffing" mechanism. Early examples of this gearbox circa 1969 and 1970 or so have plastic gears on the output like the older style, with a darker (and longer-lasting) rubber drum used in the early 1970s until the brass-core drive tires used for the rest of the 1970s and 1980s and into the 1990s on the later old-power trains.
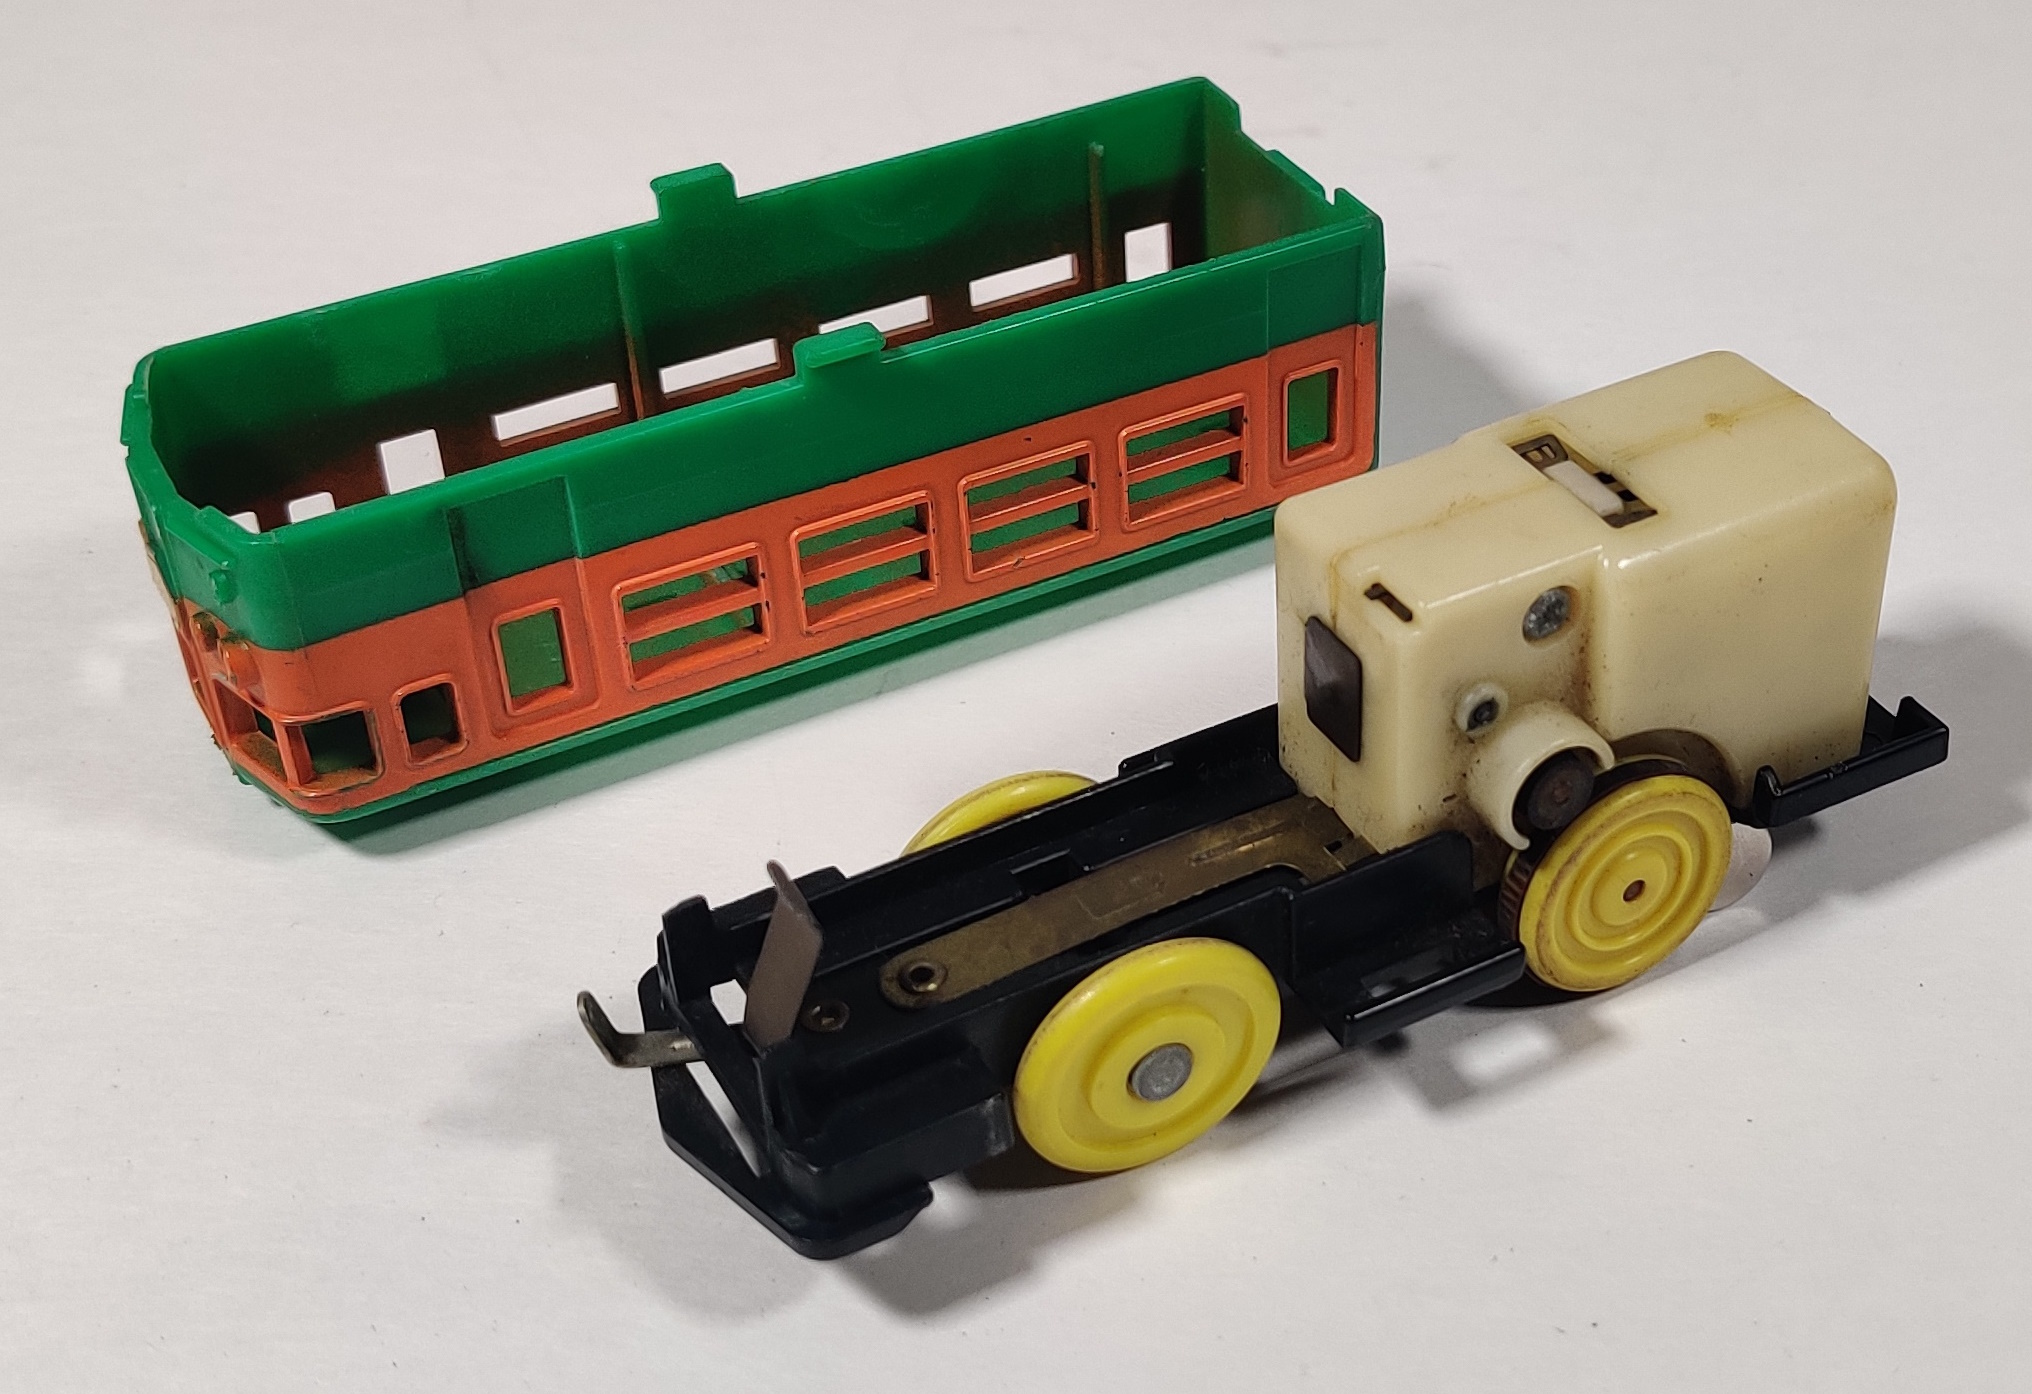
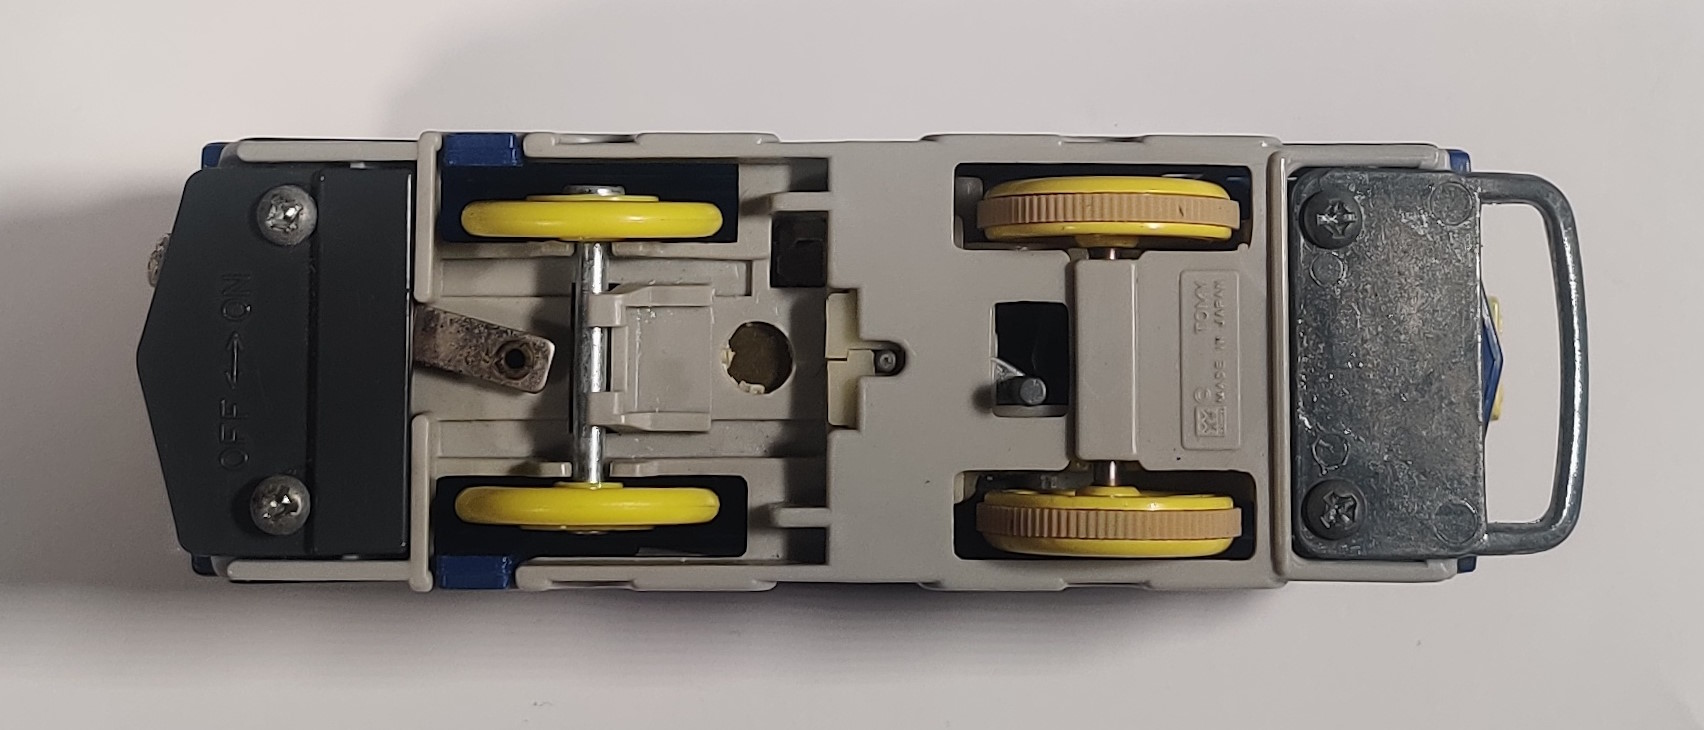
Starting with new releases in the later 1970s and being retrofit into older tooling in the 1980s, many trains moved to using a milky-white plastic friction-drive gearbox. Cramped models like the D51 and C12 continued to use the thinner metal gearboxes up into the early 90s. Variants of rim-drive gearboxes were used in many 70s export sets and due to their age nearly all rim-drive gearboxes will have completely failing rubber components if not additional mechanical faults, most typically a motor which does not run or a power switch that no longer operates correctly.
Other old-power gearboxes
In addition to the "standard" friction-drive gearbox types, a few other releases also had specific gearboxes to fit odd train toolings or include special features.
The Round-Trip Plarail locomotives feature a mechanical reversing mechanism triggered by a hanging metal pin that would be triggered by track sections with raised angled portions of the track. The two types of round-trip gearbox are covered on the Round-Trip repairs page.

Another style of reversing old-power gearbox was designed to fit inside a new version of the C-12 but did not end up going into production with the reversing feature, with the toolings later used with a non-reversing gearbox for Palitoy Discovery Time and Stelco Junior Express production in Hong Kong. Although the production version of this gearbox did not include the reversing capability, parts from a Round-Trip gearbox can be used to make these export C-12s reversing-capable. This is covered in more detail on the Hong Kong-made C12 gearbox page.
The EC10 Express Train released in 1979 was the only old-power train to use a two-speed gearbox, and it is built similar to the later new-power gearbox in both its single and two-speed varieties, with a spring assisting the roof-mounted switch (which is not the power switch, although its middle position leaves the gearbox in neutral) in changing gears. Like other old power gearboxes, one of the drive hubs needs to be removed to get the gearbox fully apart for repairs.

The cramped Mickey Poppo locomotives have their own style of old-power gearbox built into their small chassis. It (as well as the new power version) is covered on its own page.
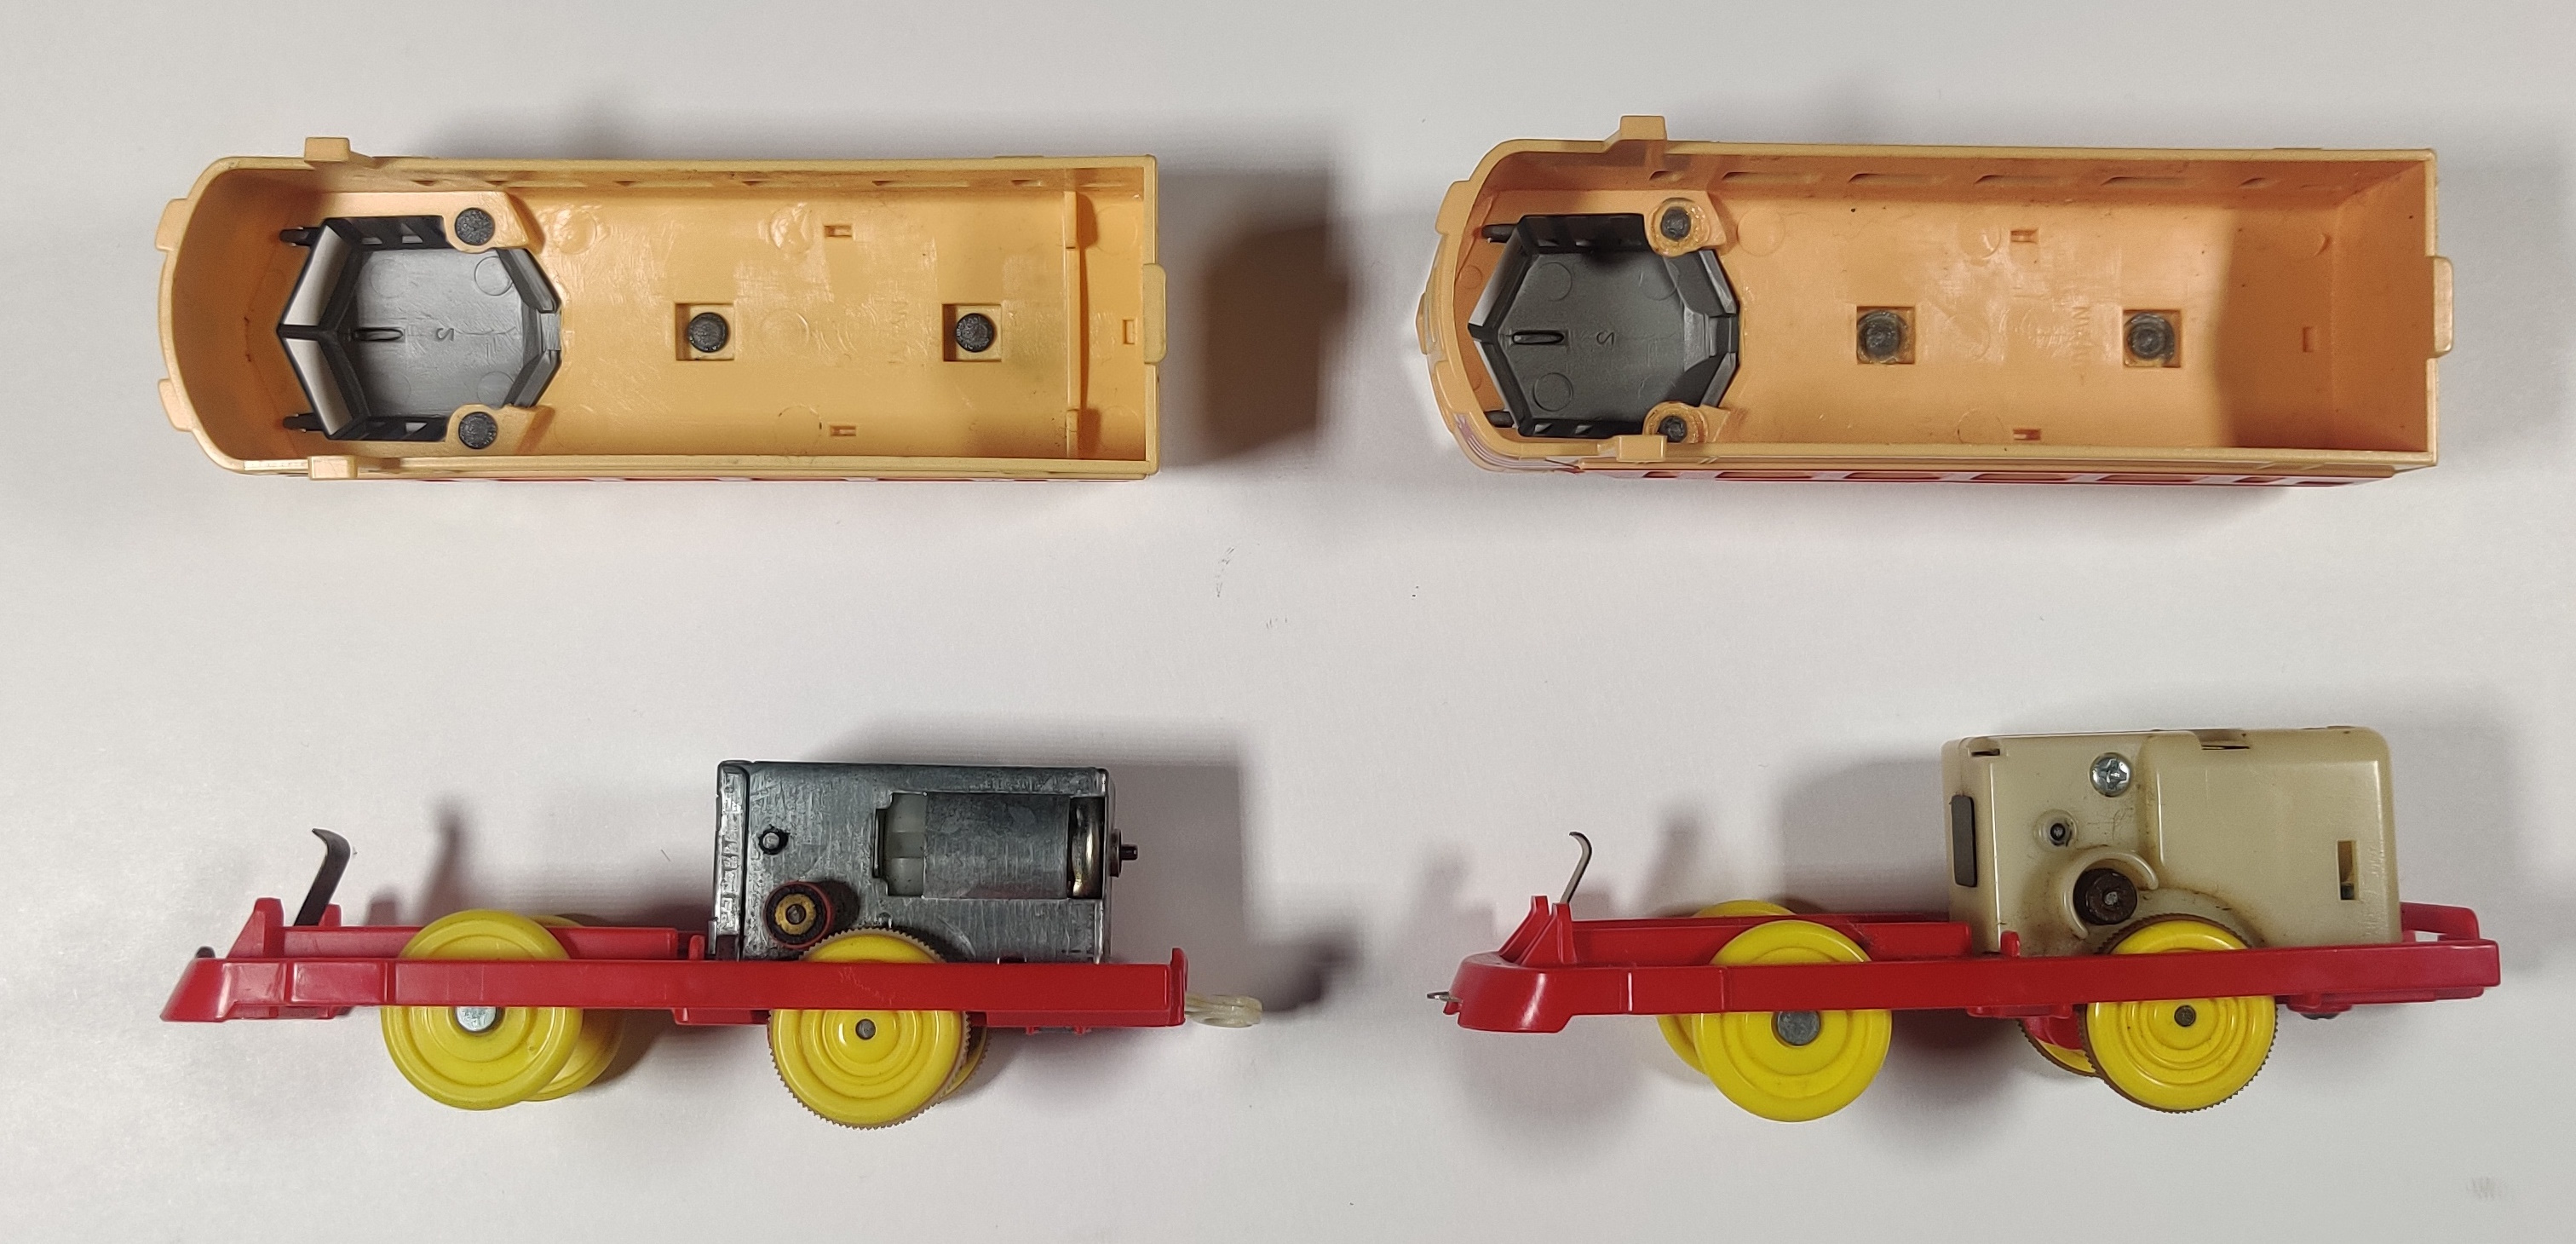
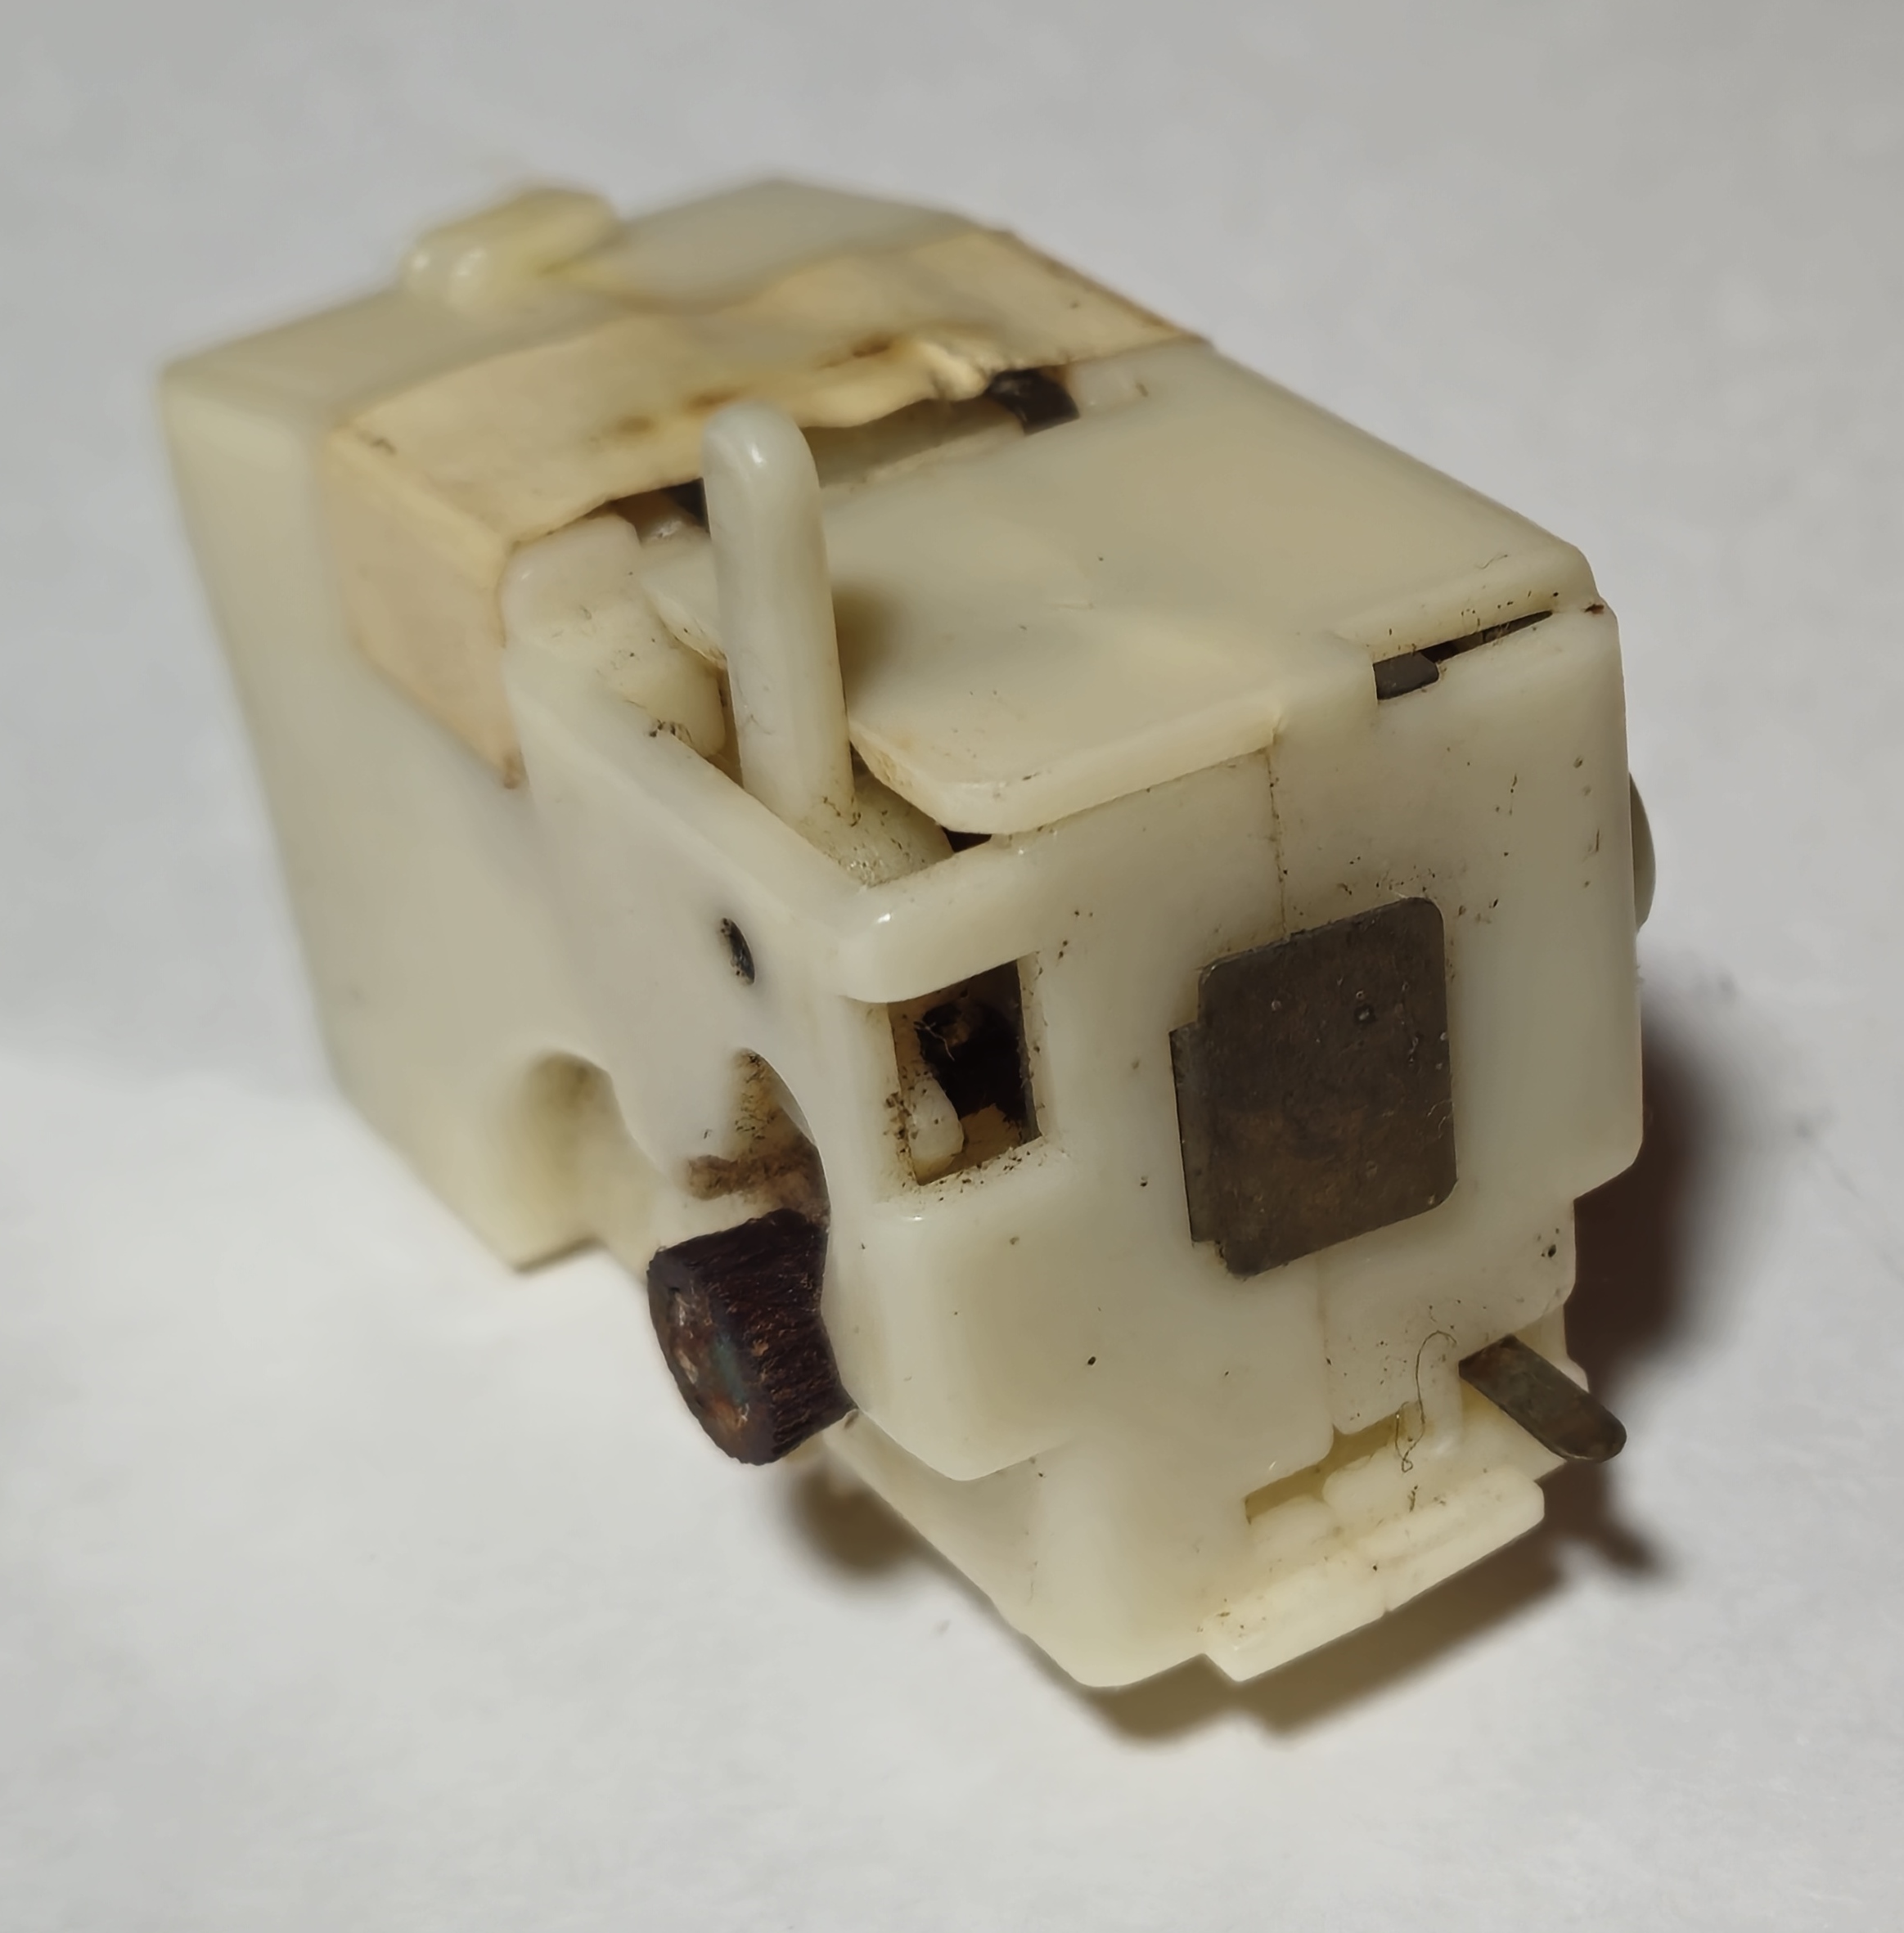
Metal gearbox disassembly
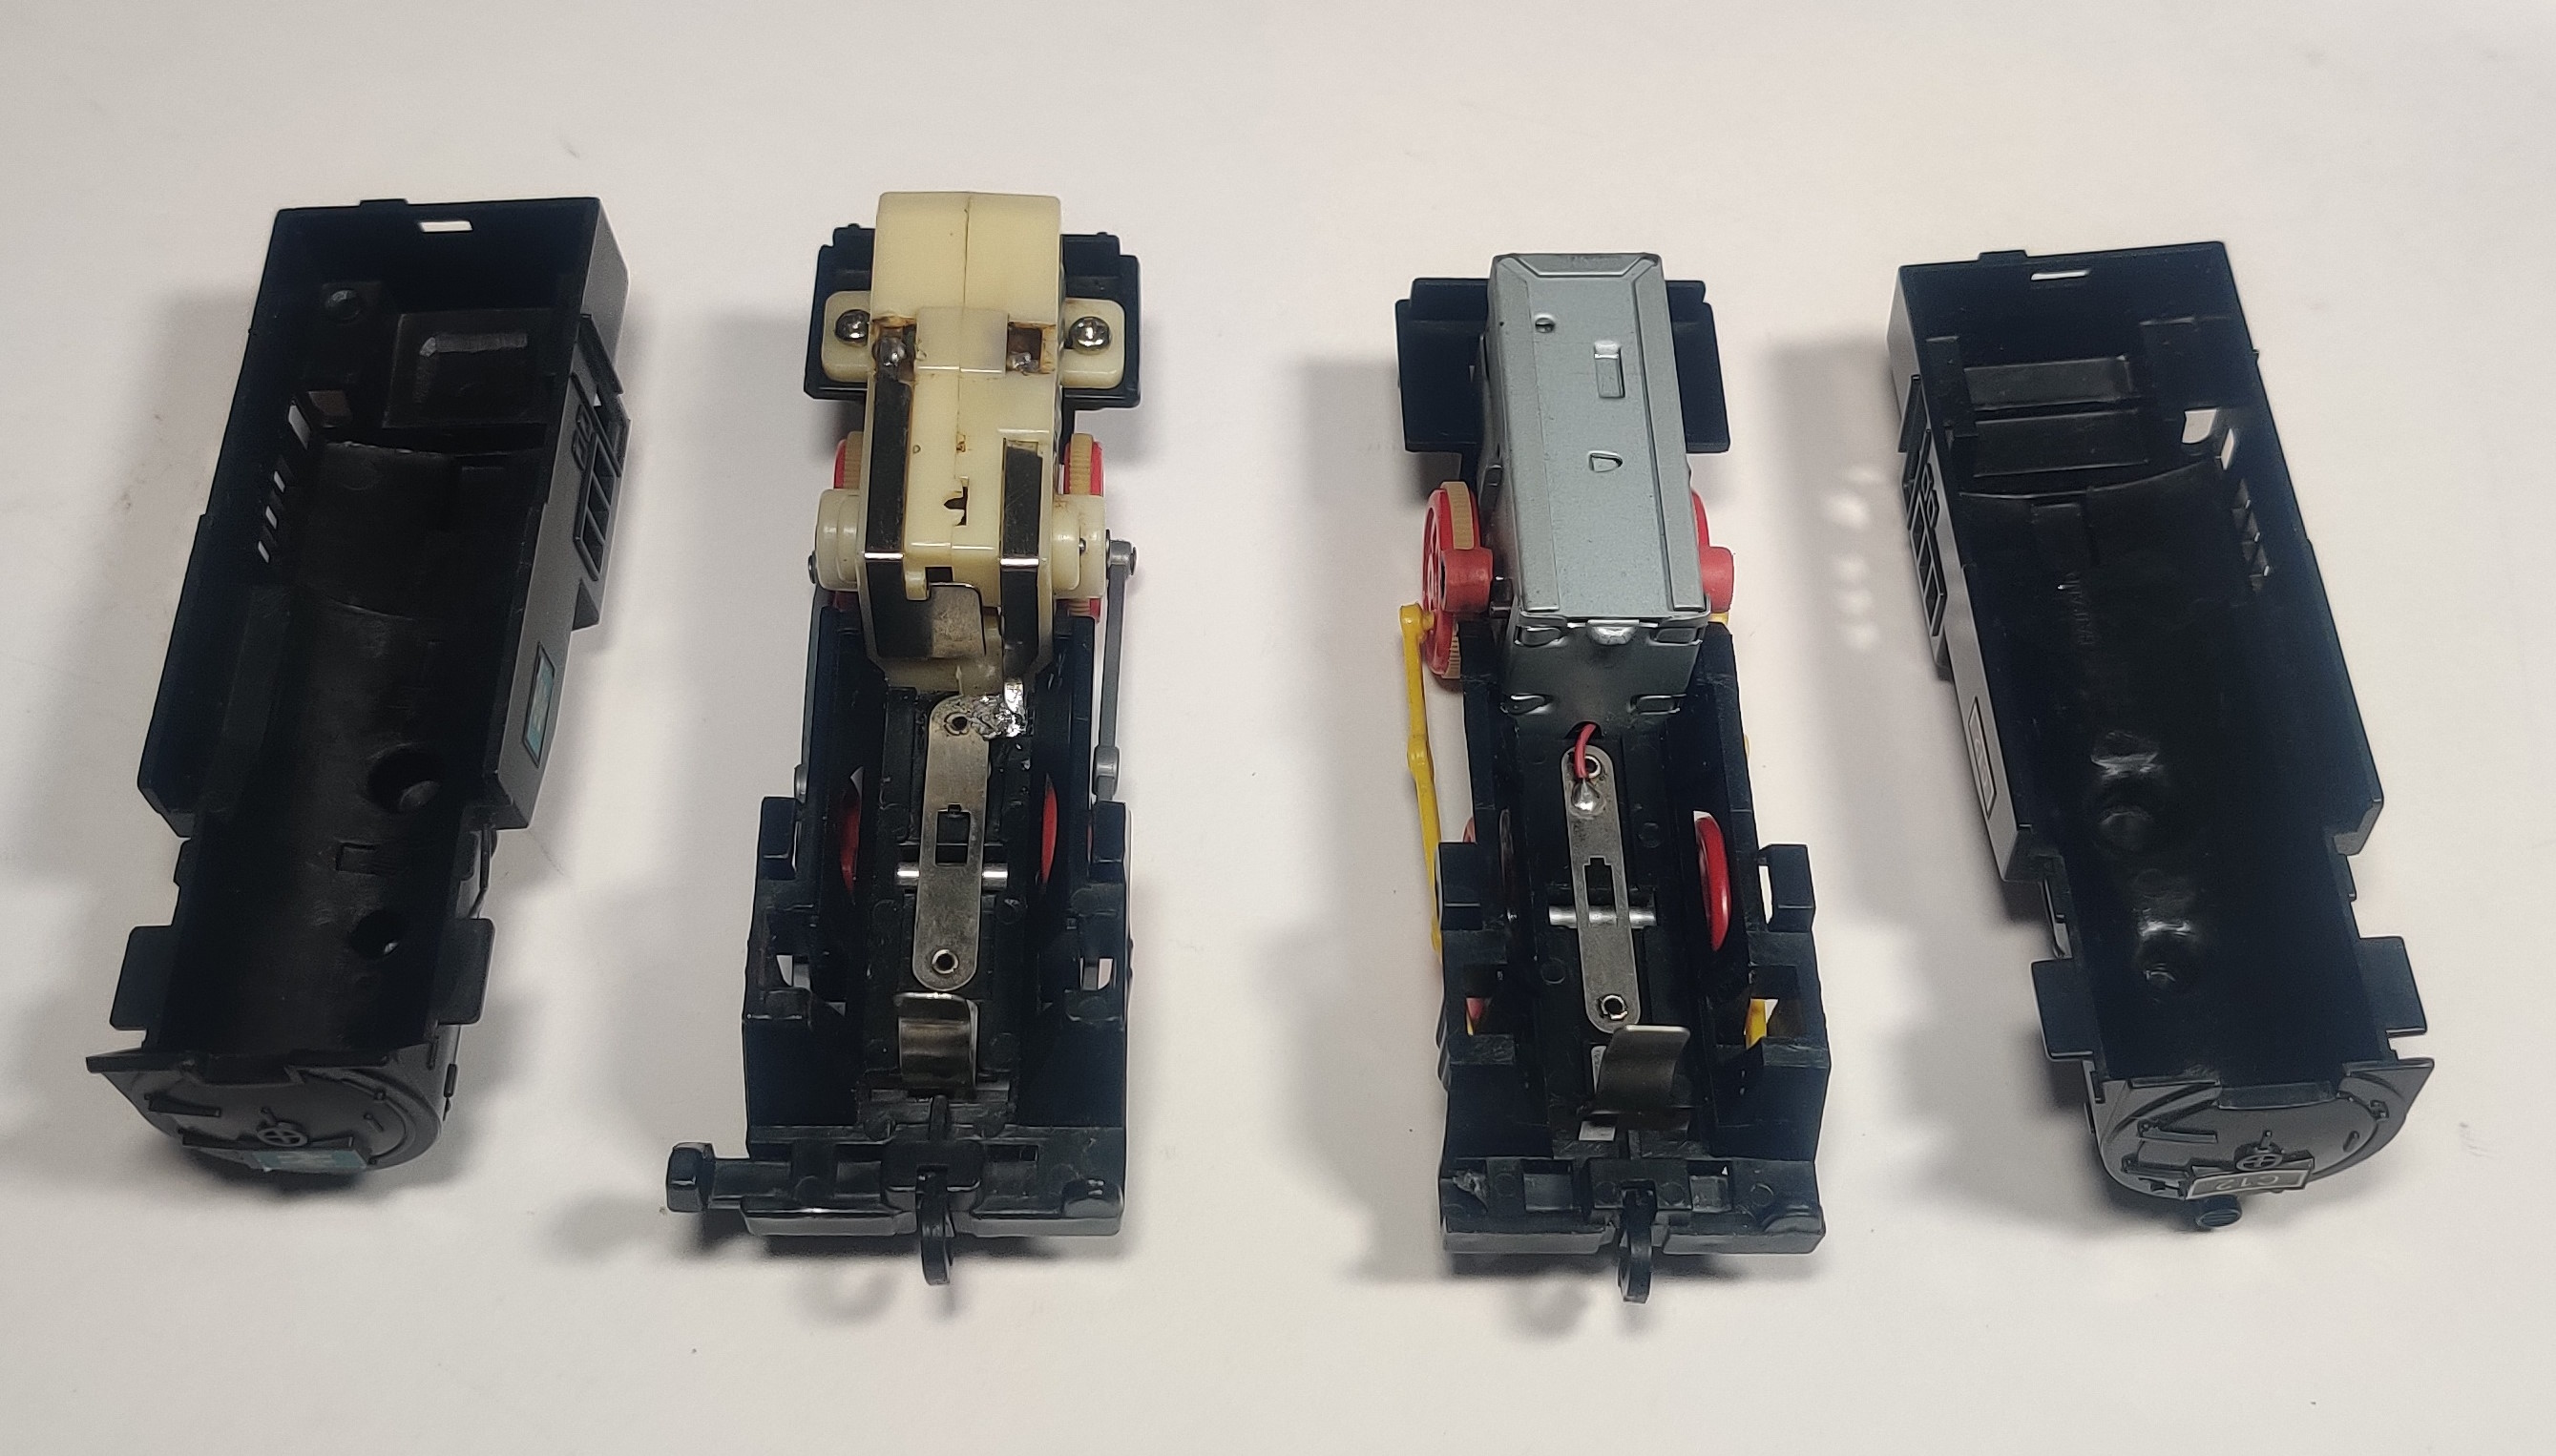
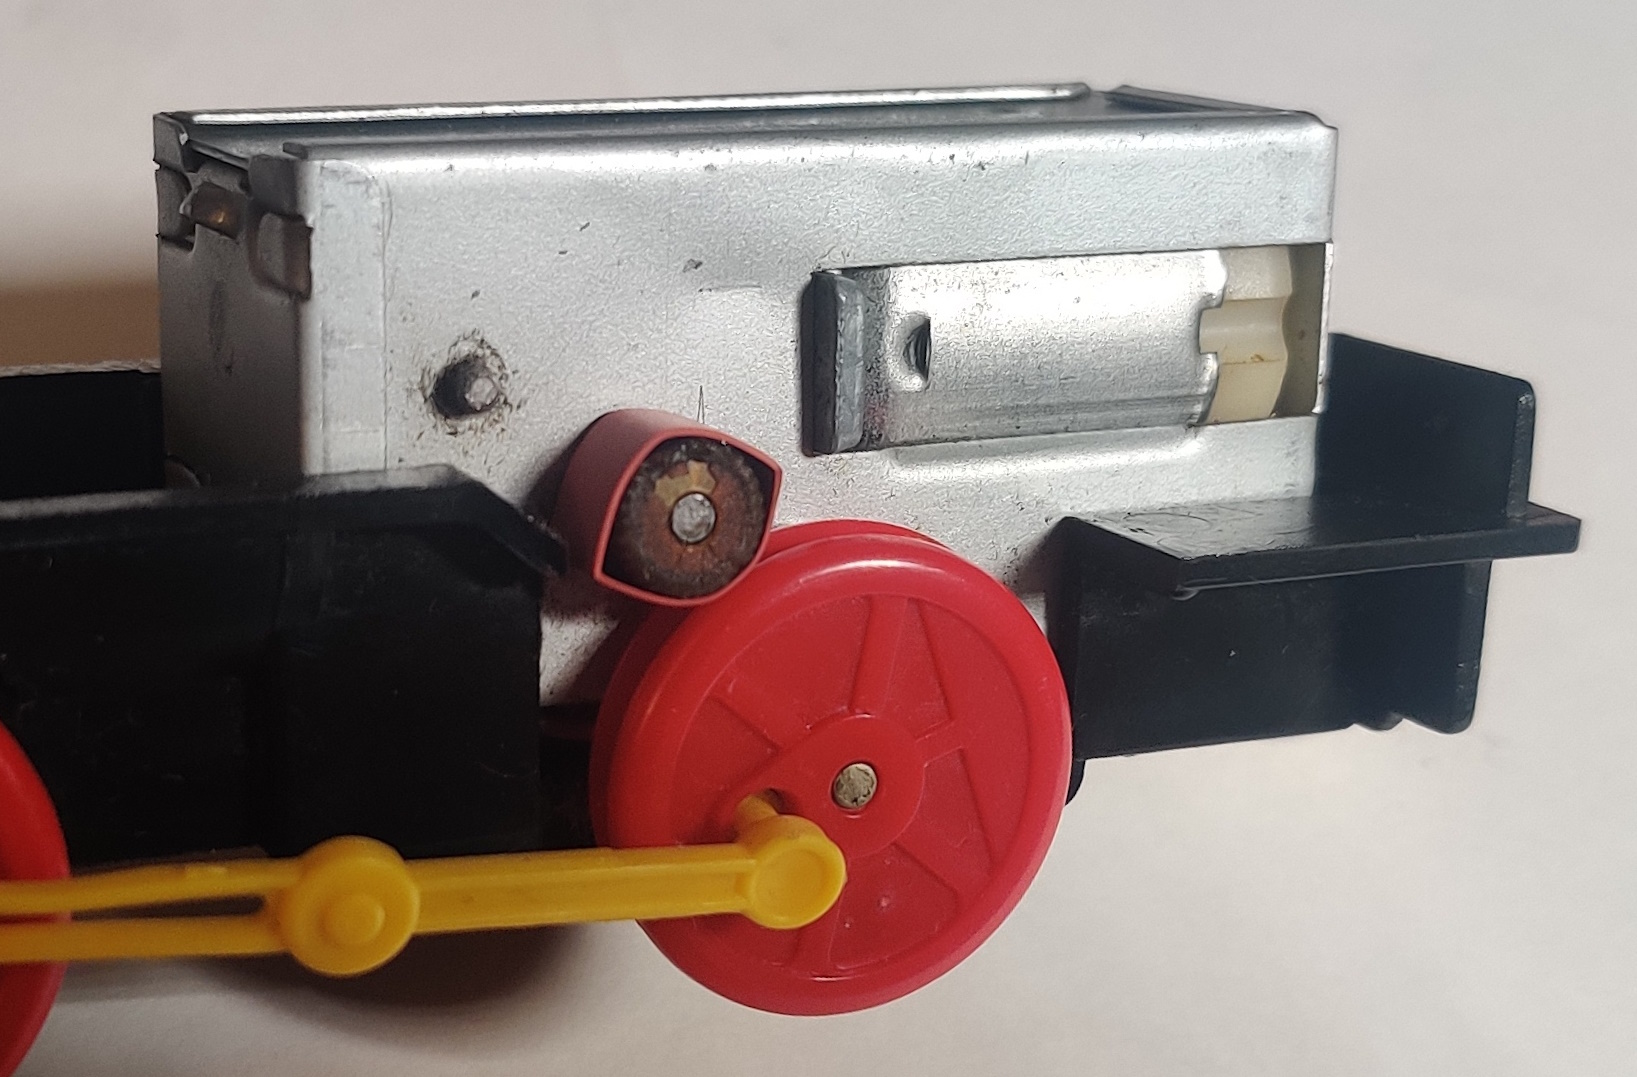
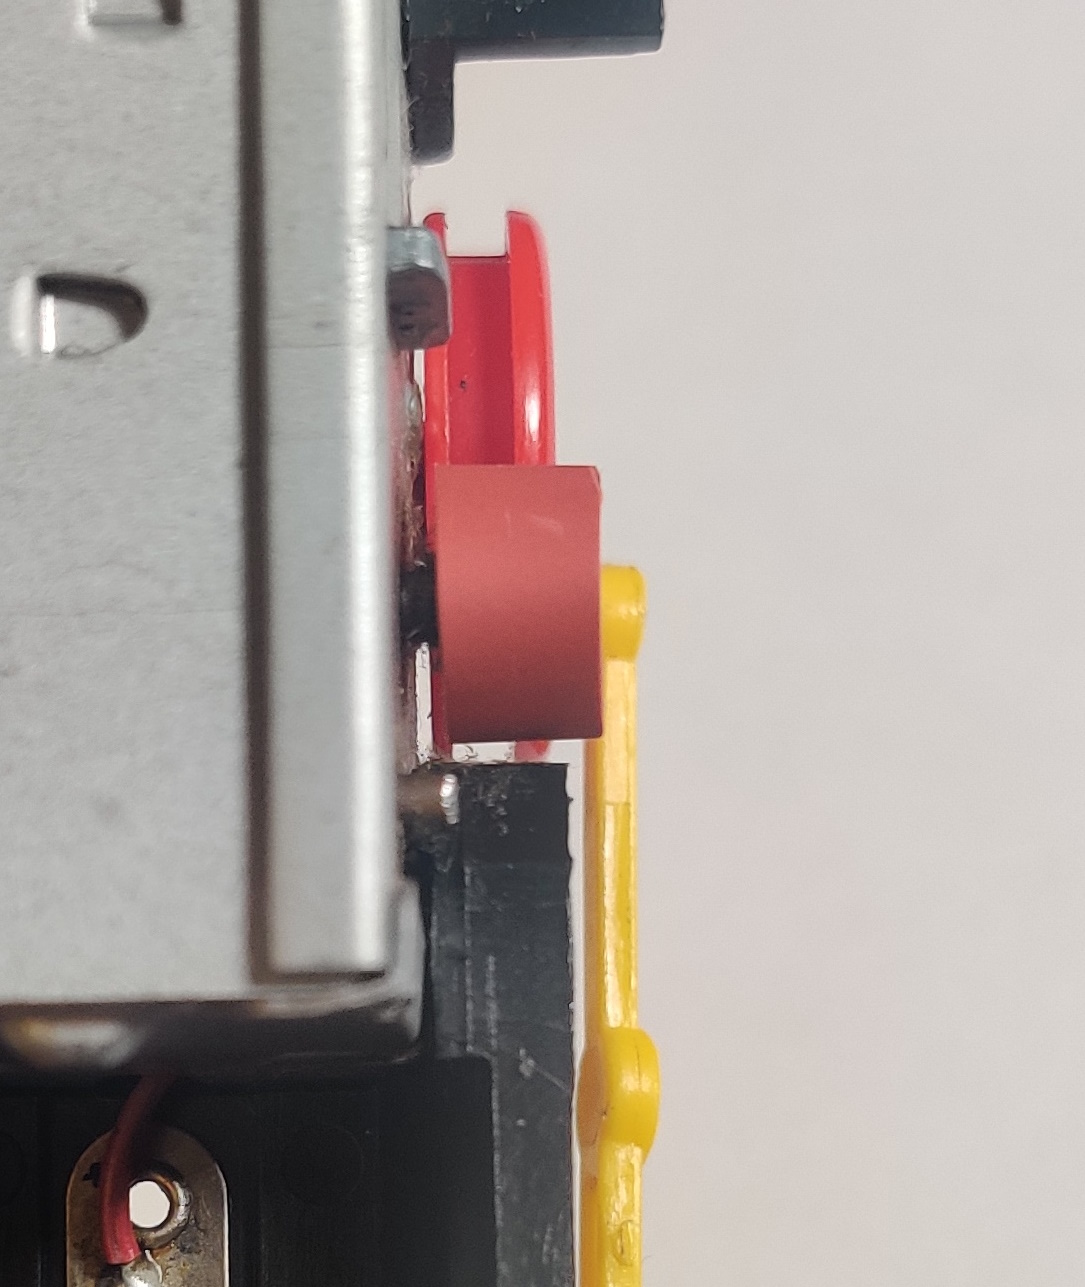
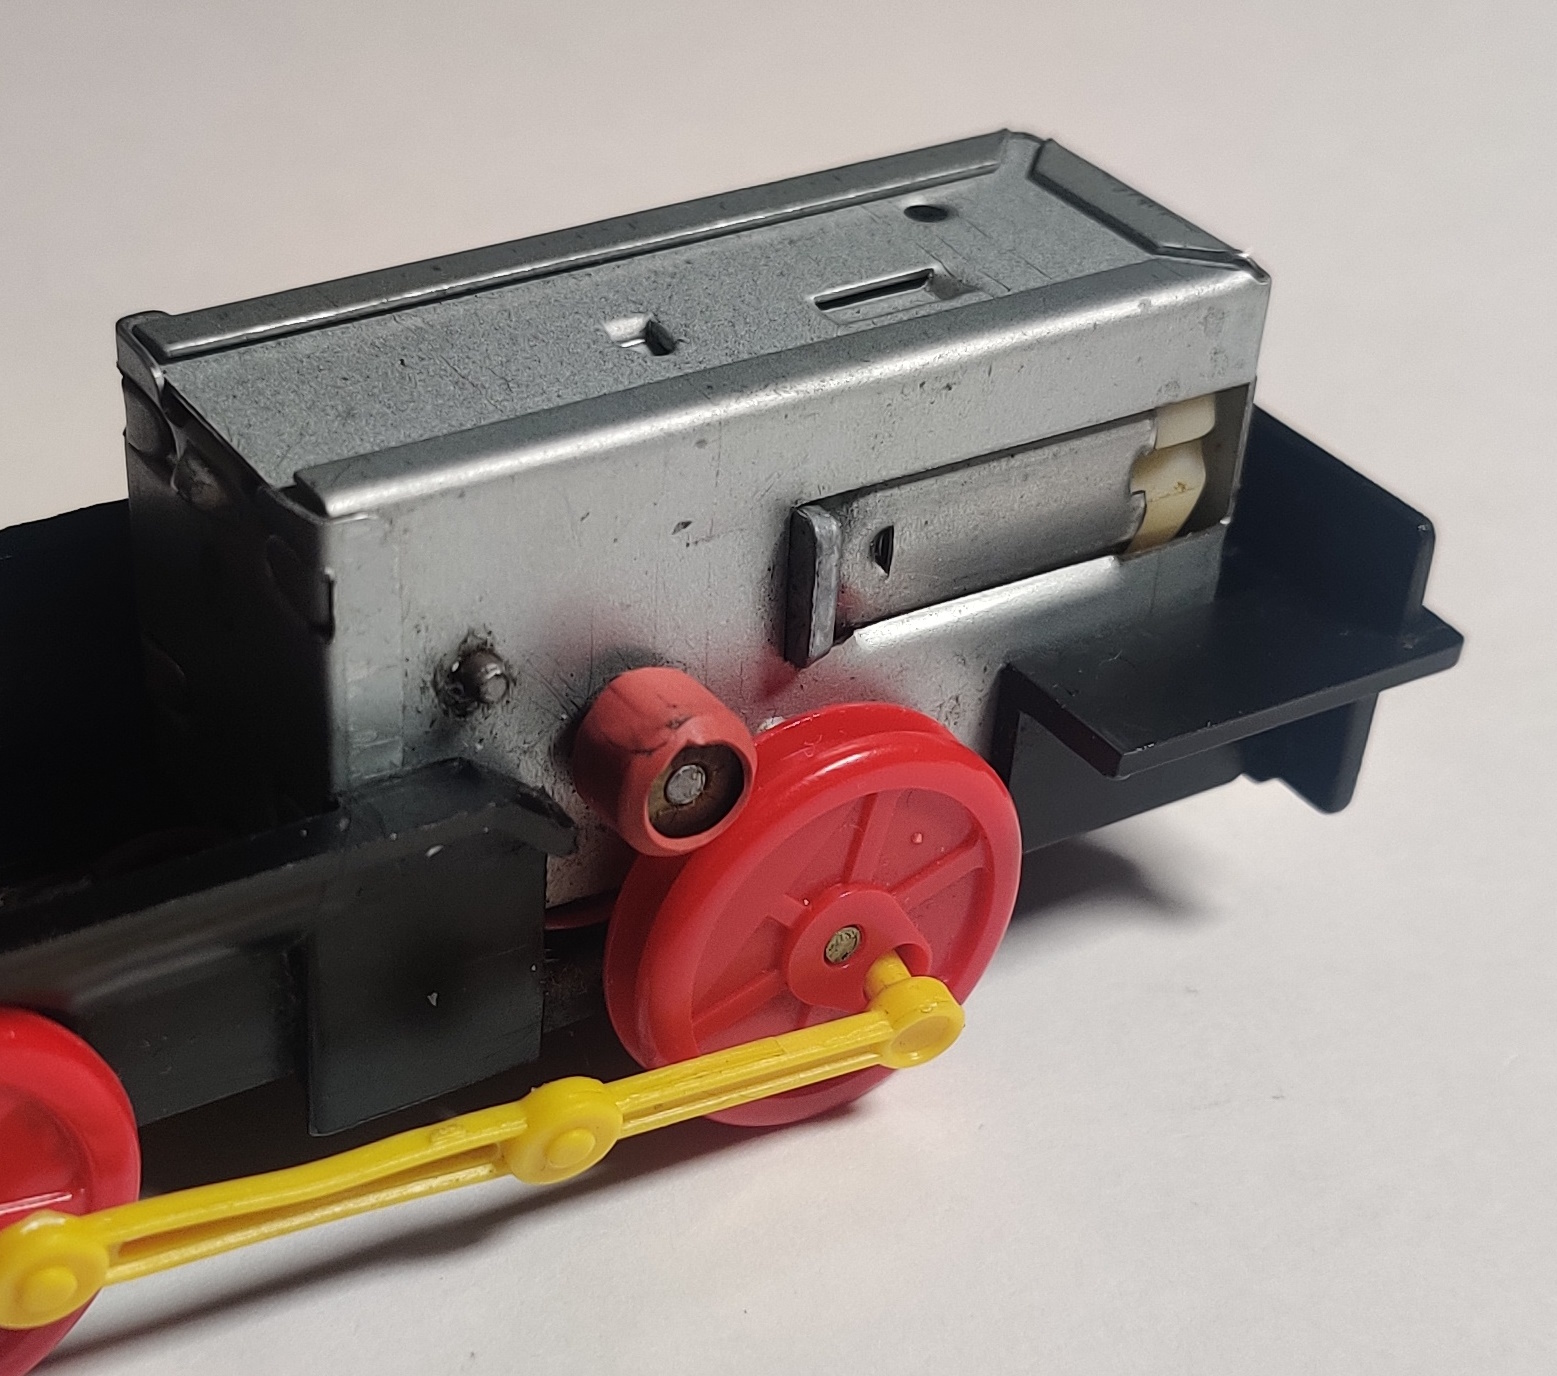
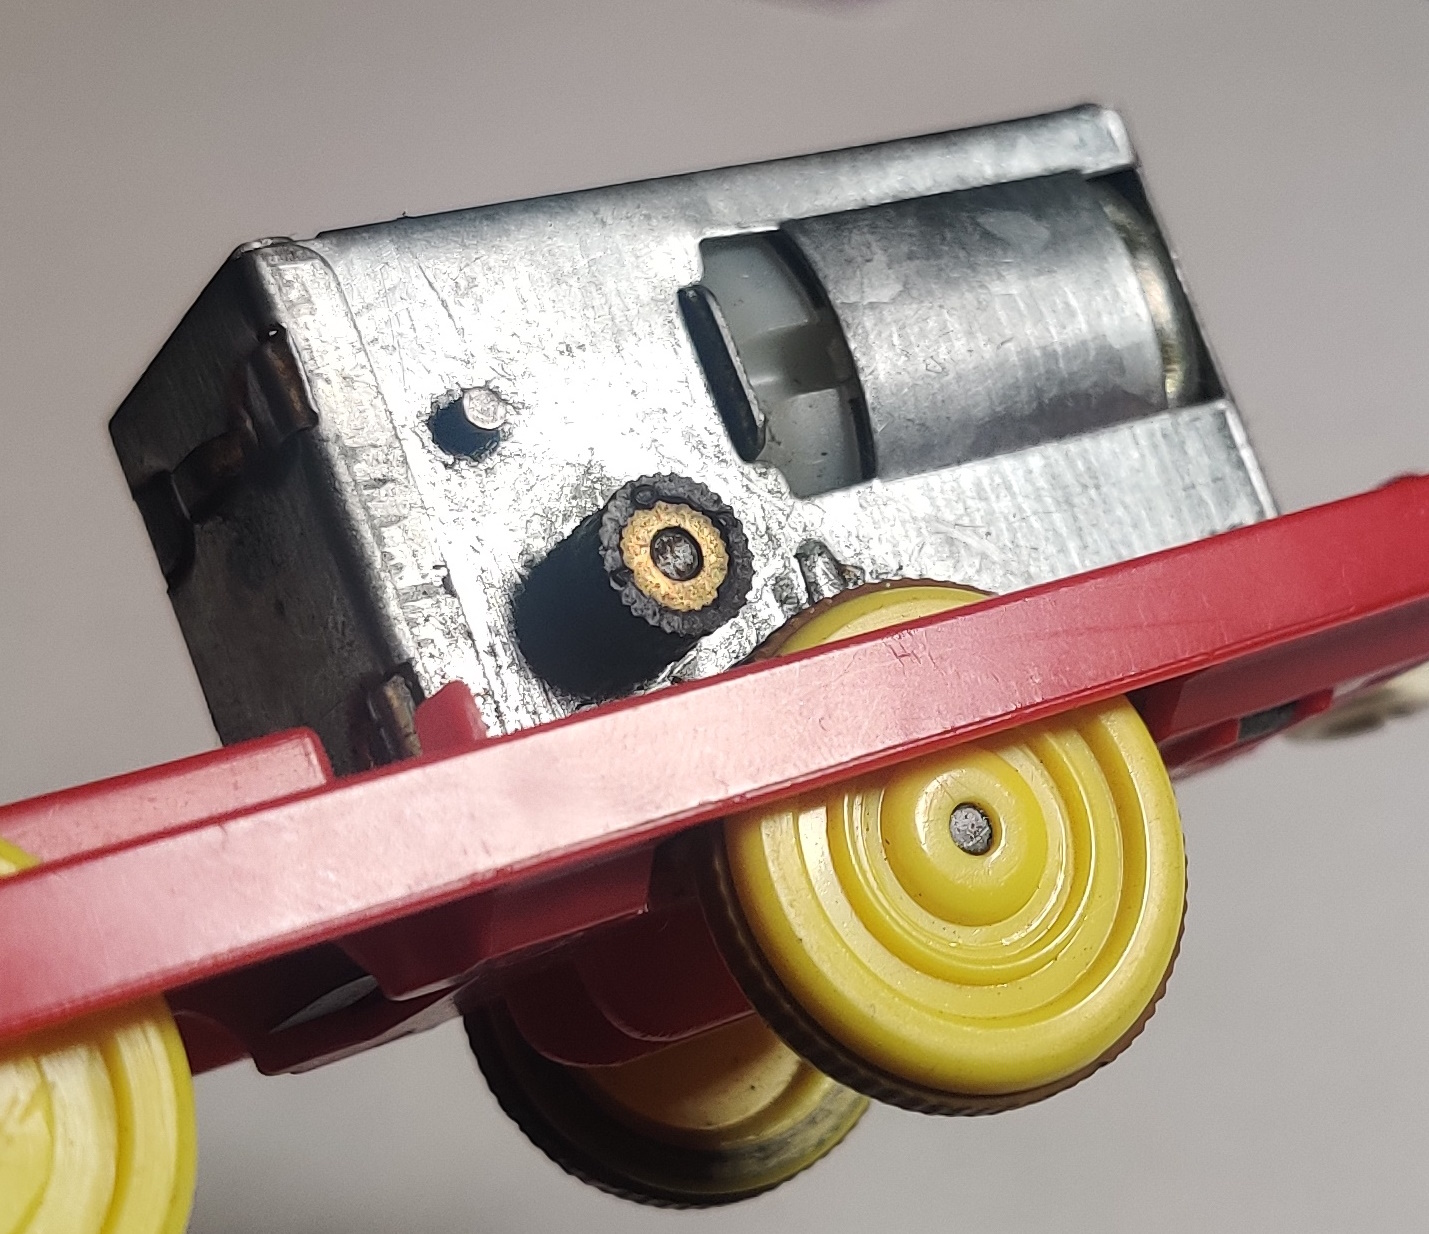
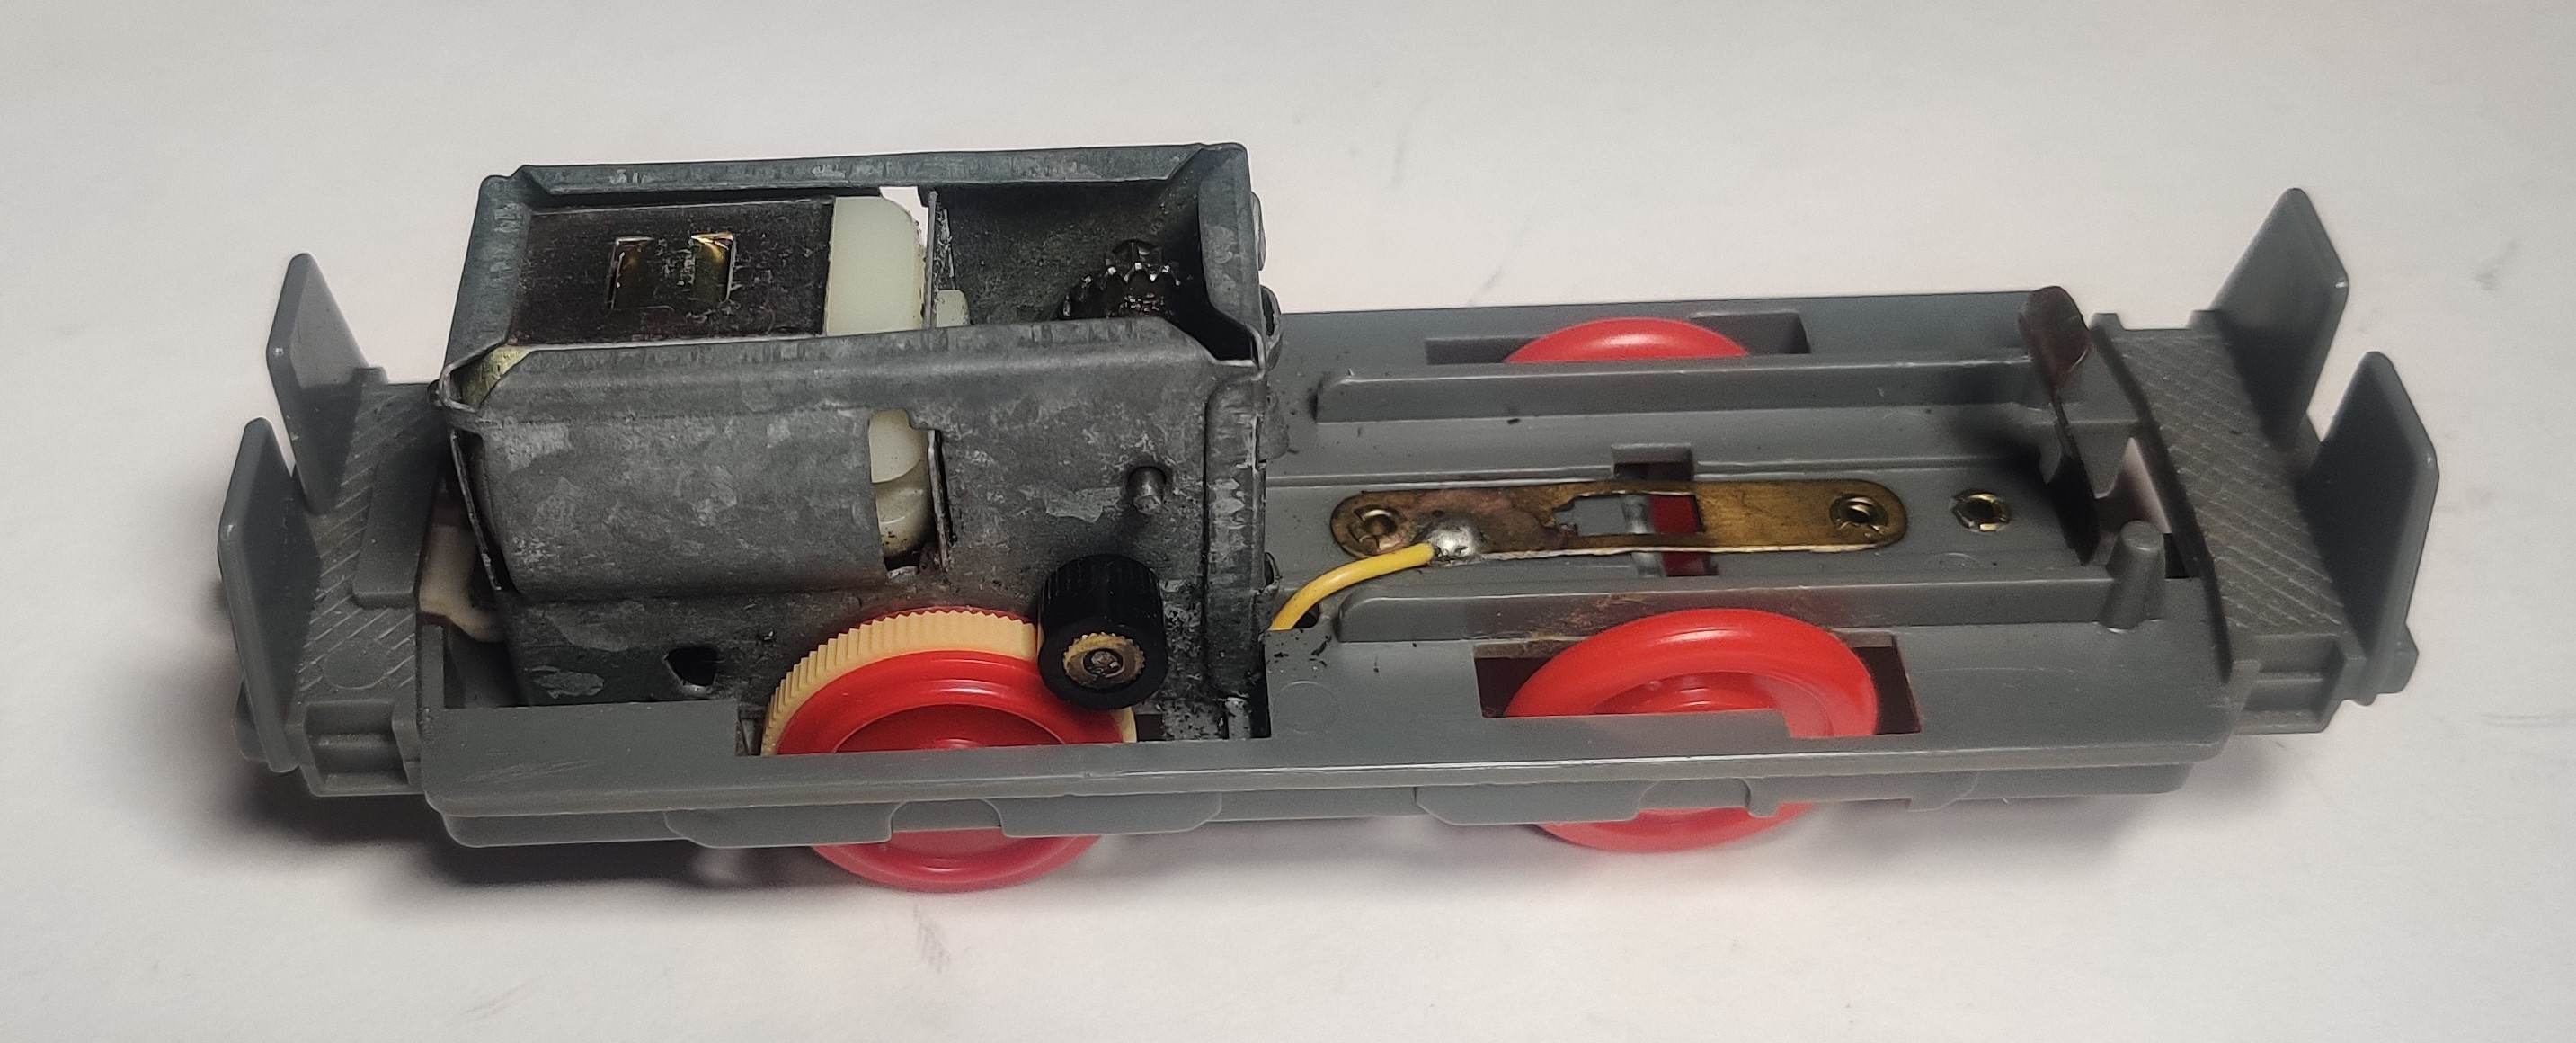
Thankfully, it is not too often that I end up needing to completely open an old-power gearbox to repair it. Because the drive wheels constitute the last stage of the gearbox with the gearbox's output tires, the gearing back to the motor is such that it can usually be backdriven by firmly rotating the output tires, freeing up stuck motors. Usually, if only the rubber drive components need to be replaced, the gearbox does not need to be disassembled.
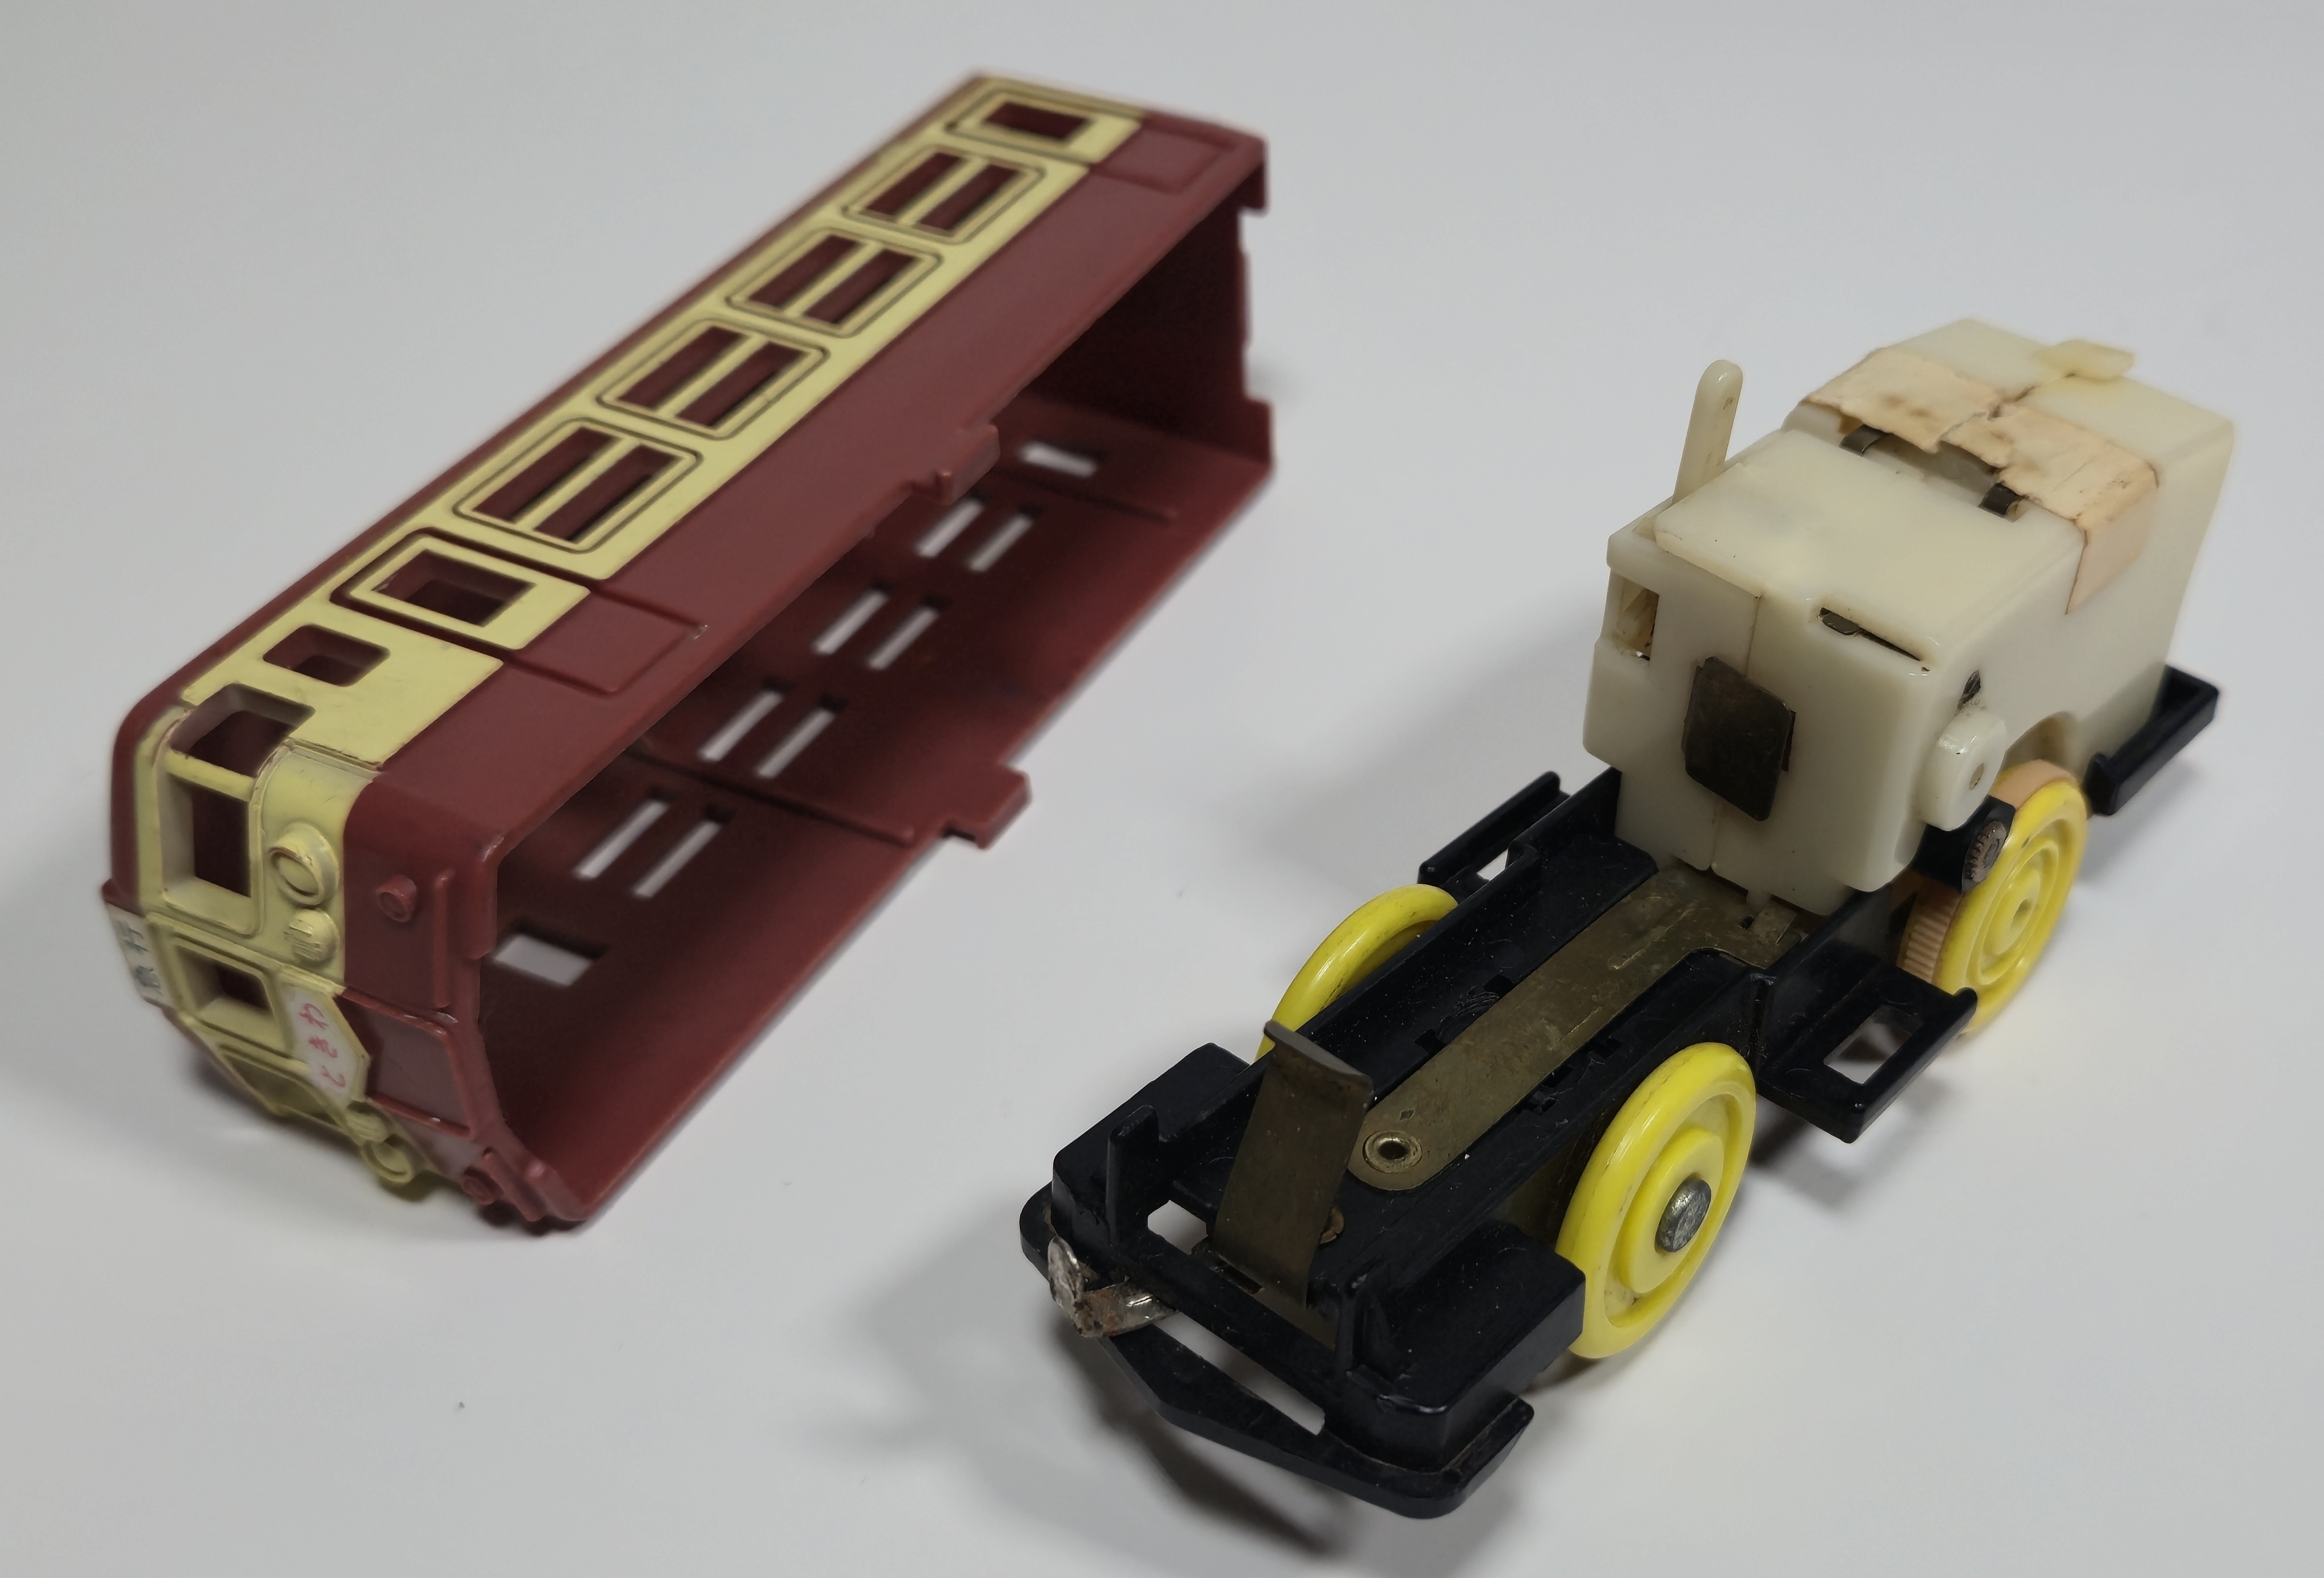
The metal type gearboxes of pretty much all types had tabs which held them in place through slots in the plastic bodywork. The tabs would be folded over and hold the gearbox in place. Some gearboxes are held in only with tabs, other times they have a rivet through part of the gearbox affixing them to the plastic chassis. Rivets like these would need to be carefully drilled out.
Lift the metal tabs out of the chassis until they are back in line with the case of the gearbox. Be sure to go slowly and manipulate the tab from as near to the bend as you can using tweezers or a flat bladed screwdriver. Some toolings (usually older ones) use more fragile plastic mixes or are not as well supported, so be careful to support any weak points in the chassis near the tabs.
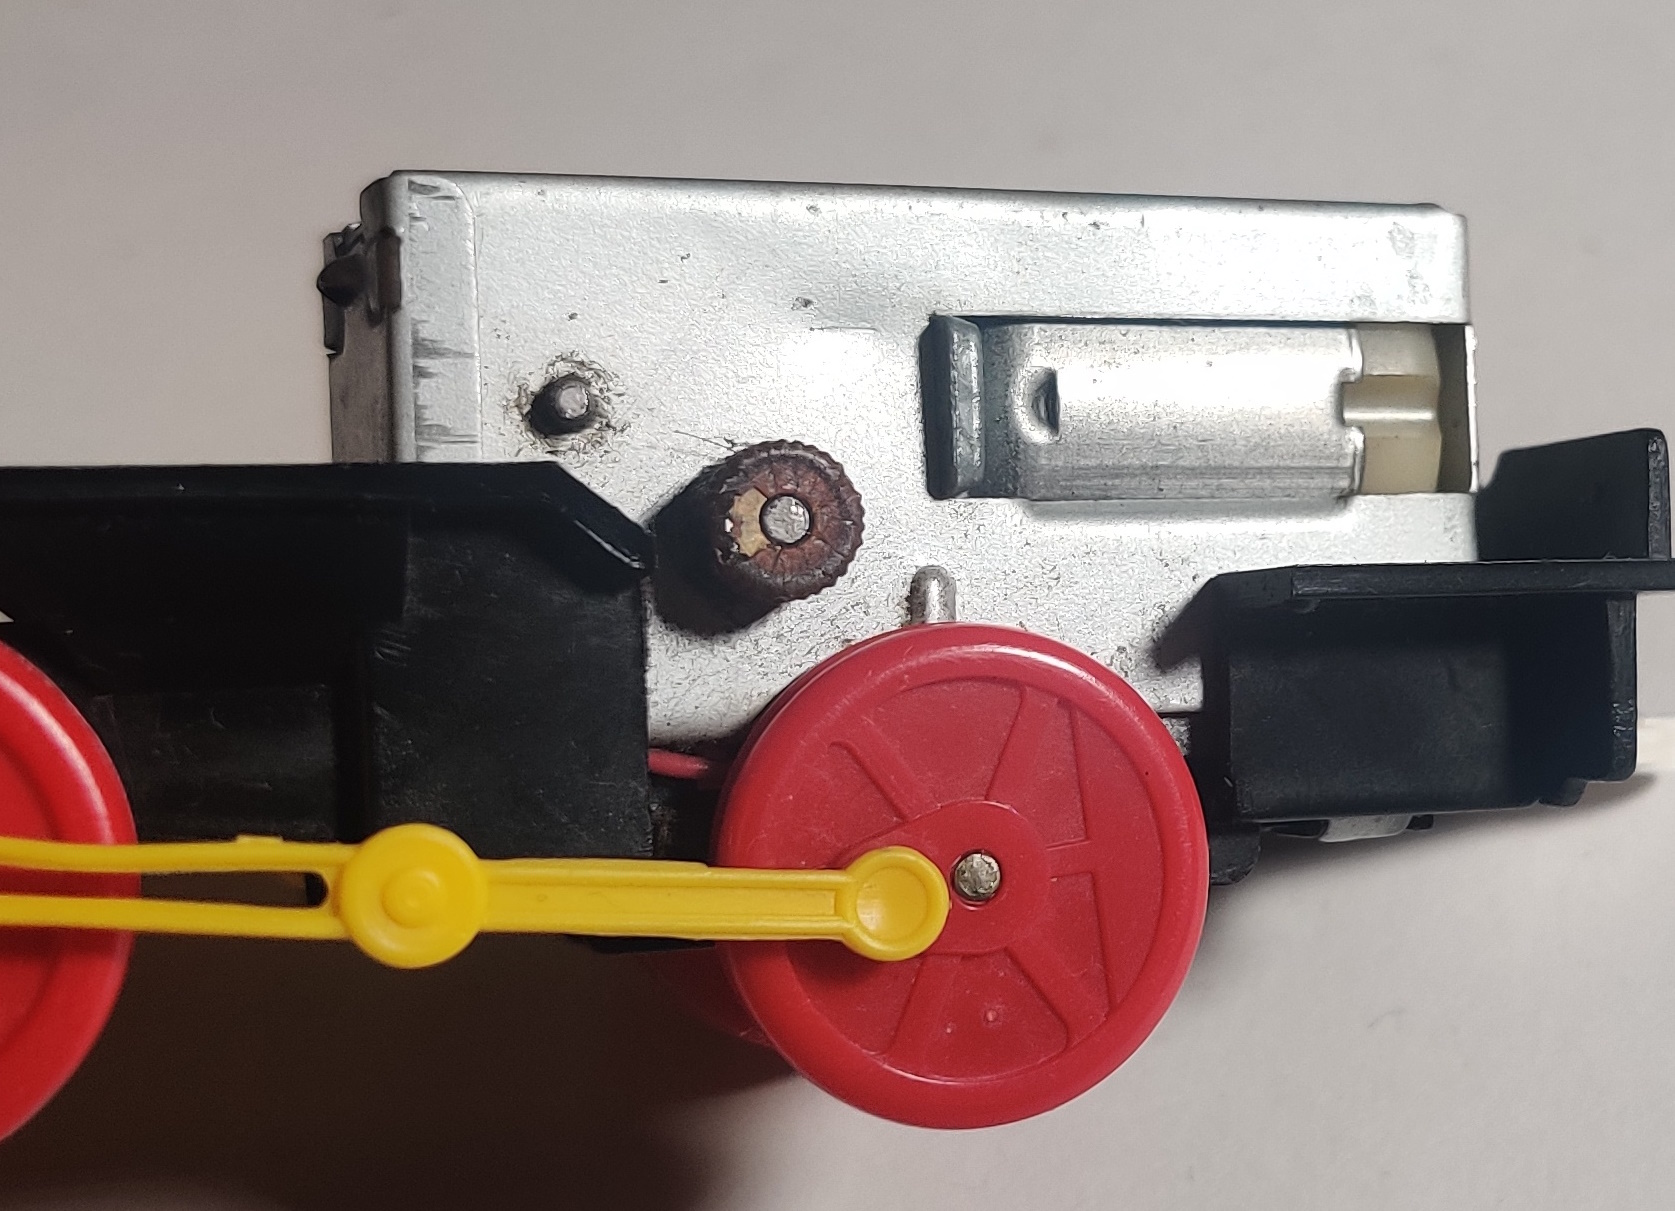
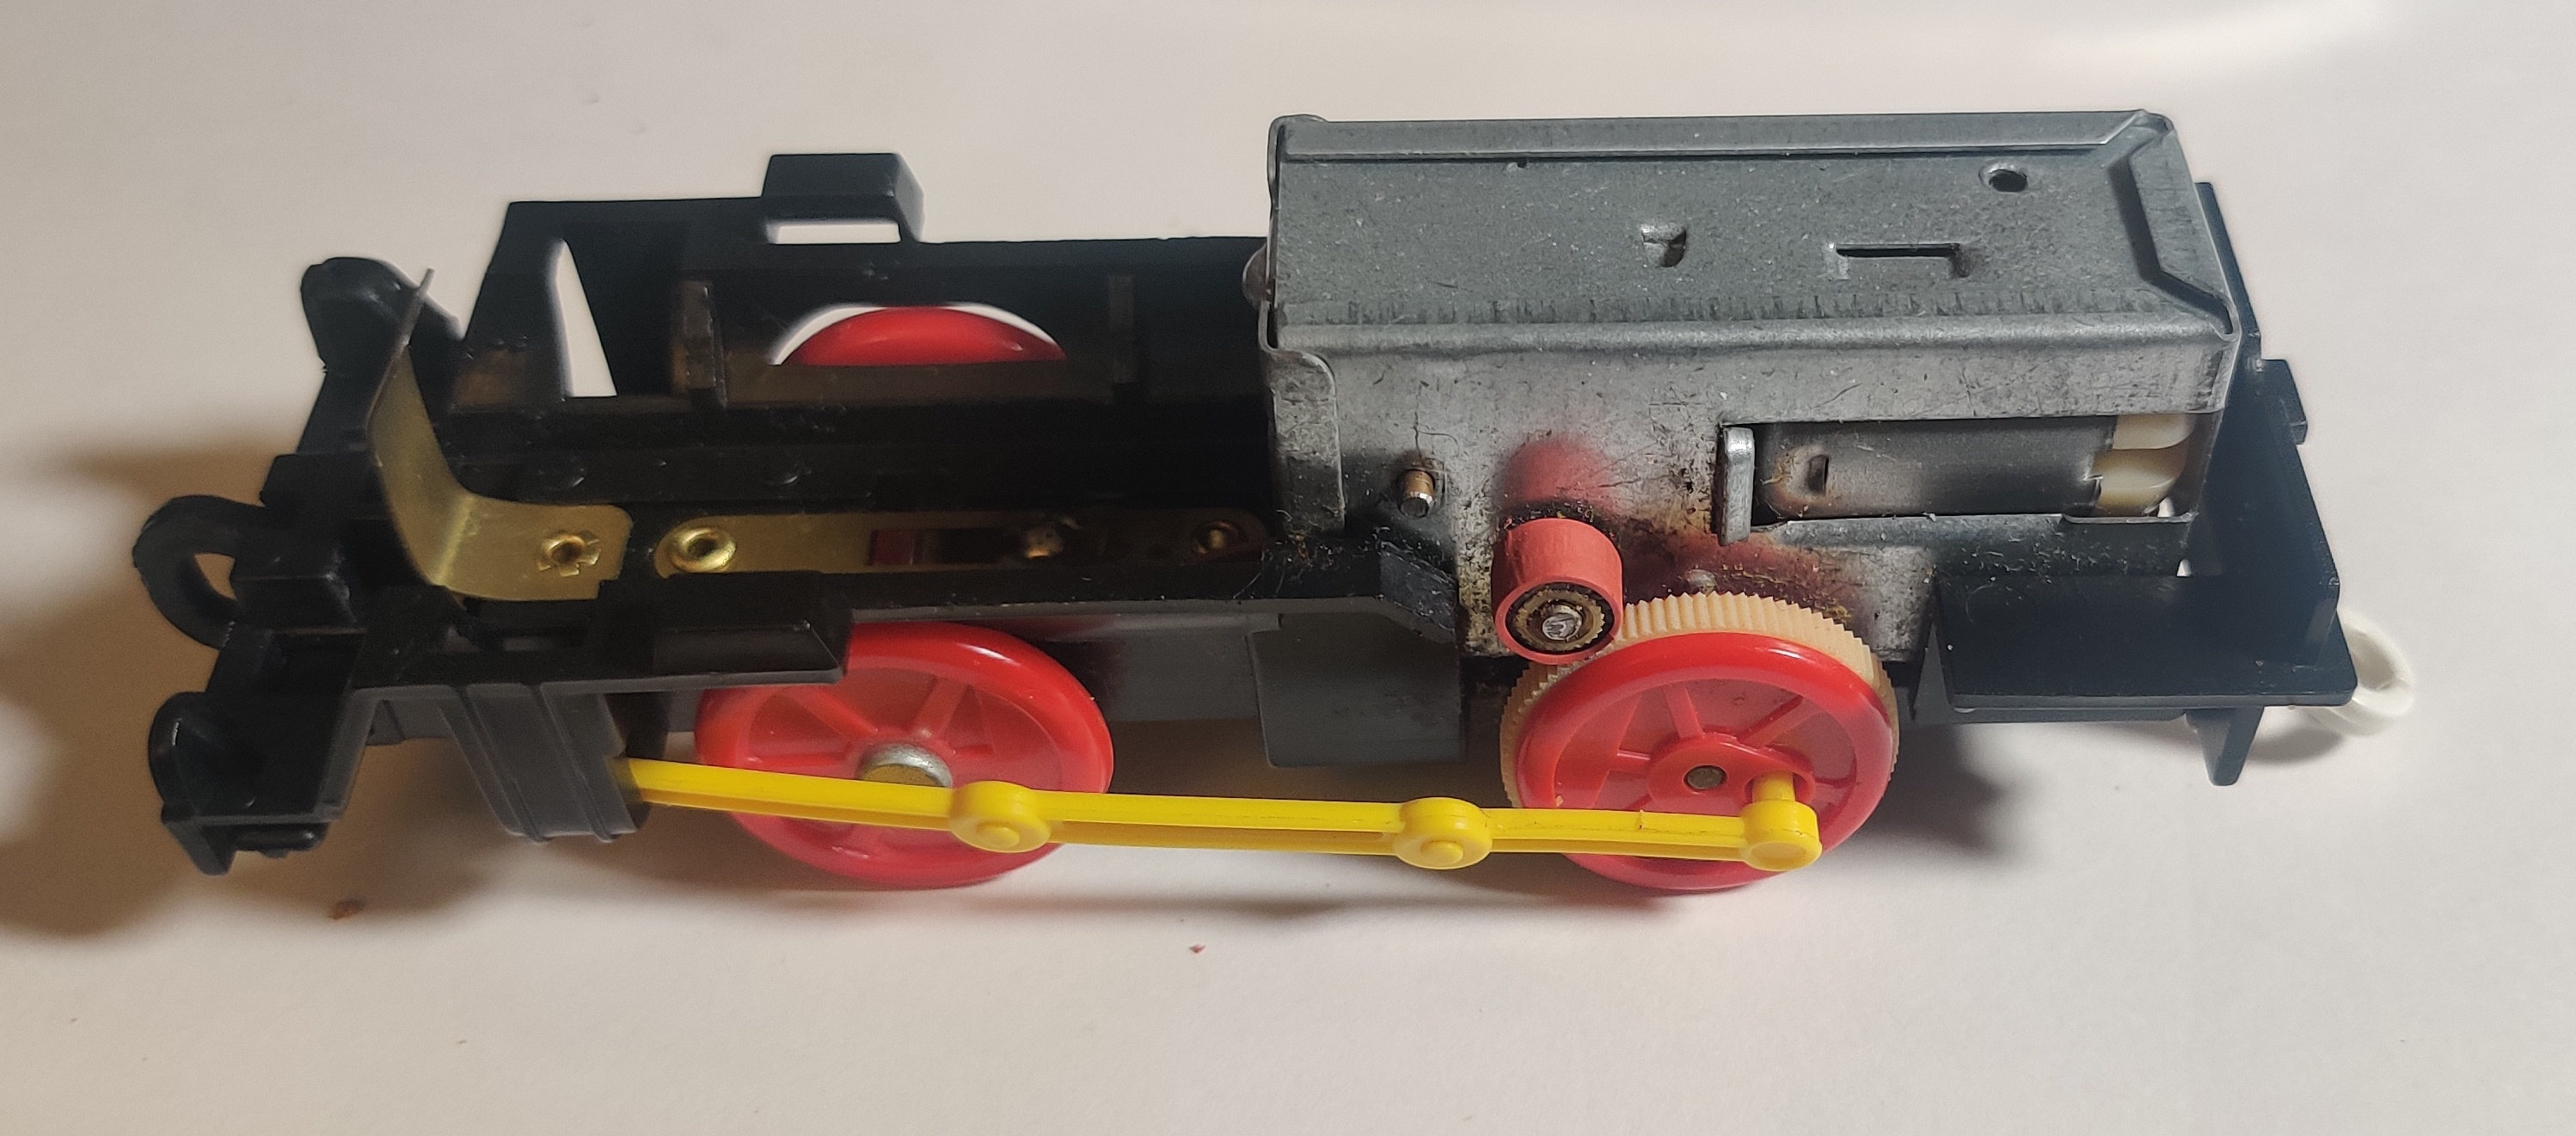
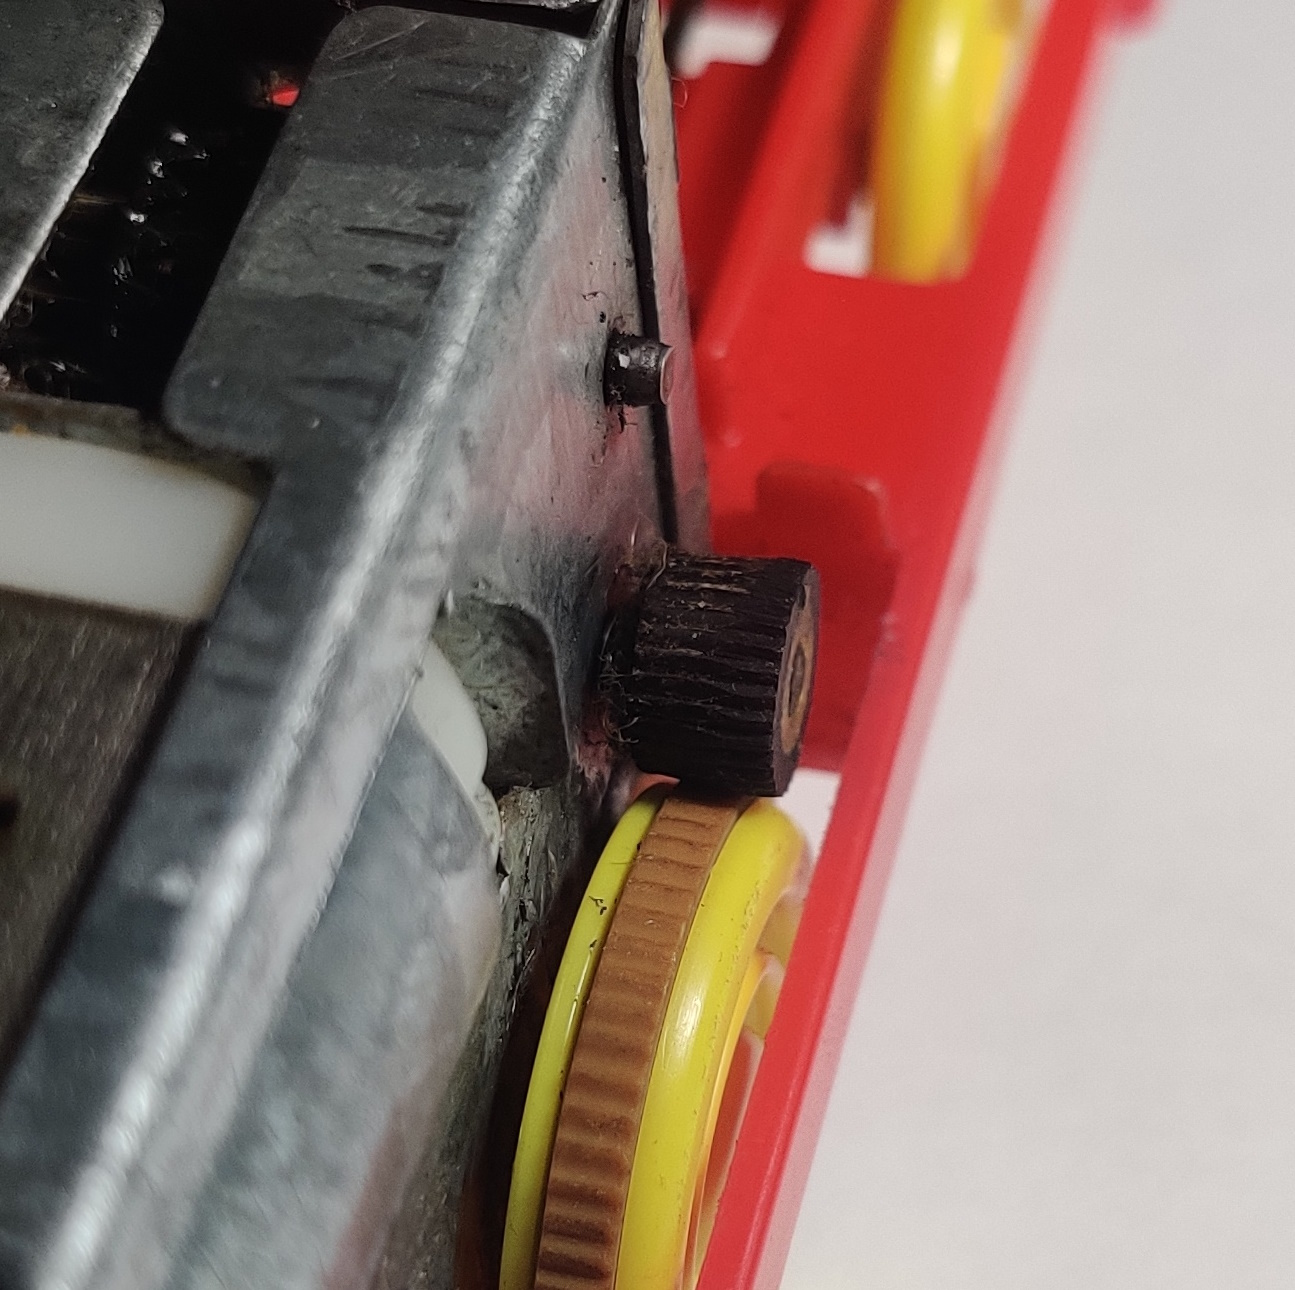
When all the tabs are straightened out, pulling up on the gearbox and pushing the tabs out from below should let the gearbox lift out. The negative contact at the front of the chassis is usually soldered to one side of the motor with a single wire that can usually stay in place but can be removed and resoldered later. The back coupling will fall out and the driving wheels can be removed if desired at this point.
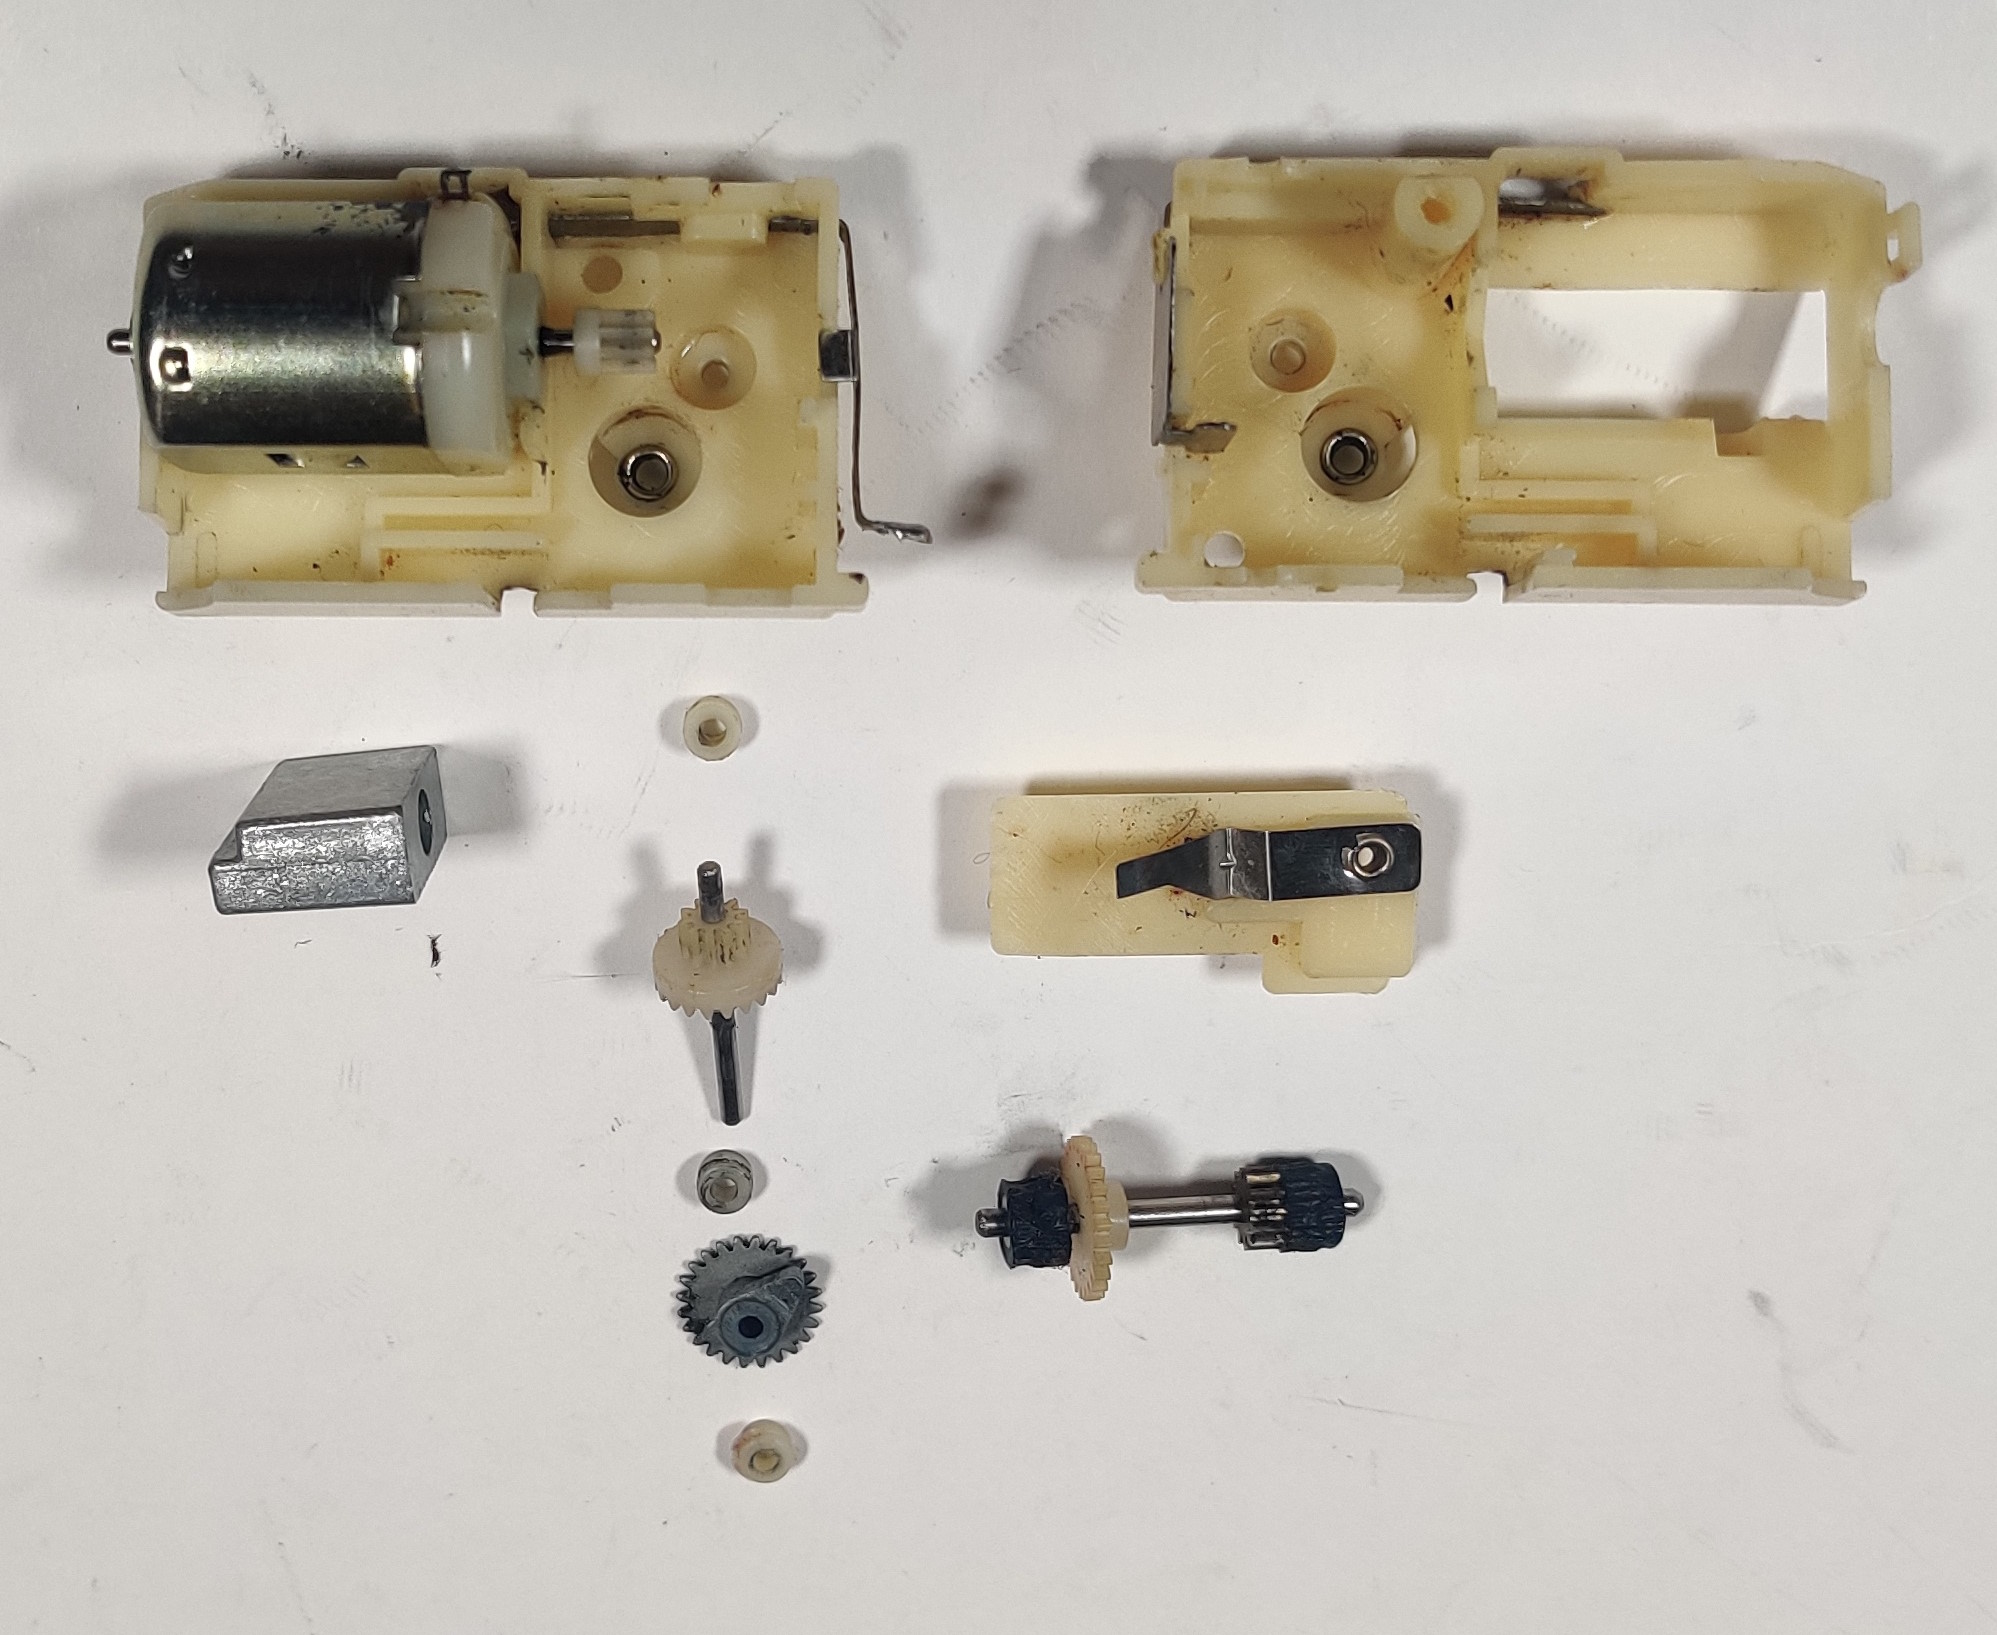
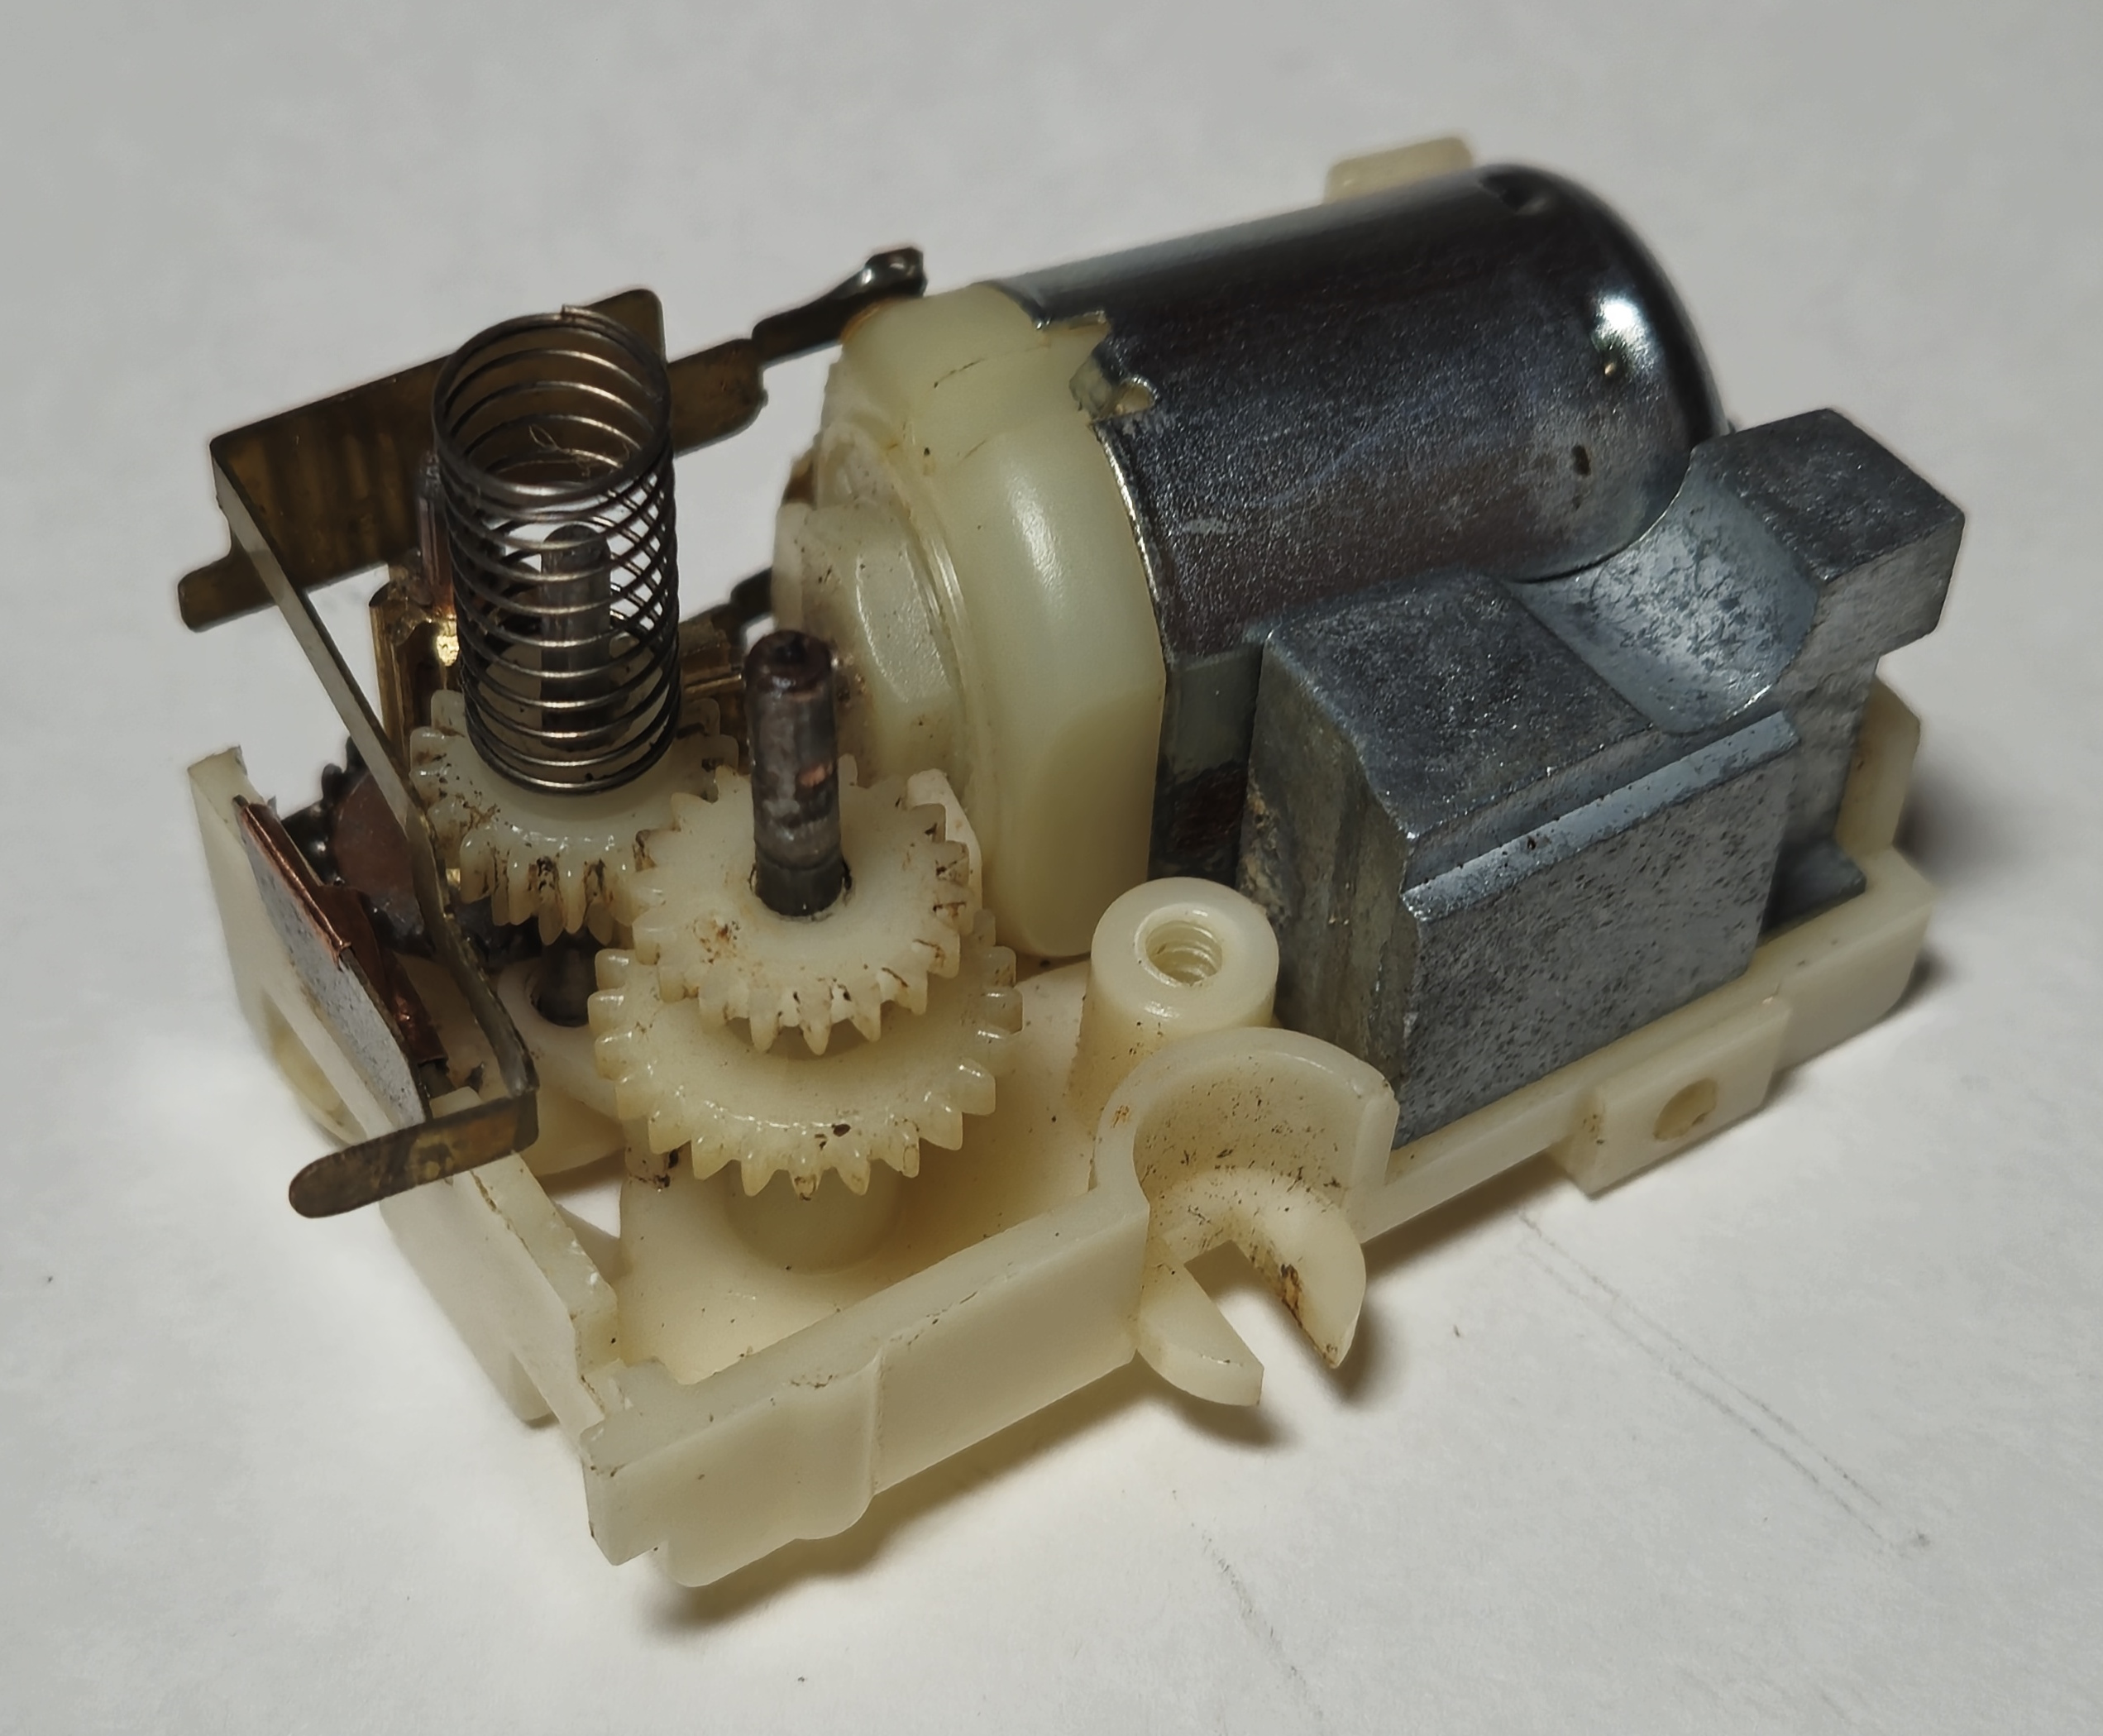
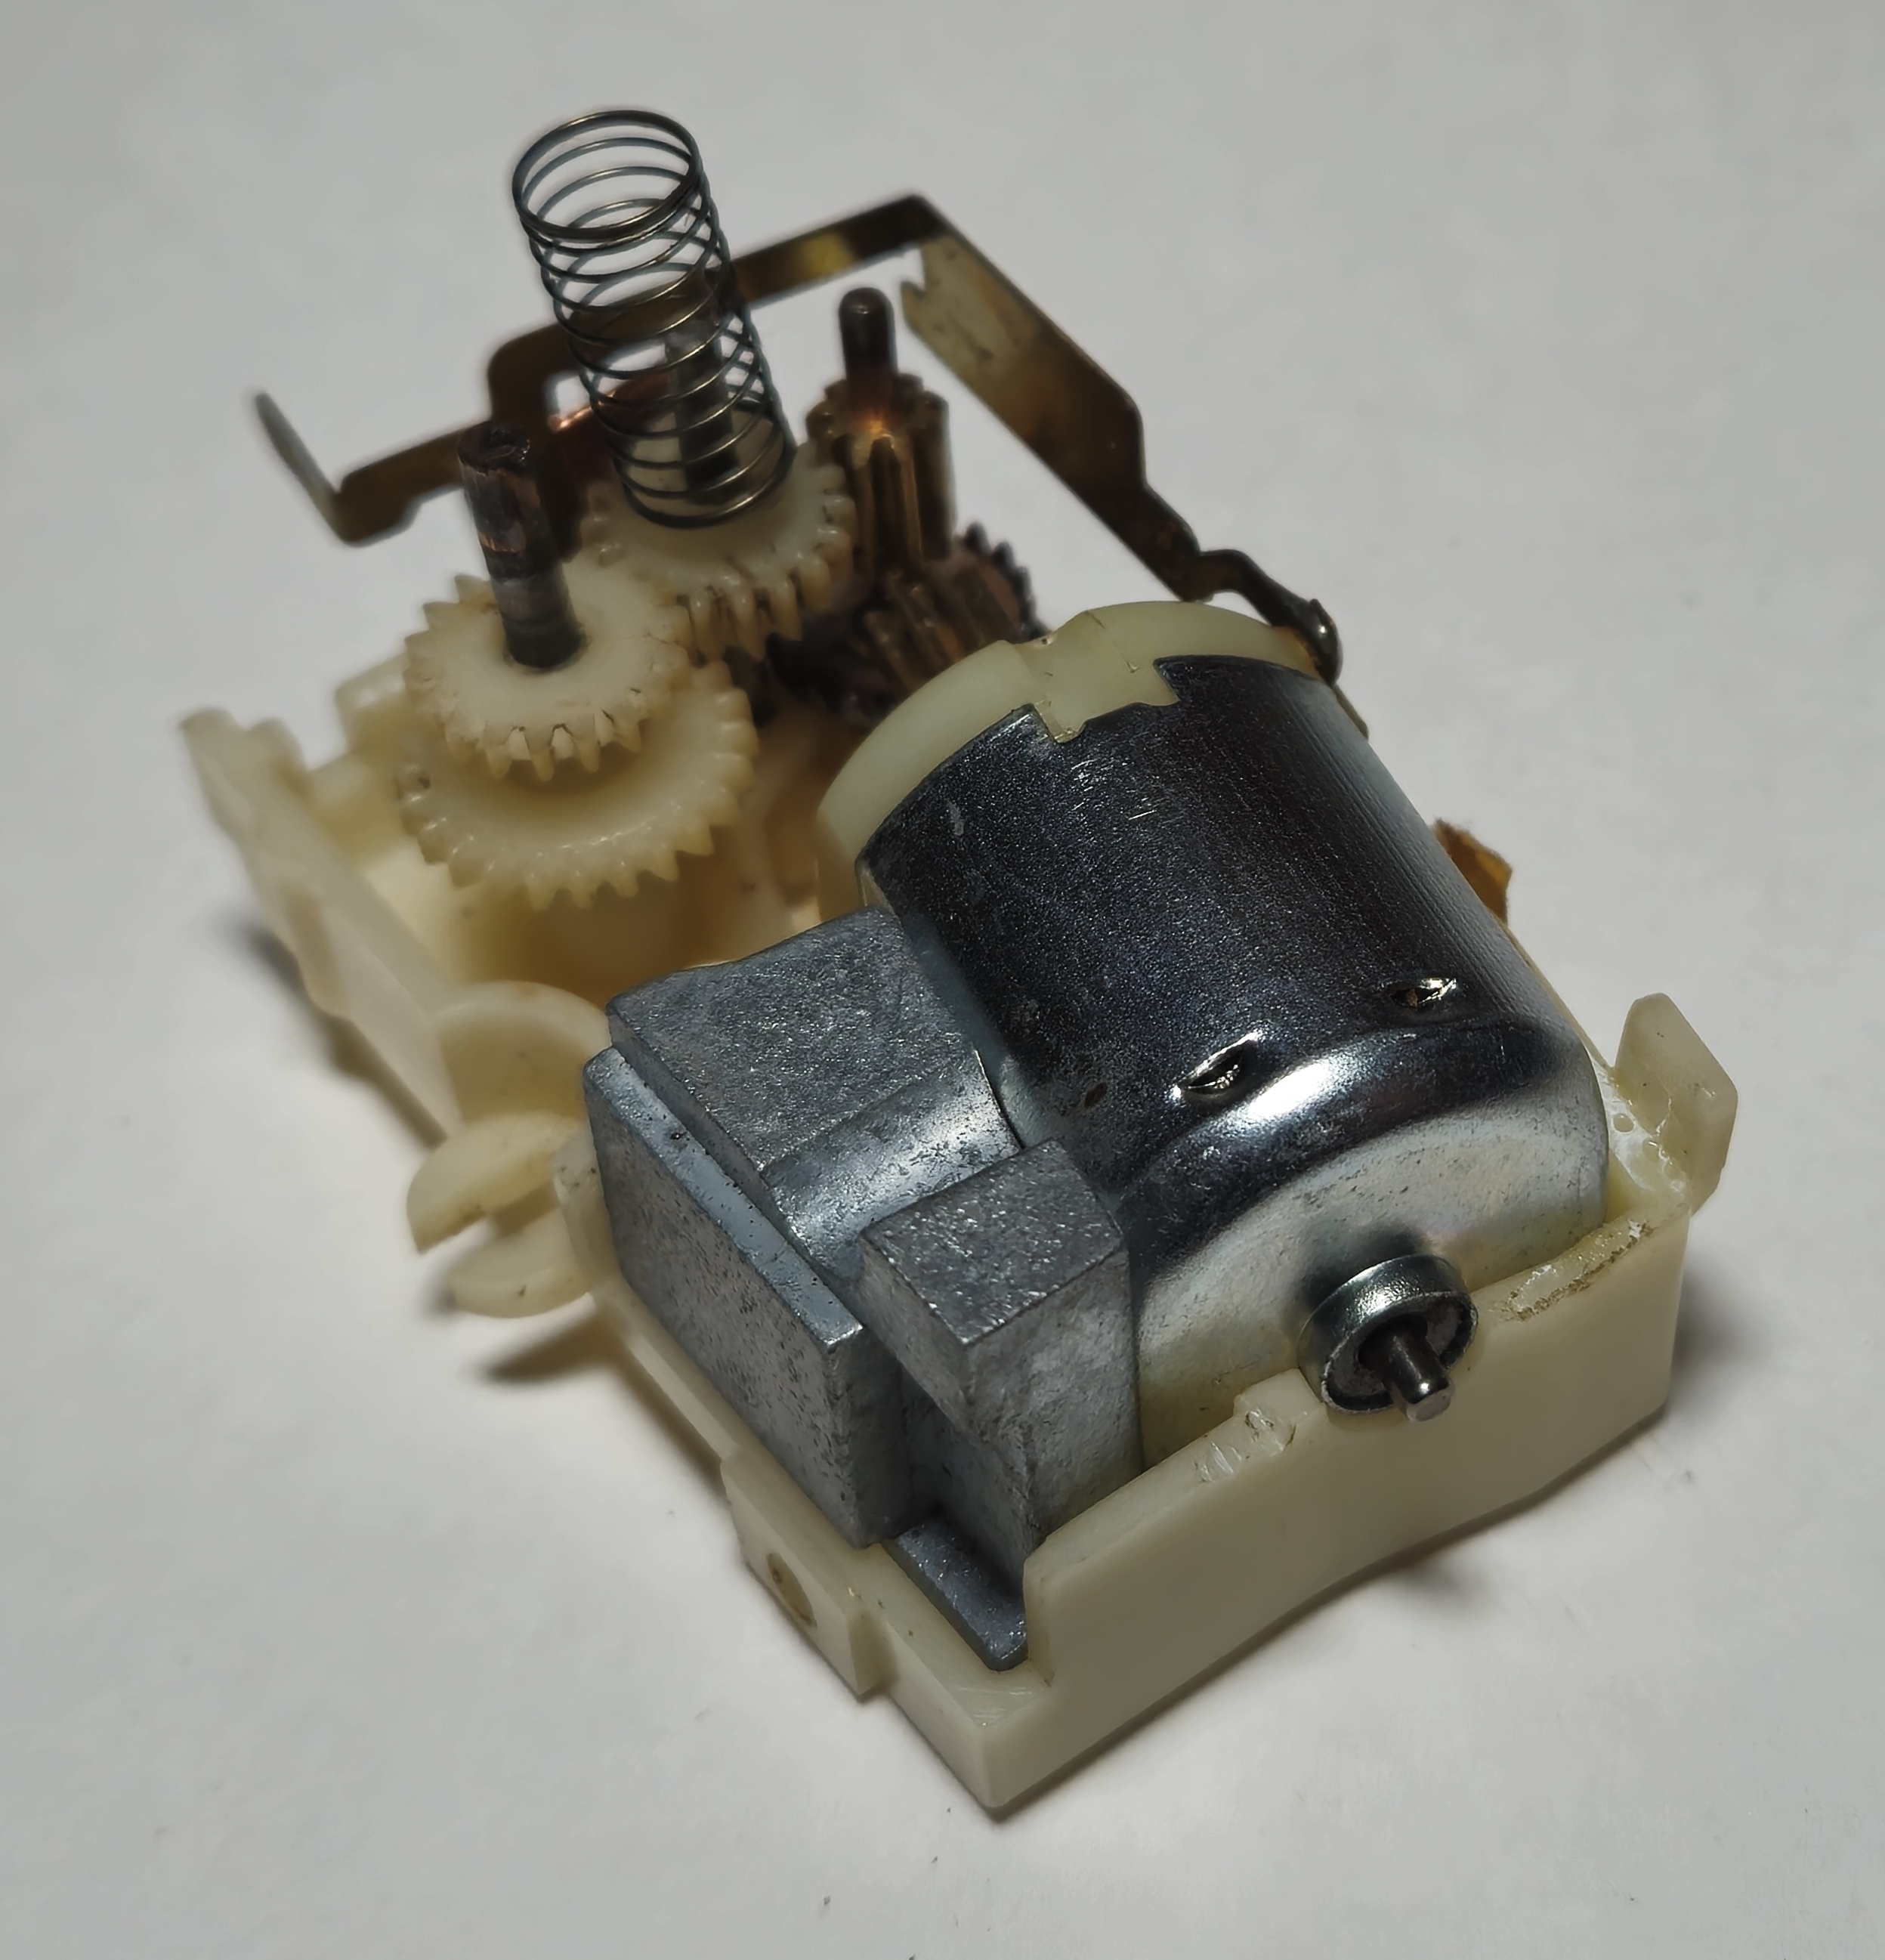
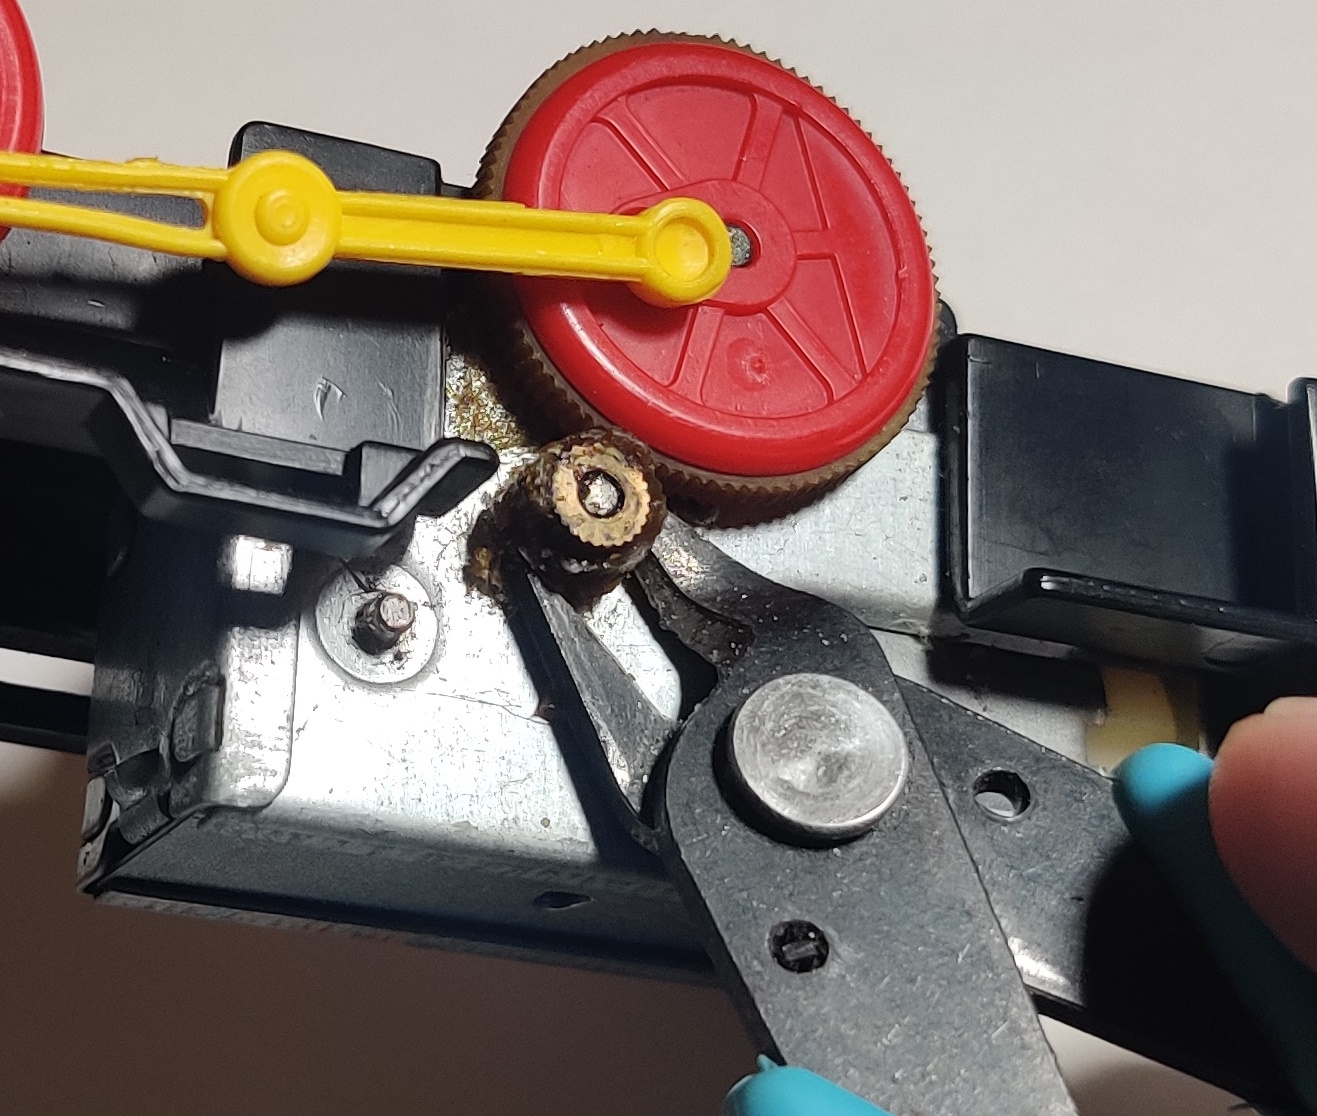
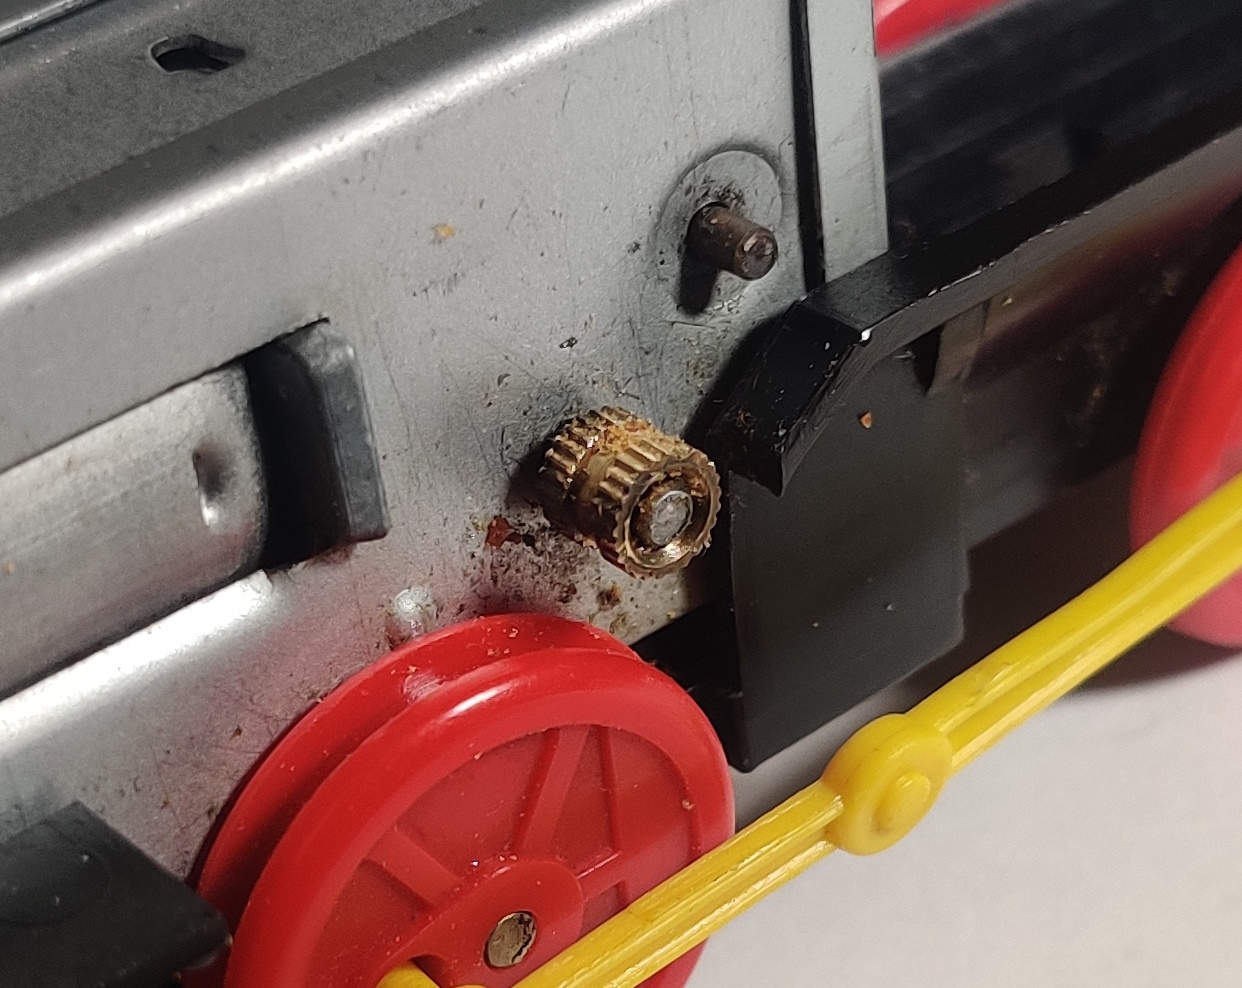
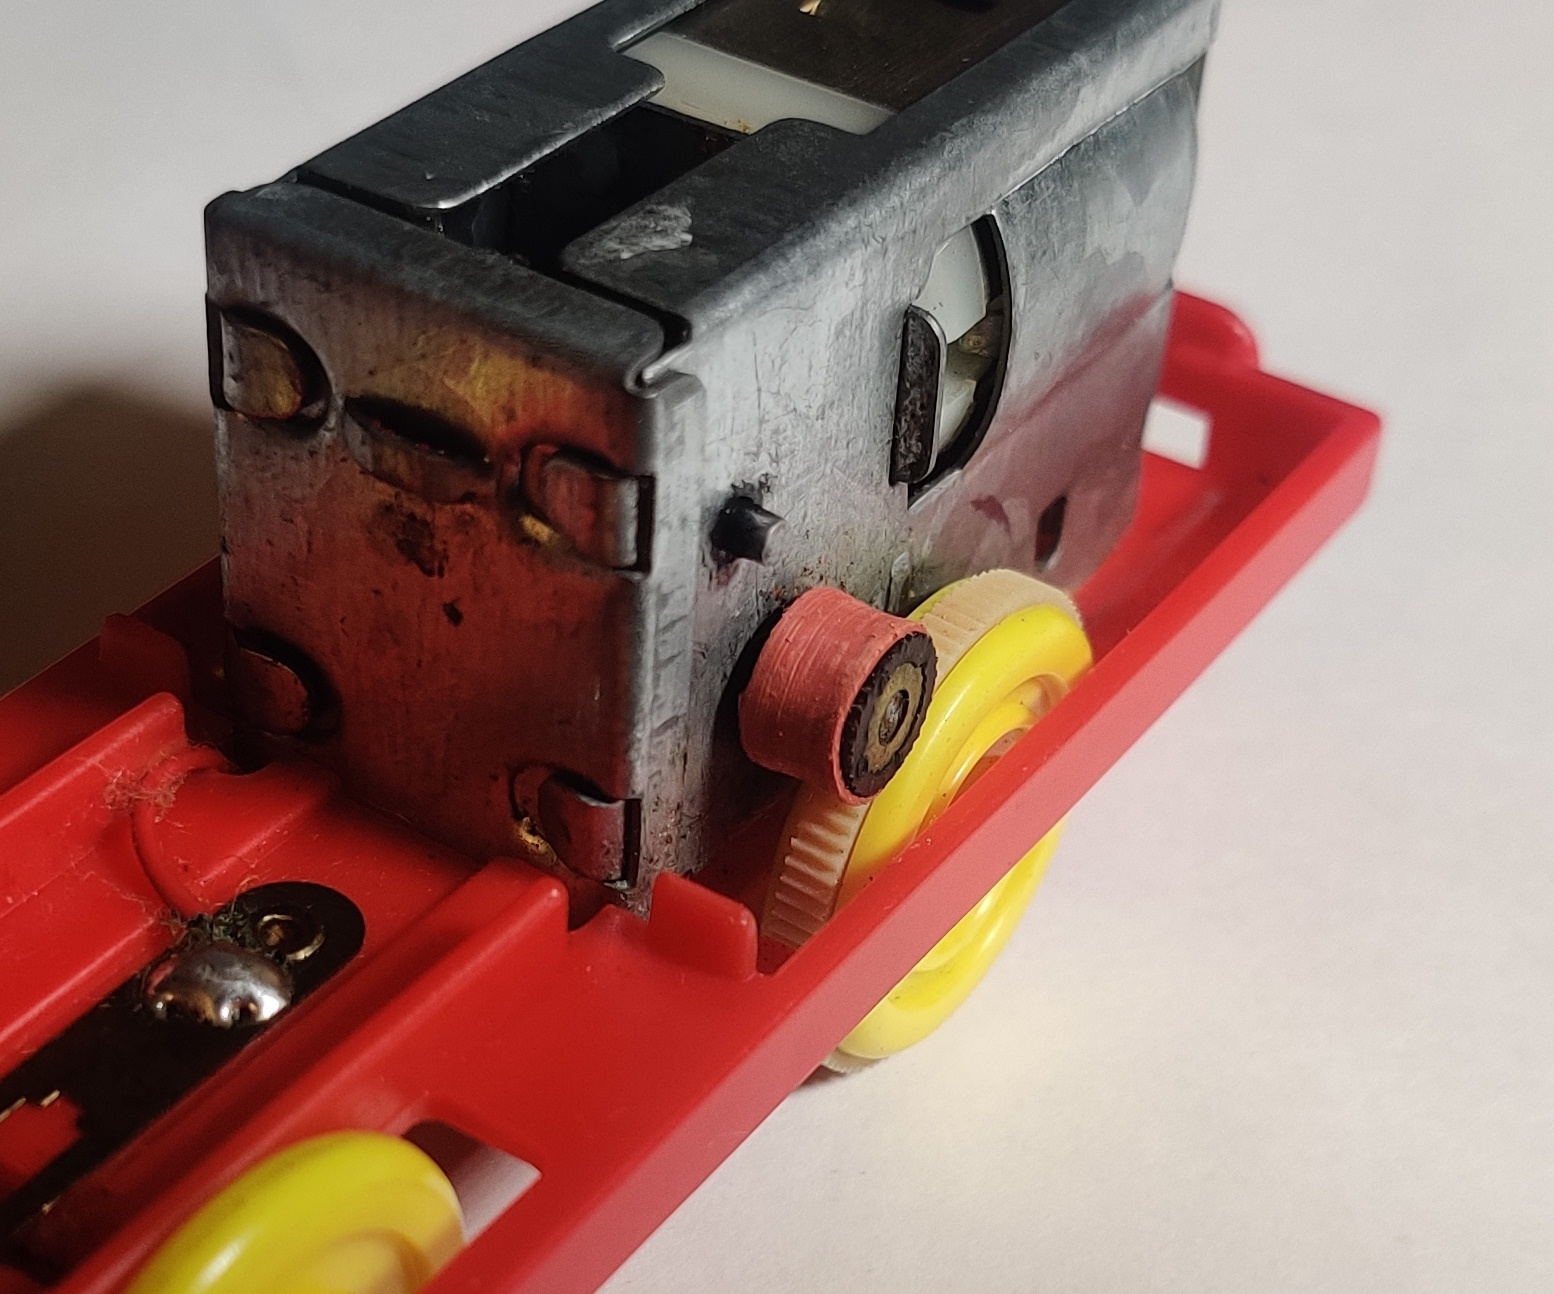
The four tabs on the front of the gearbox can be bent back to take the front plate off. This is the larger "chuffing" steam locomotive gearbox - the top plate of the gearbox can be slid out of its place. This plate holds (or does not hold) the bent metal strip that a cam on the first gearbox shaft hits against to make a "chuffing" sound. This cam spins independently from the shaft and is driven by a second gear reduction coming from the second shaft.
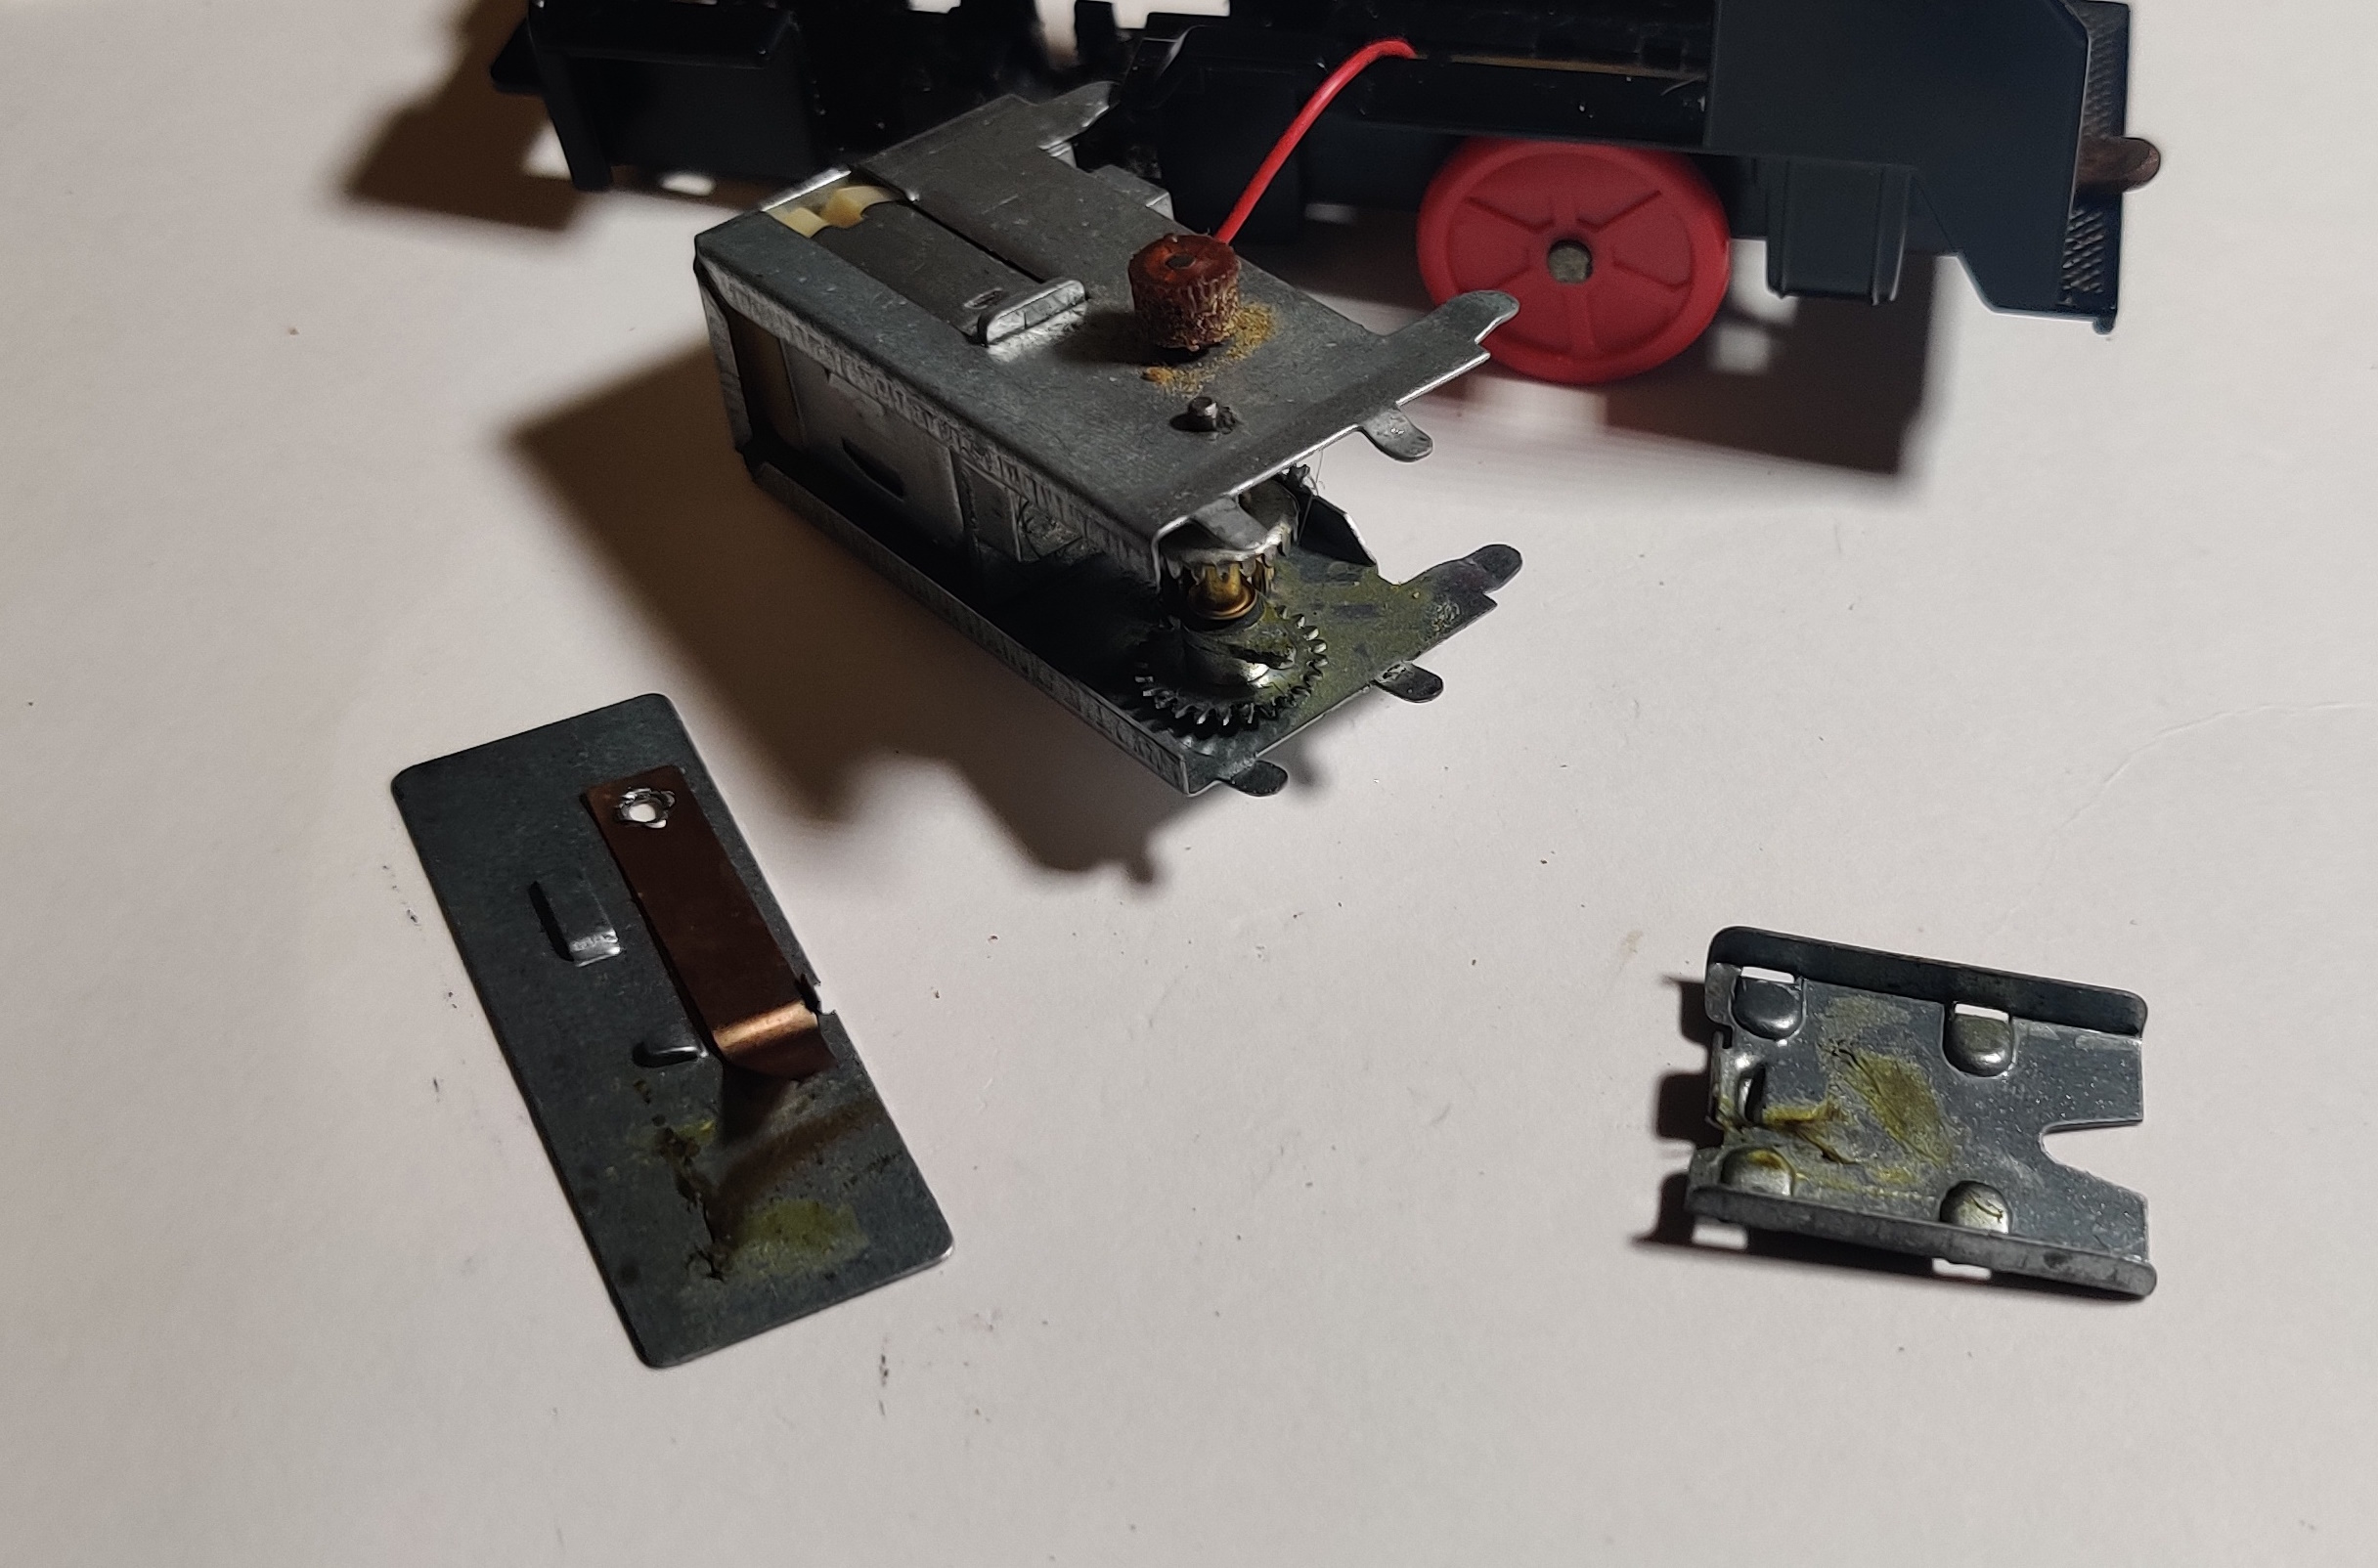
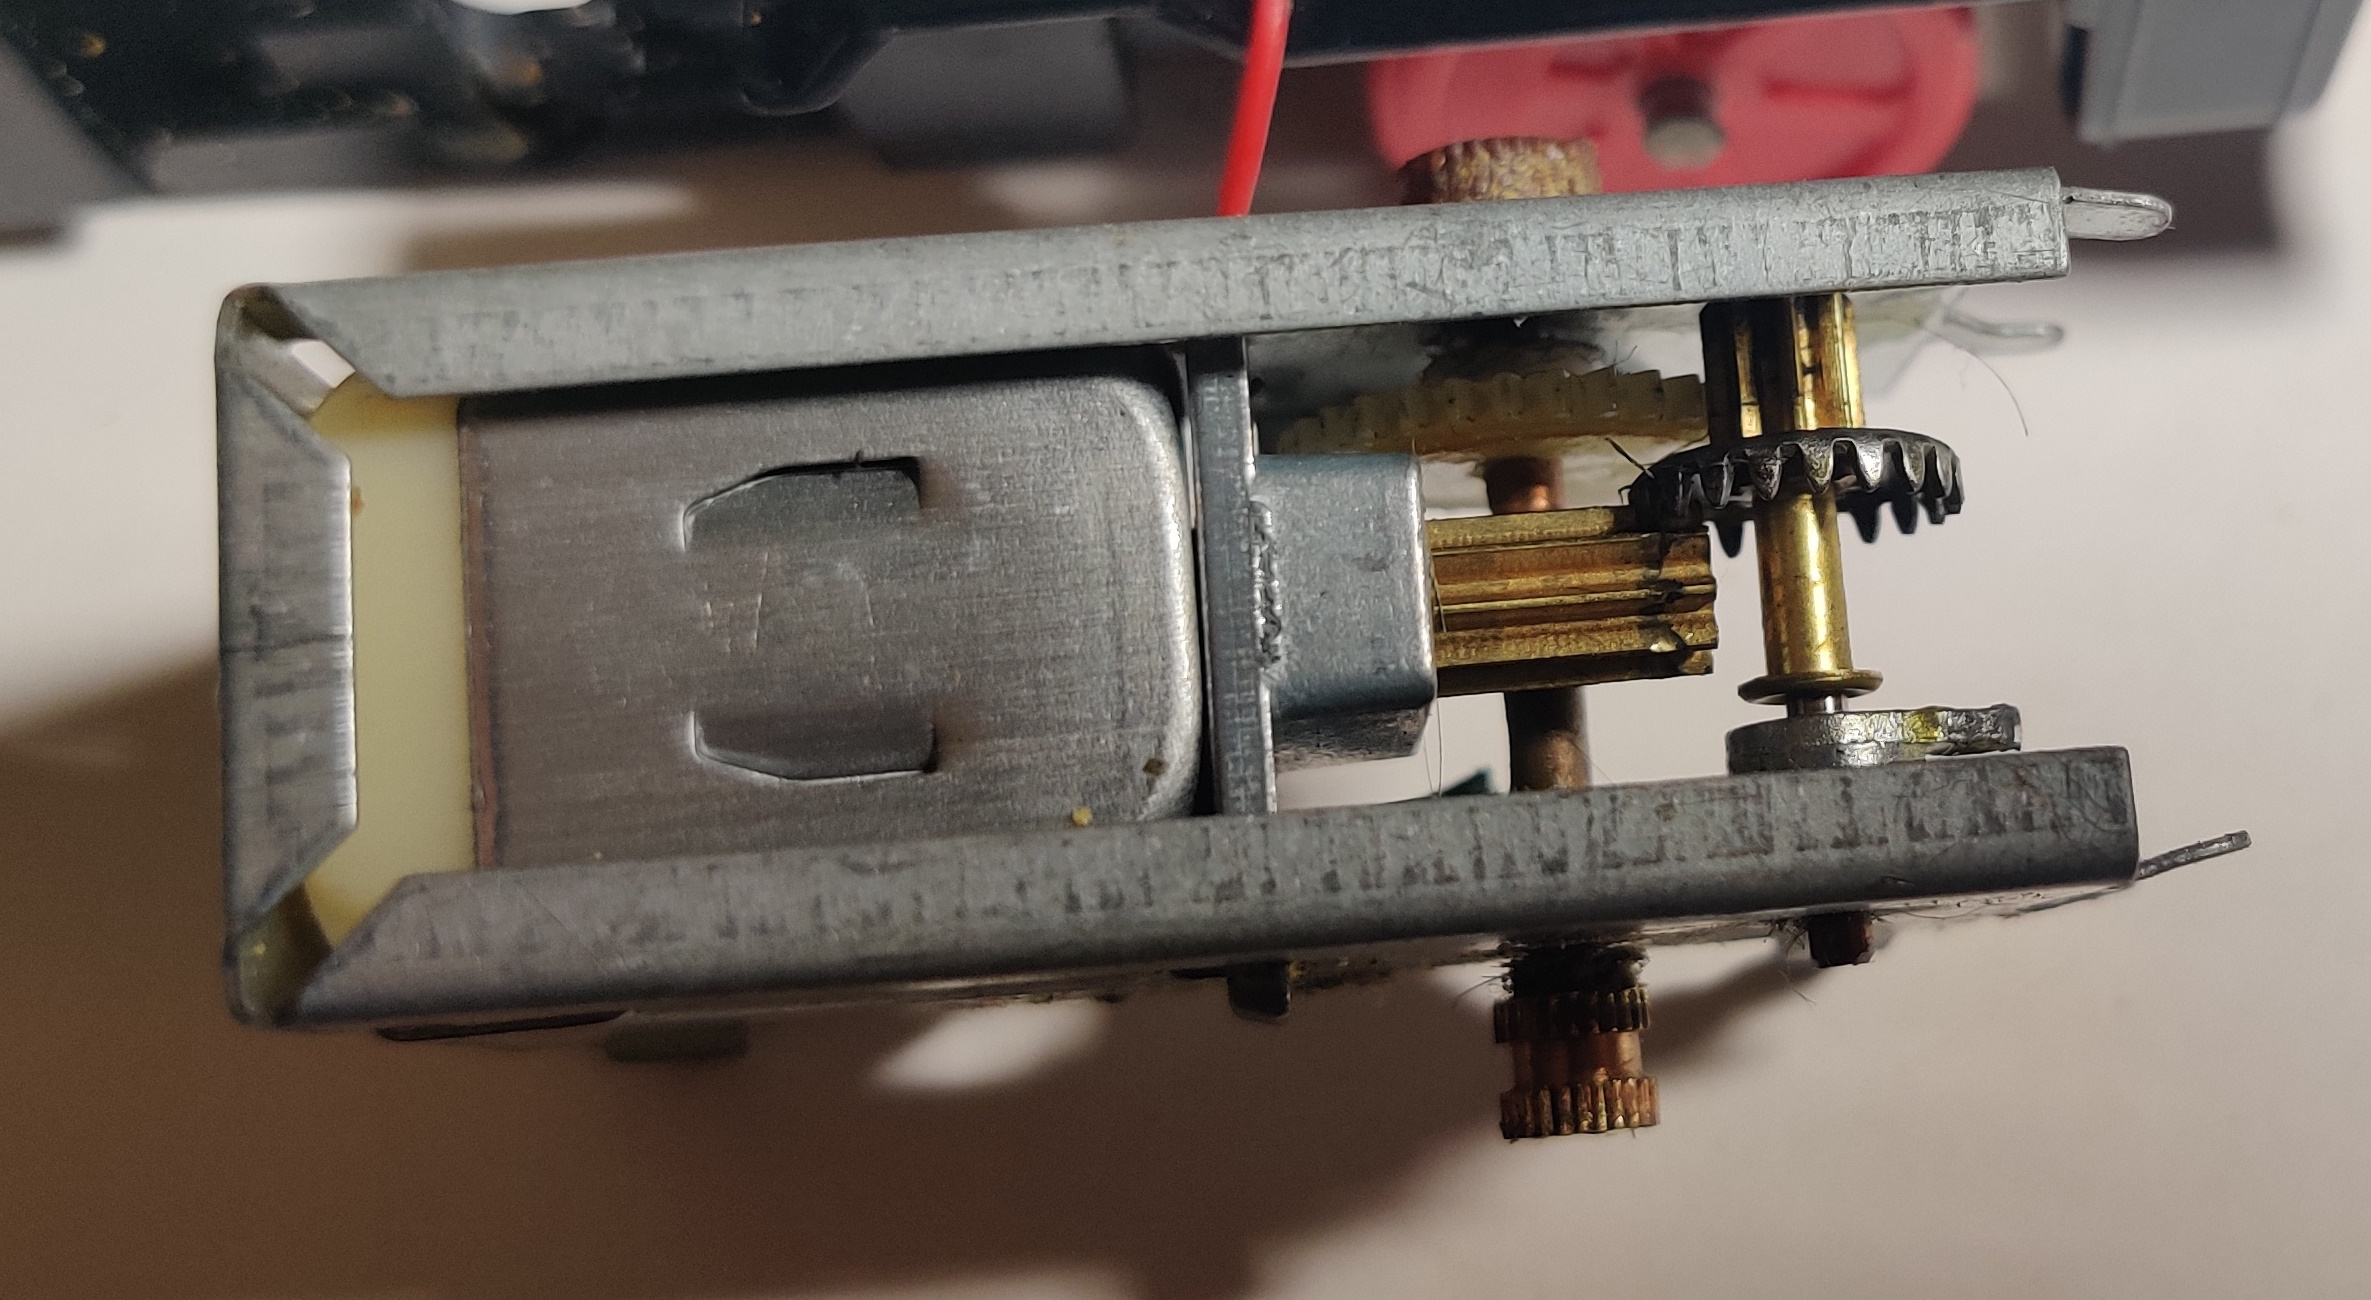
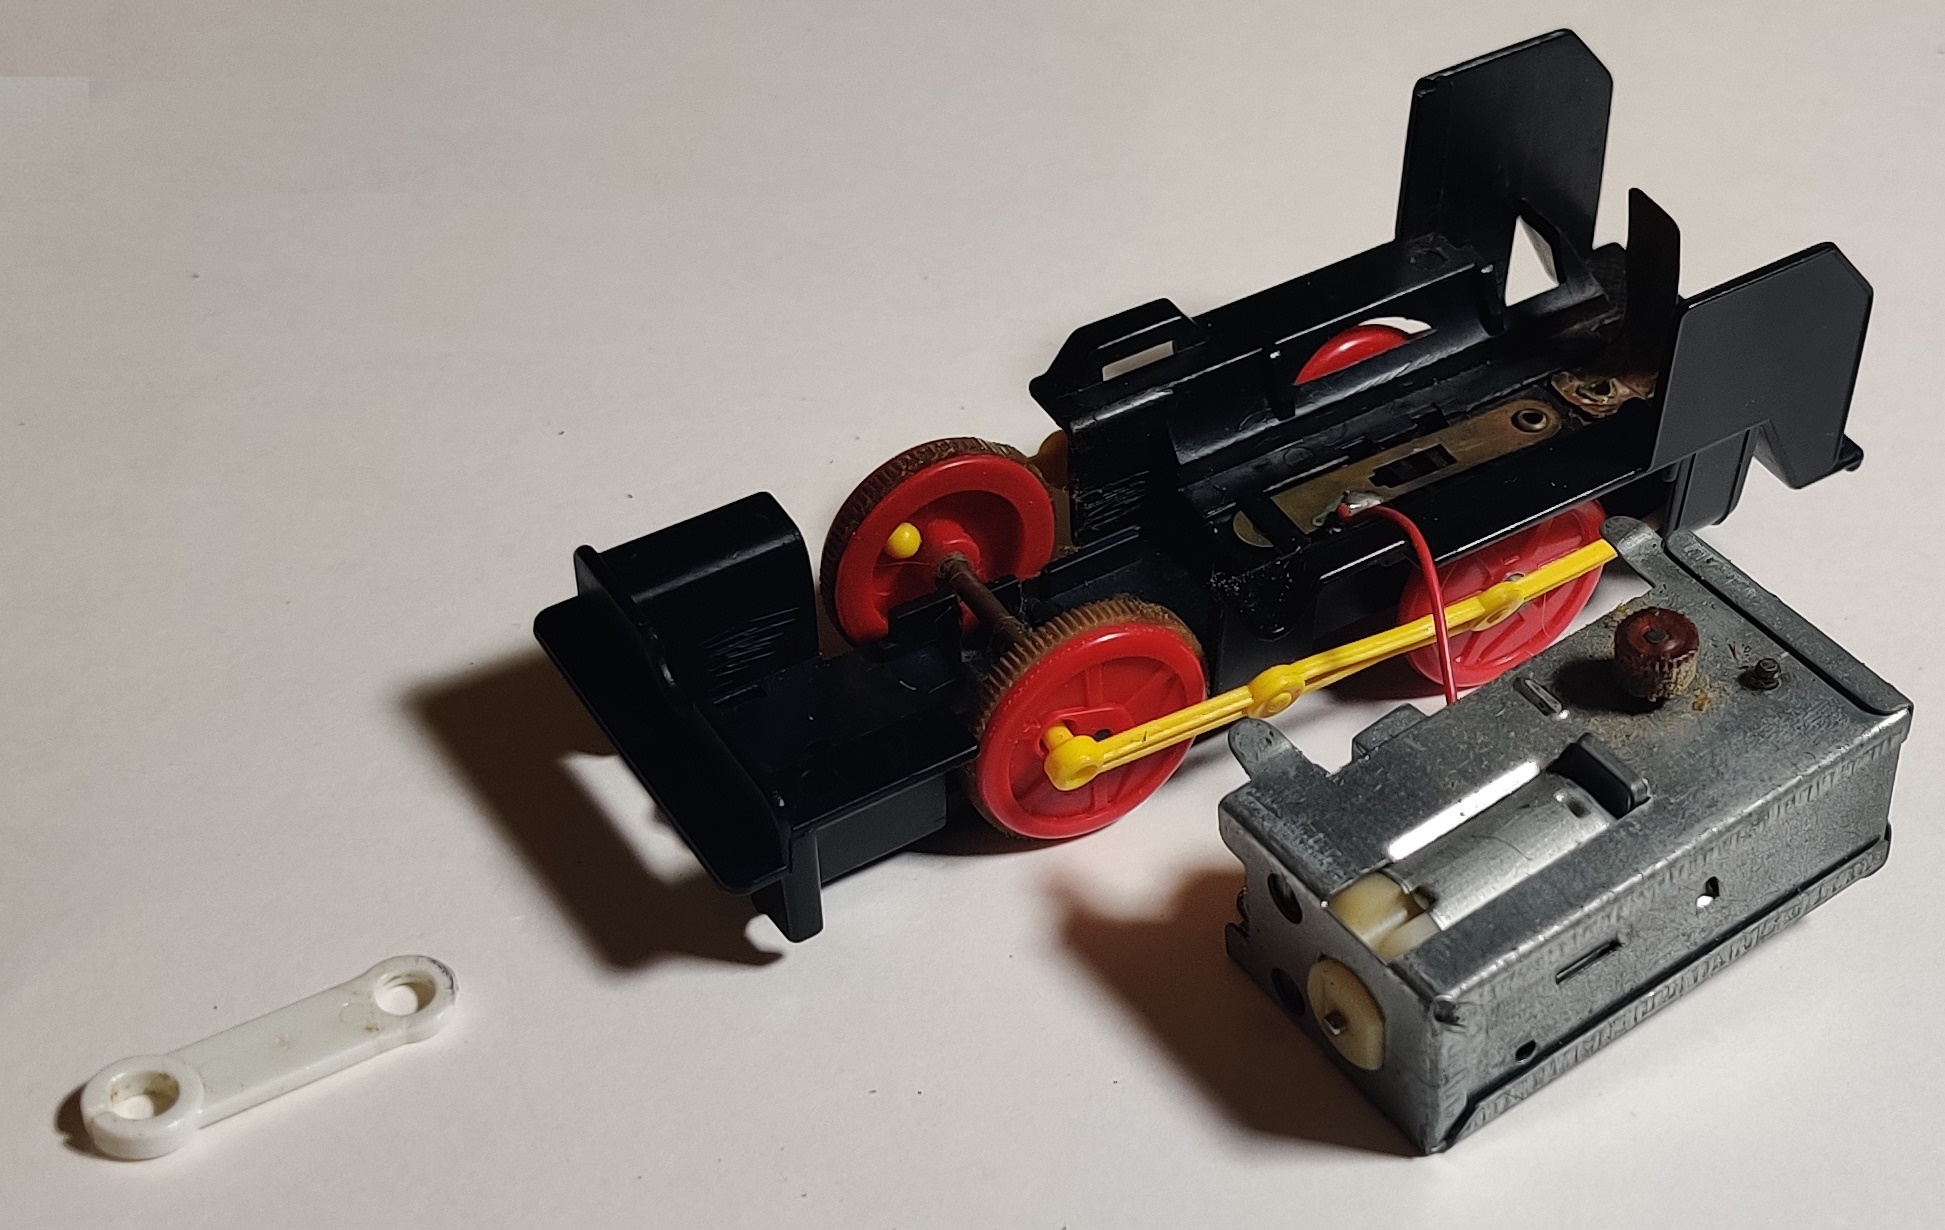
I have never personally had any reason to disassemble a metal gearbox any further than this, although if you needed to change out a burnt out motor you would need to remove one of the drive spool and allow the two sides of the gearbox to split apart - these metal ones are bent around the rear and can only be splayed open enough to remove the axles and plate crossing the gap to hold the front of the motor. In general, if you need to open an old power gearbox fully, at least one of these drive spools must be removed.
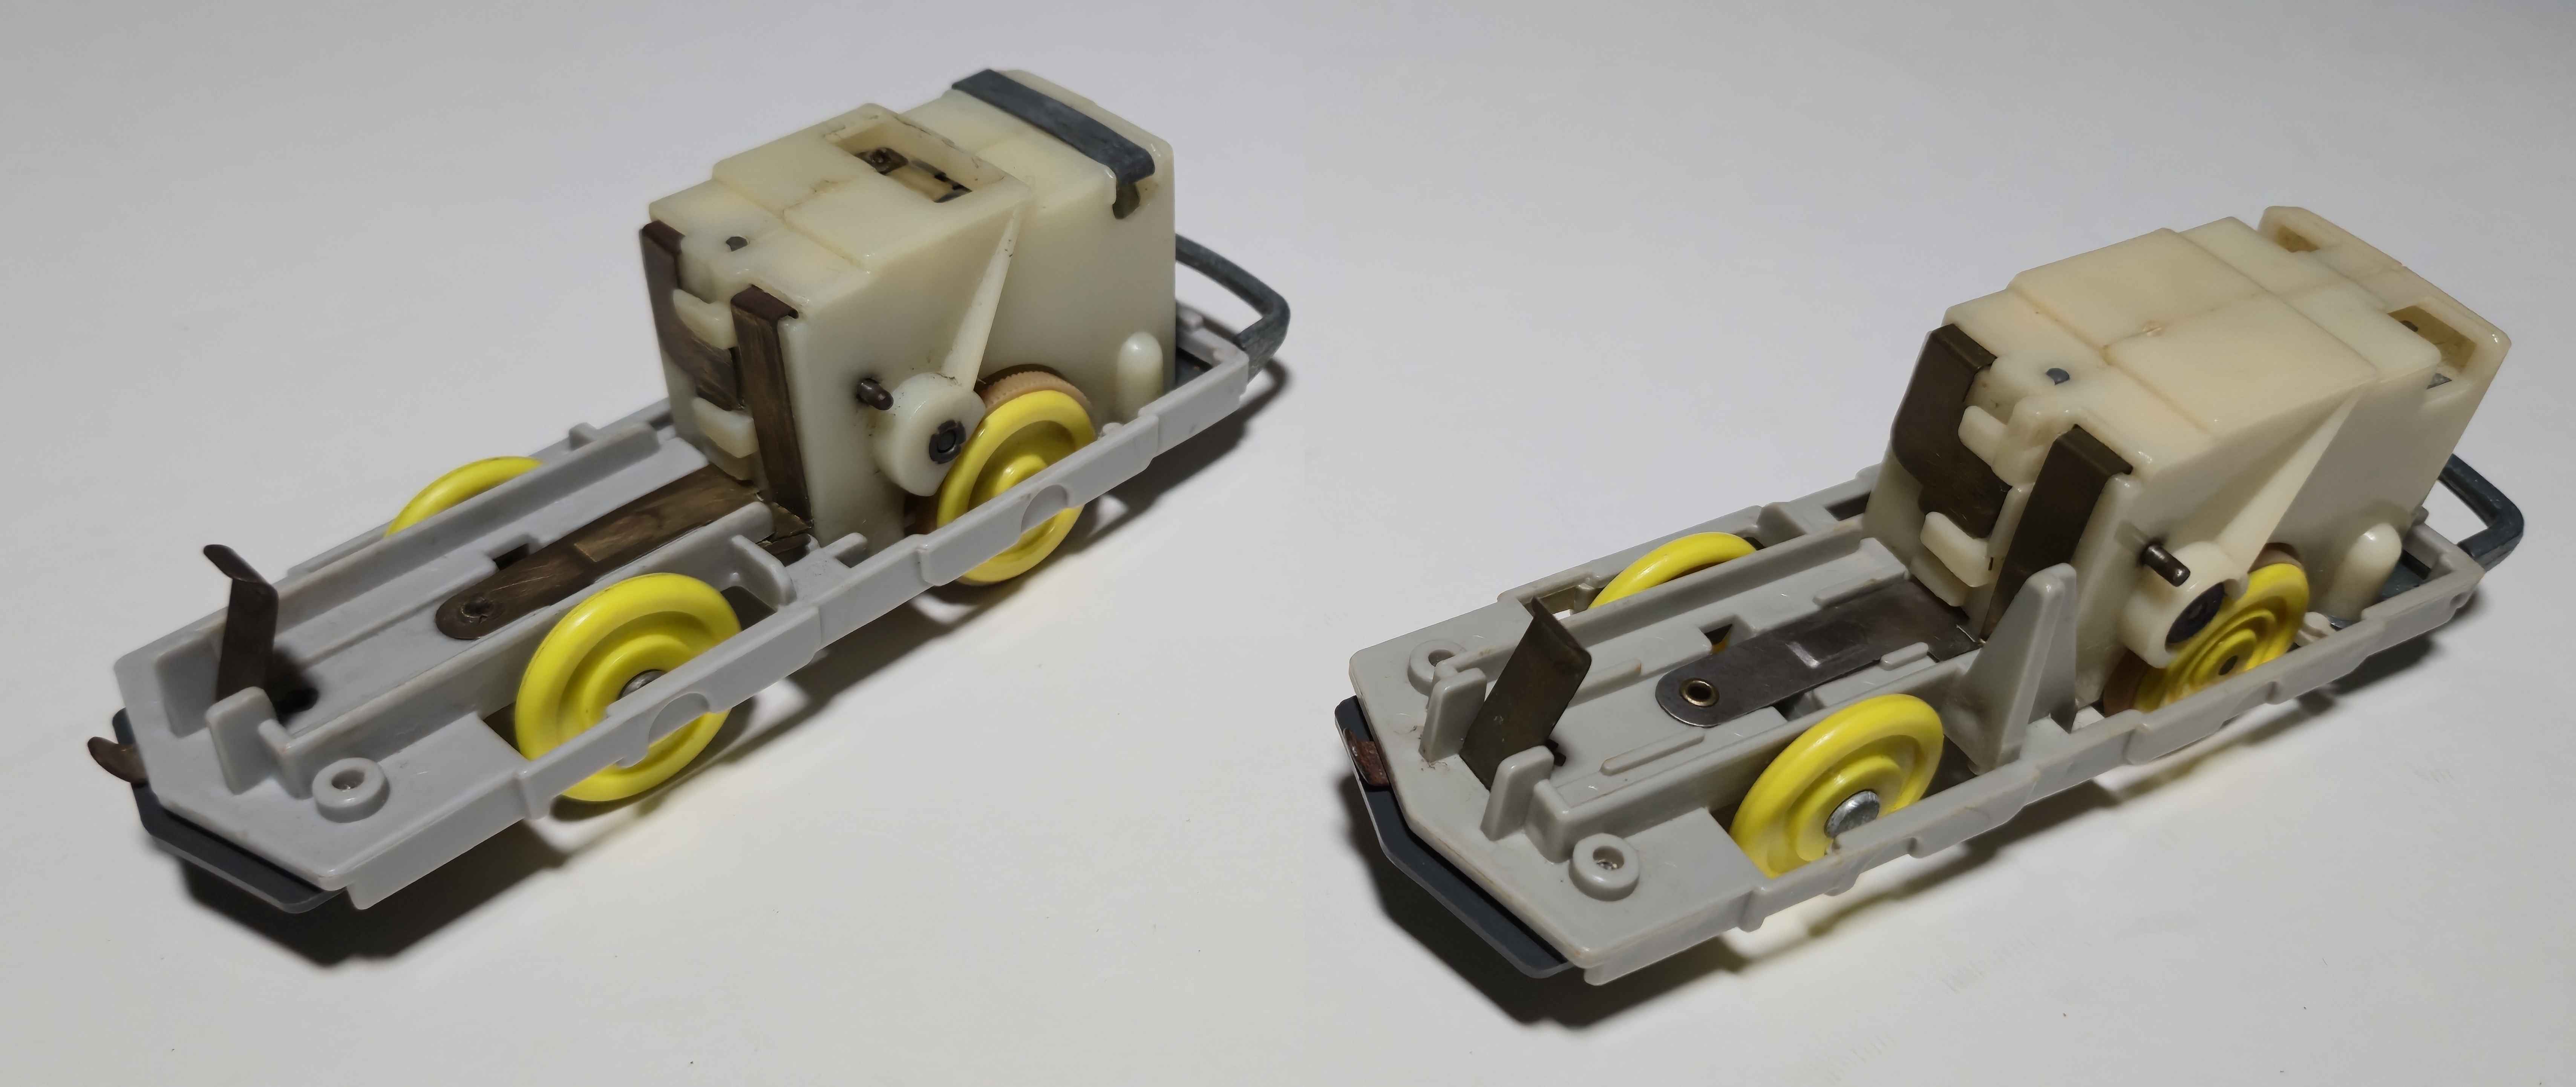
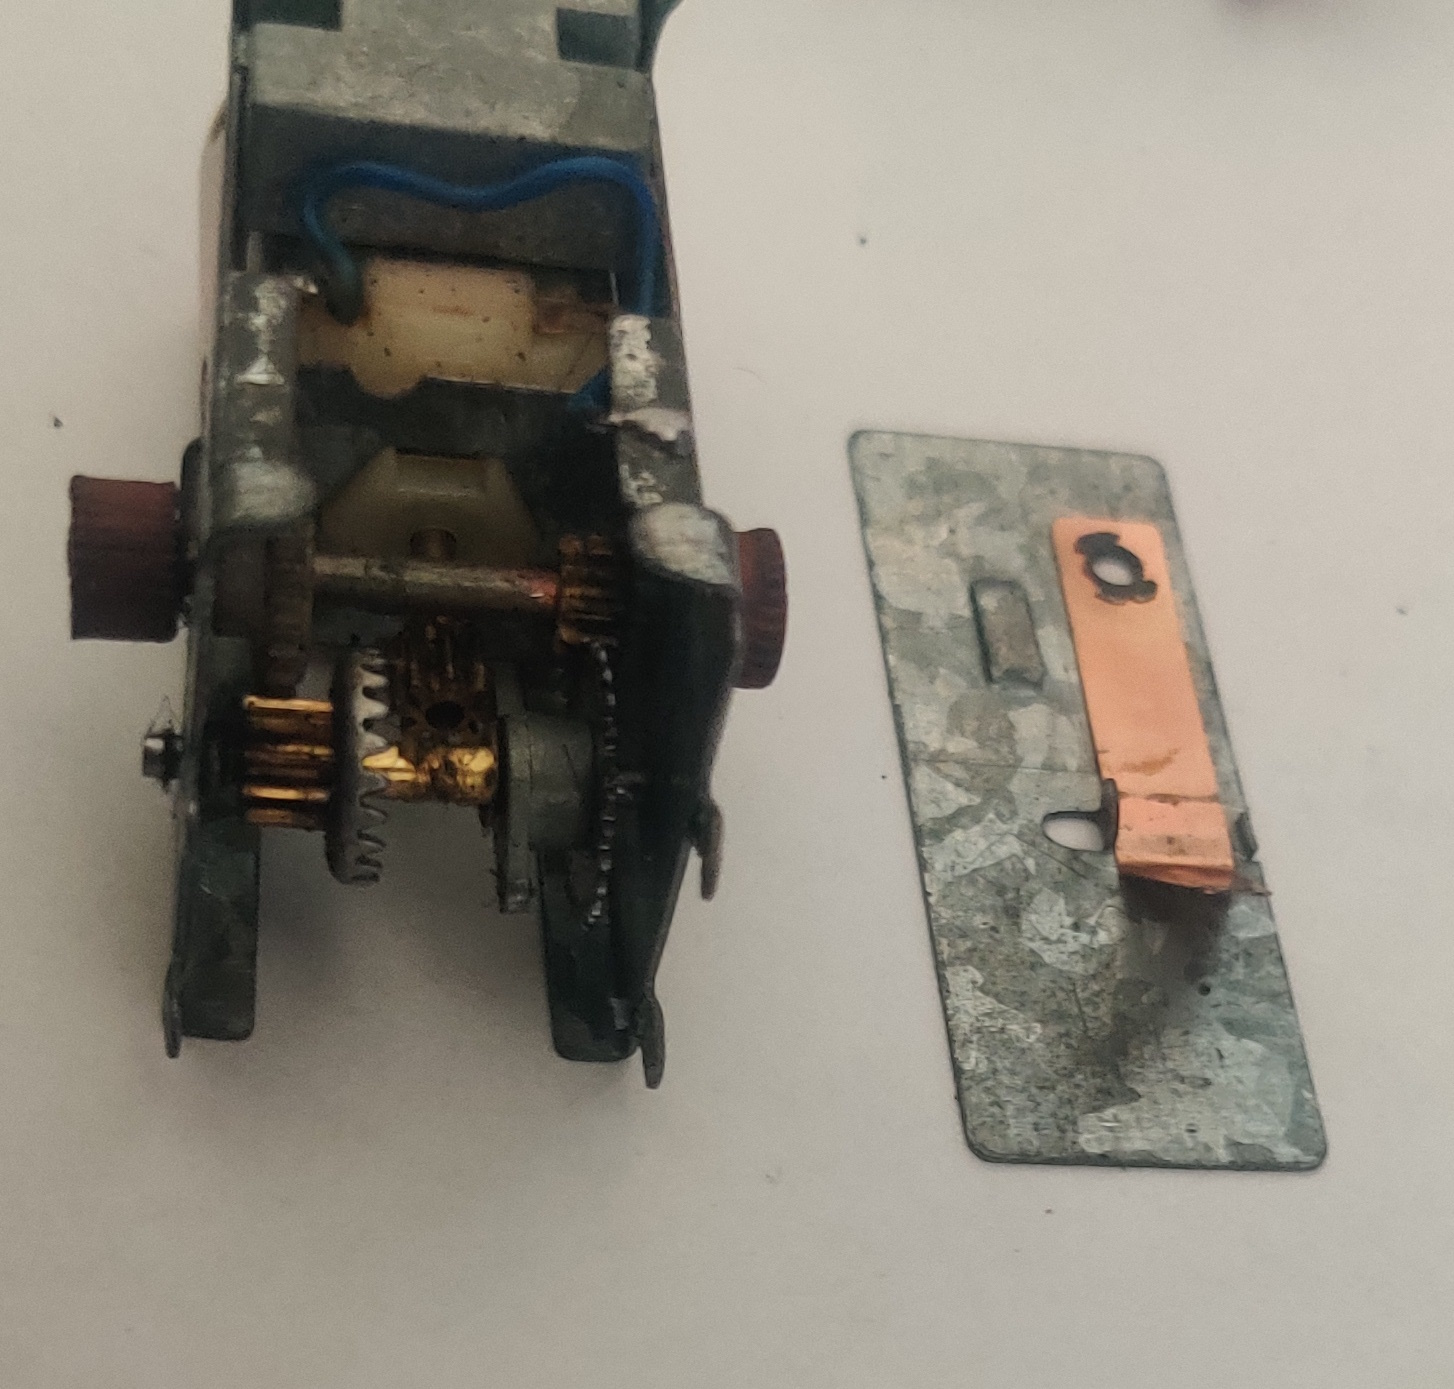
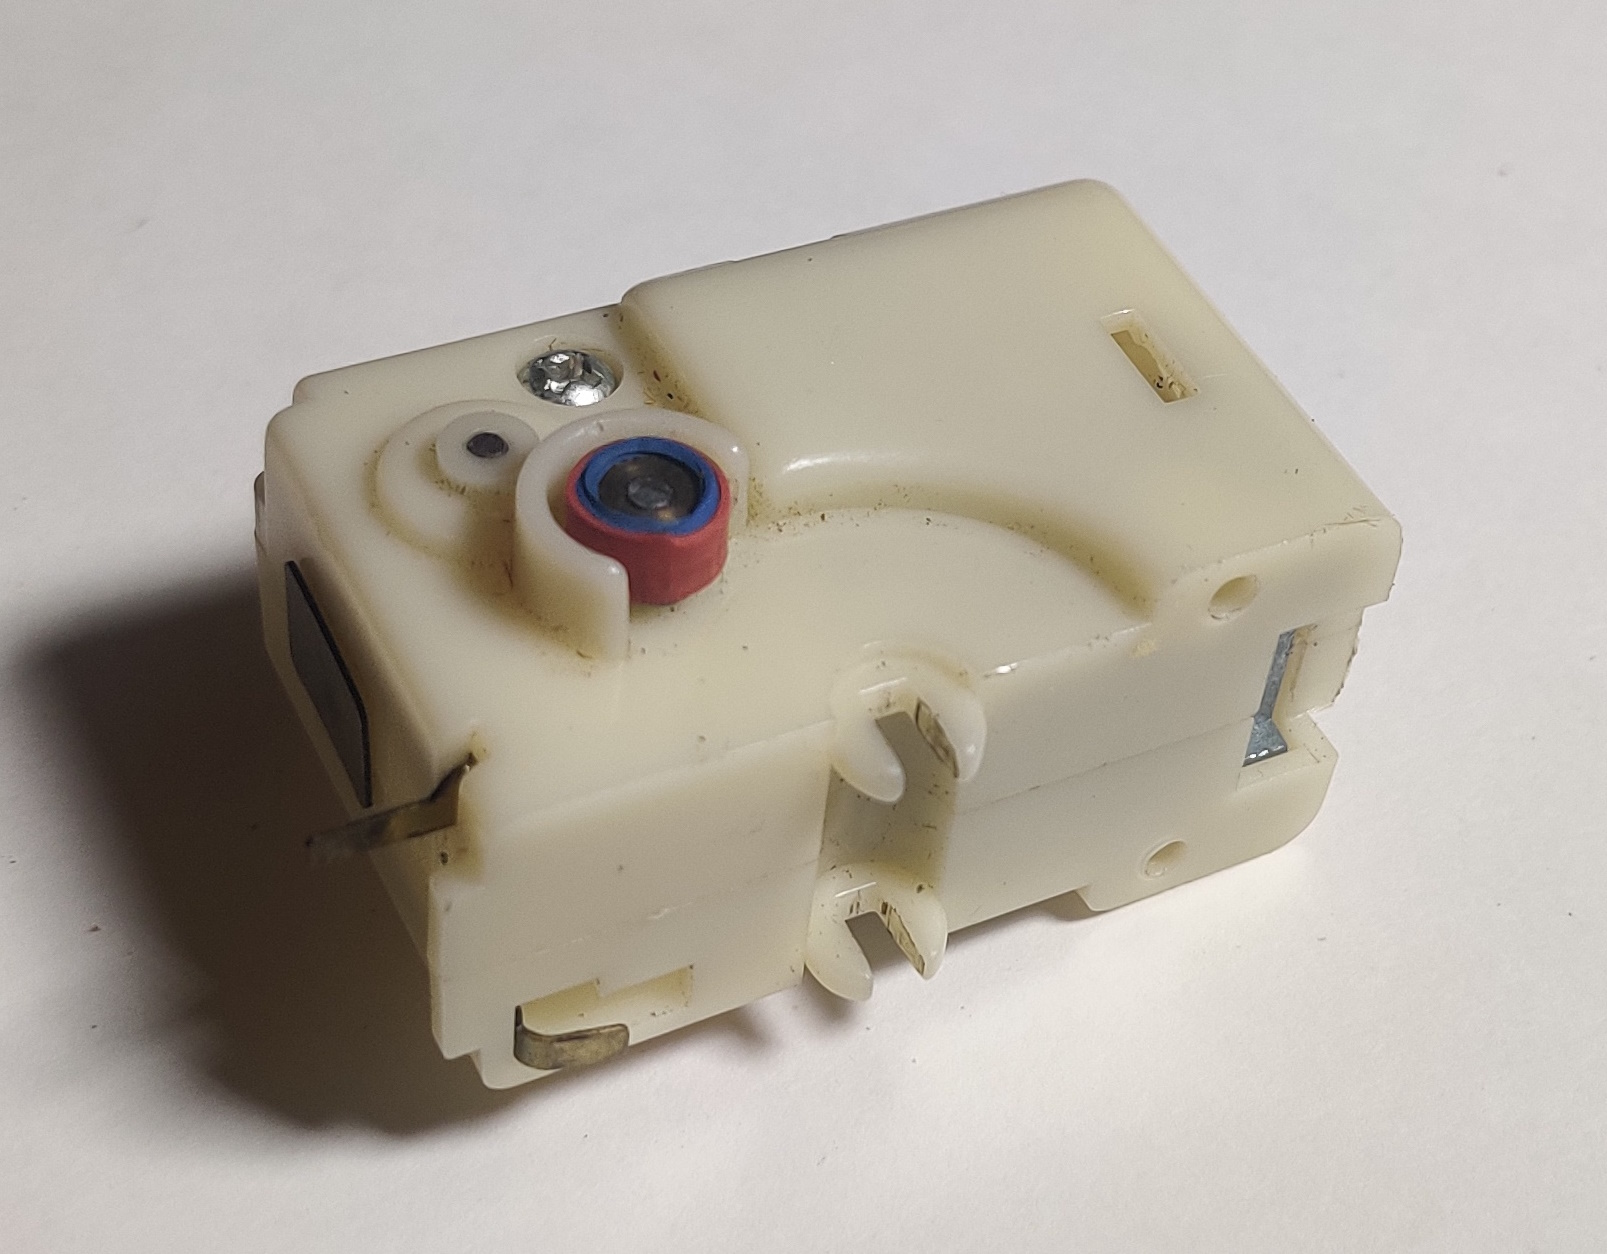
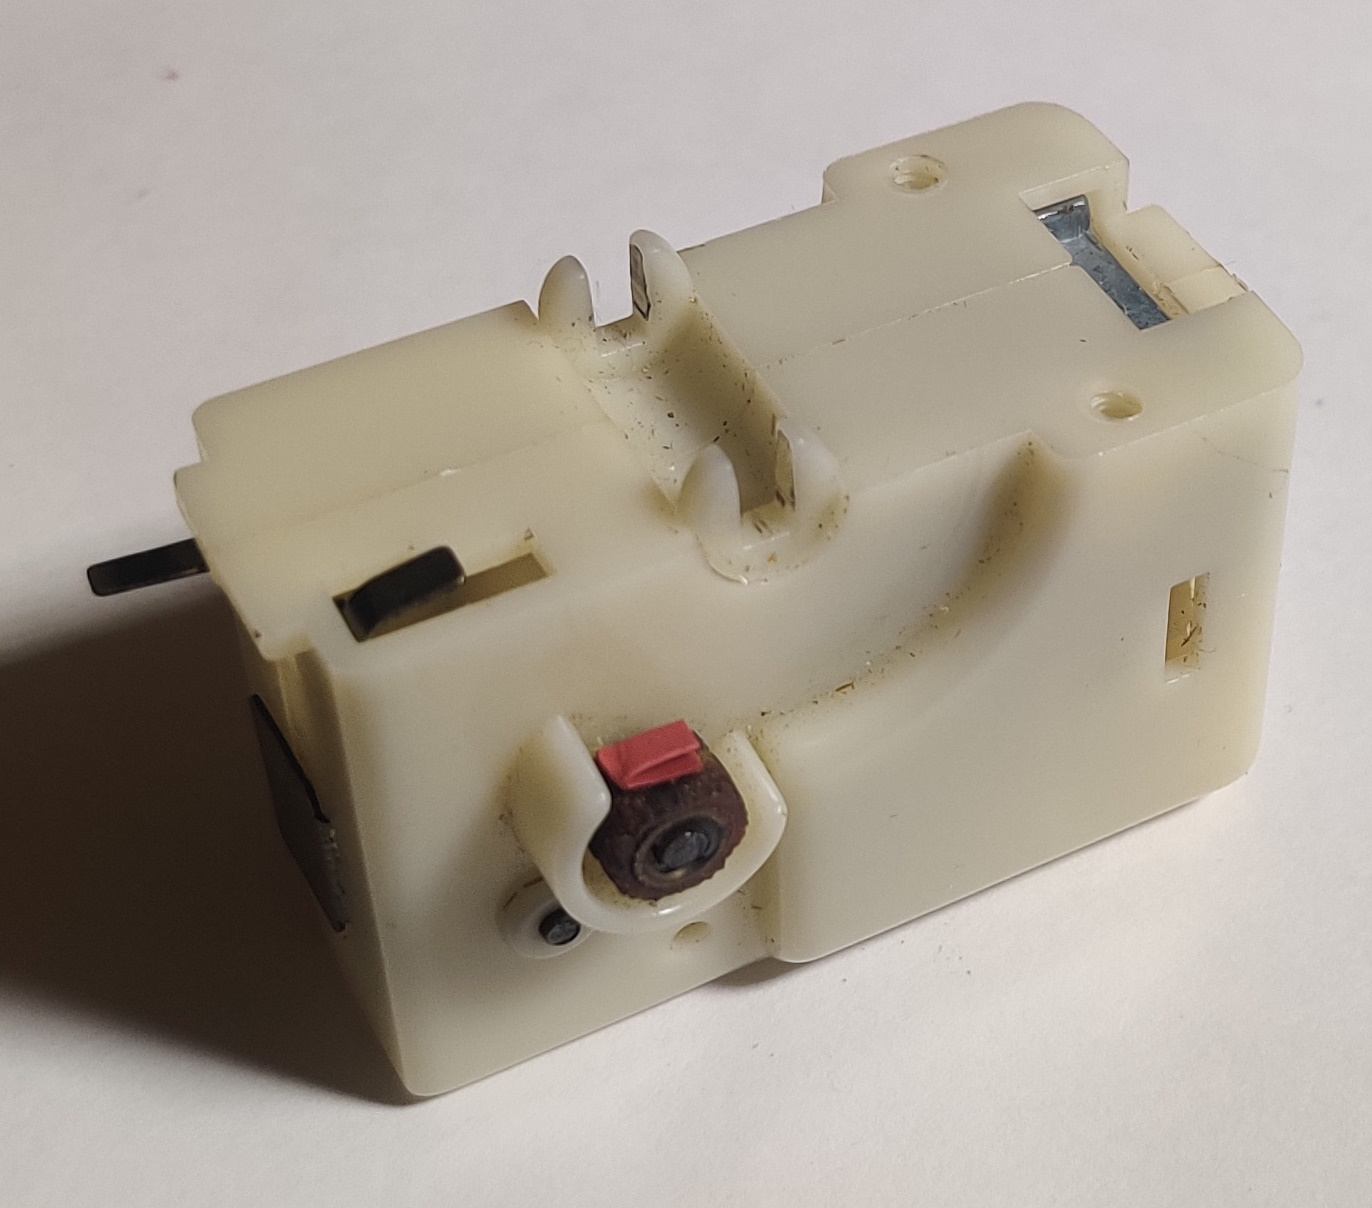
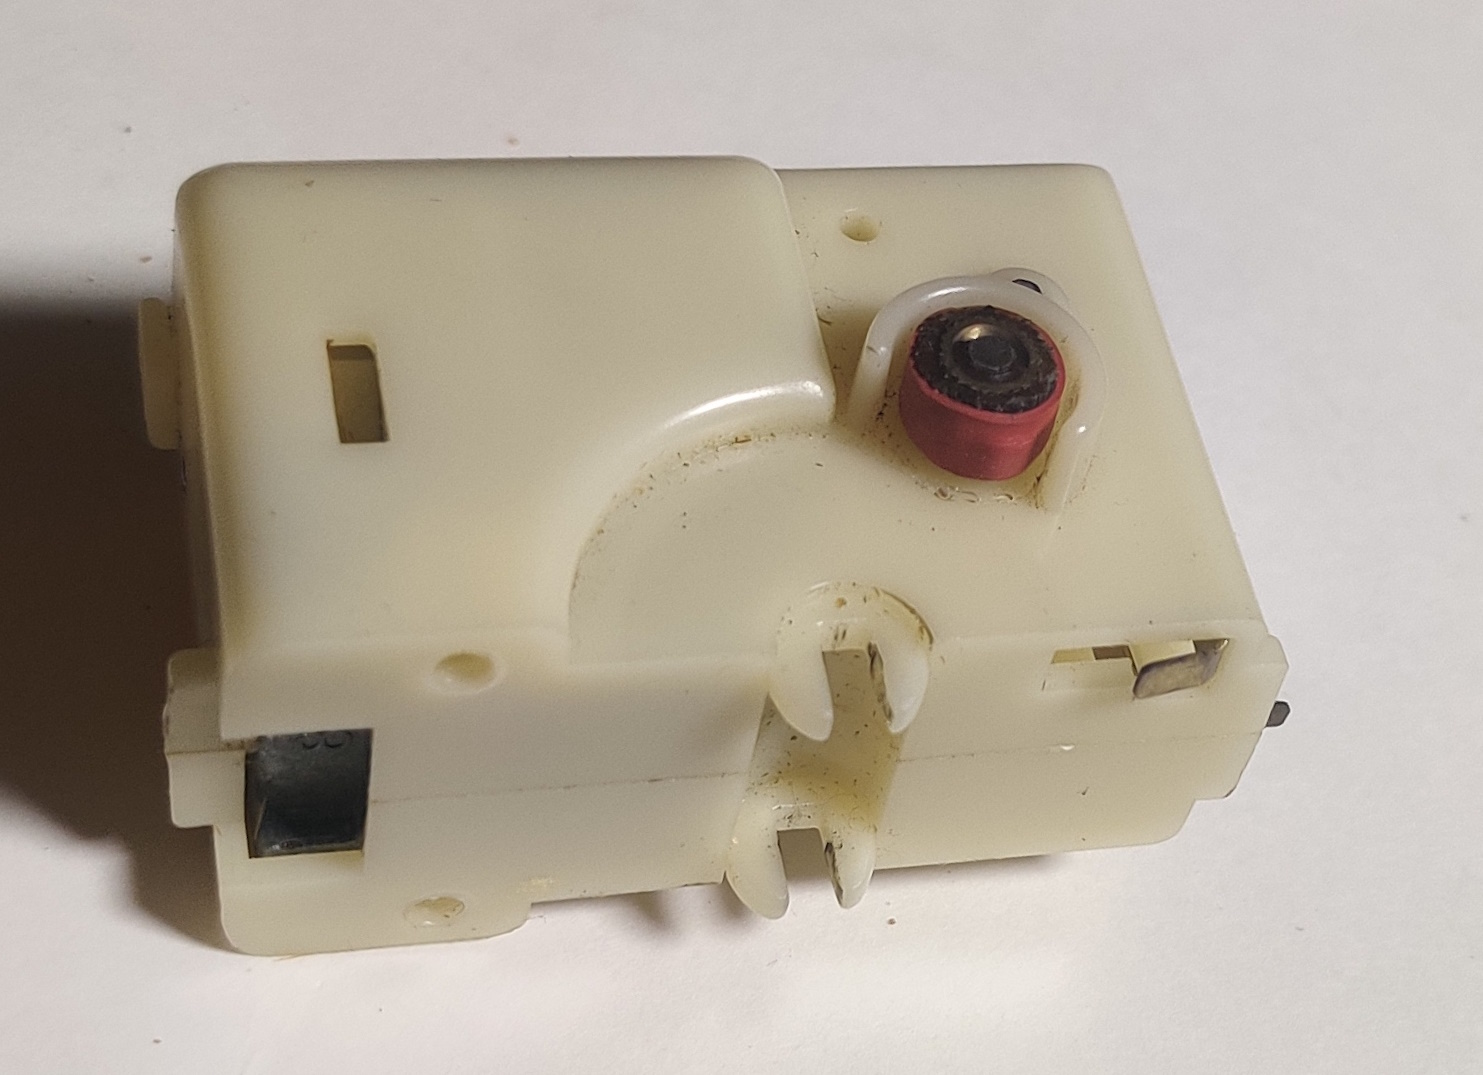
Plastic gearbox disassembly
In order to get at the plastic gears of the plastic type old power gearboxes, at least one of the two drive spools (all the brass-core type by the time this gearbox was introduced) must be pulled off. This is rather annoying.
The "easiest" way to do this is to cut away some of the plastic shroud around the metal hub and use a pinion puller to push the axle out from the middle of the spool.
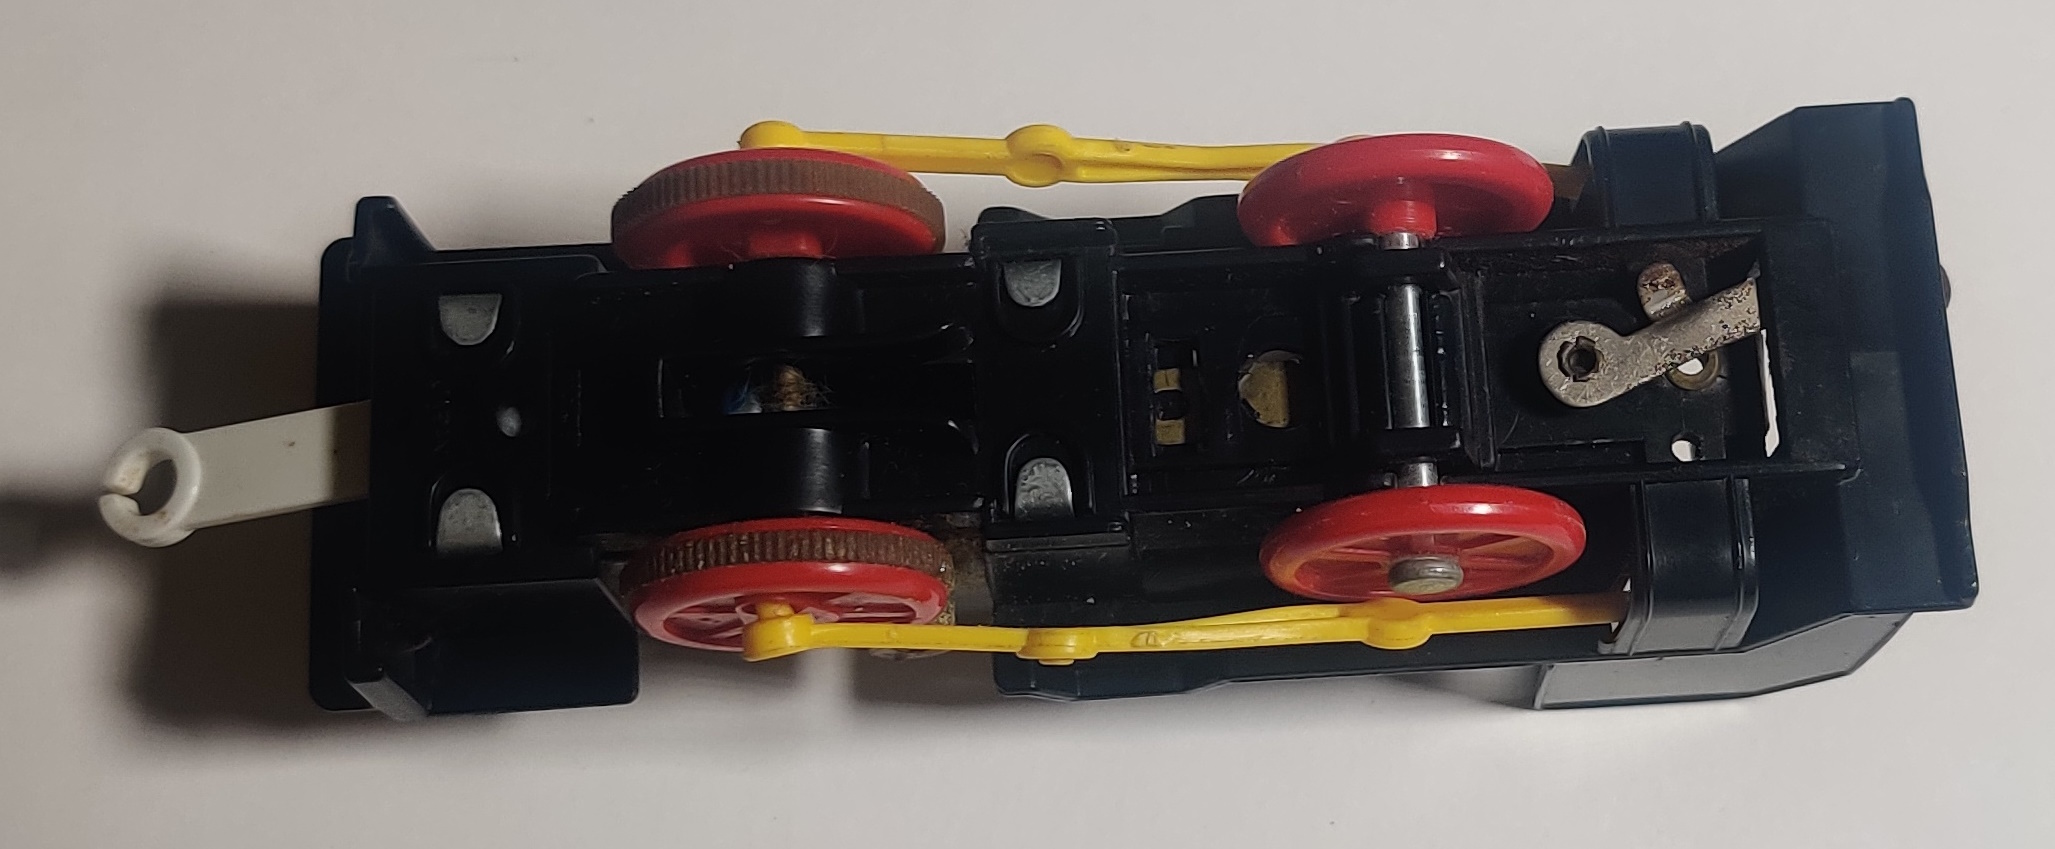
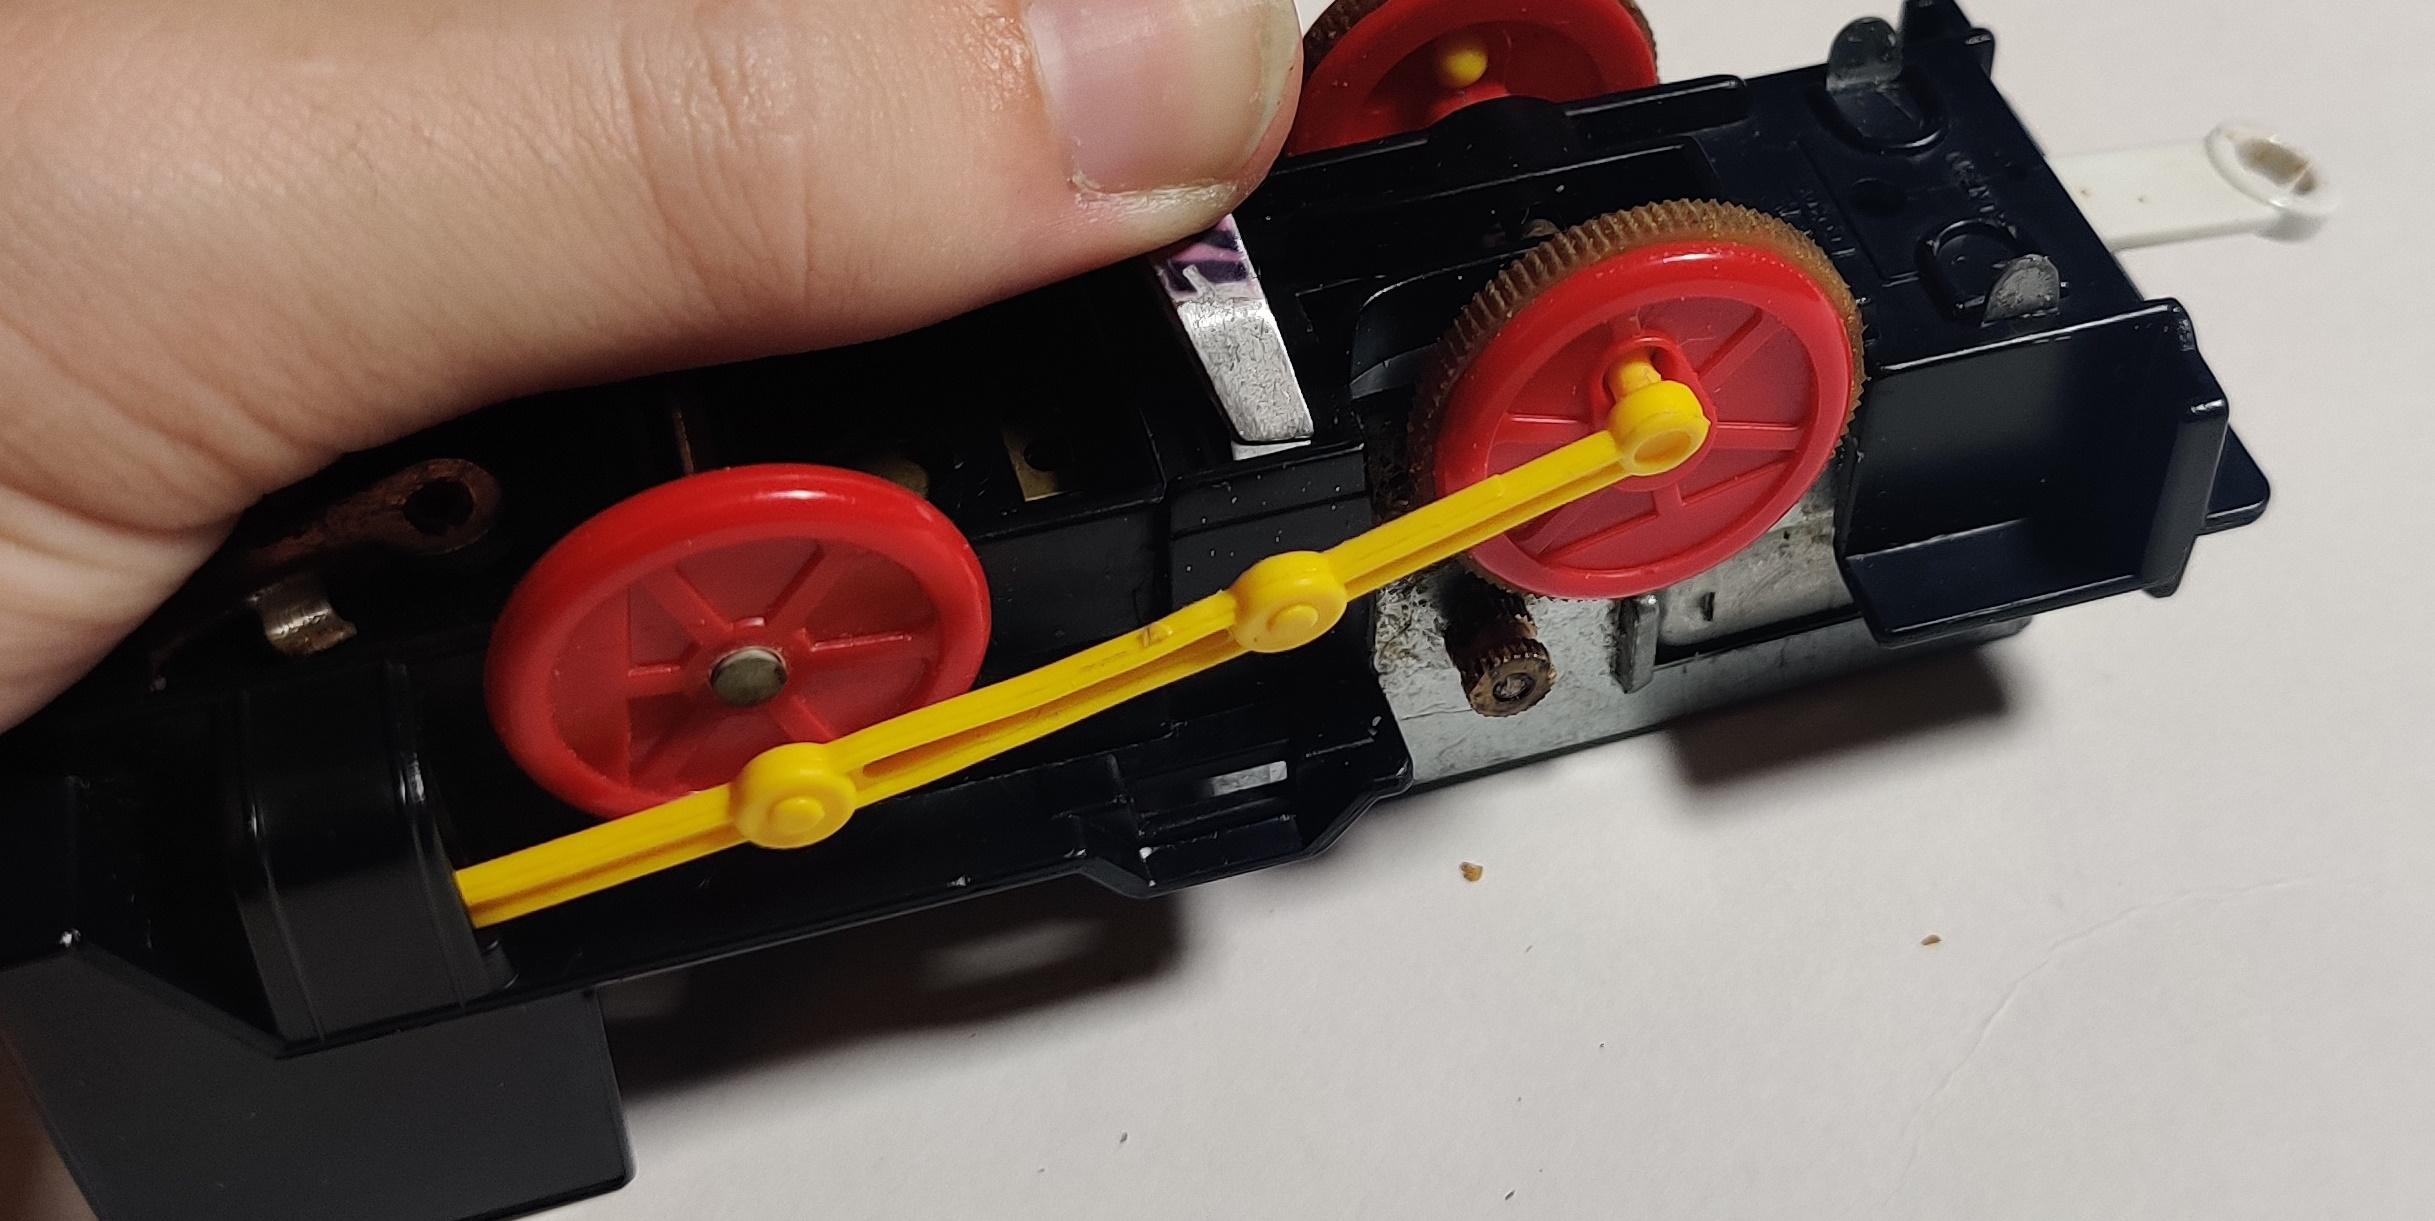
Rim-drive rubber component replacement
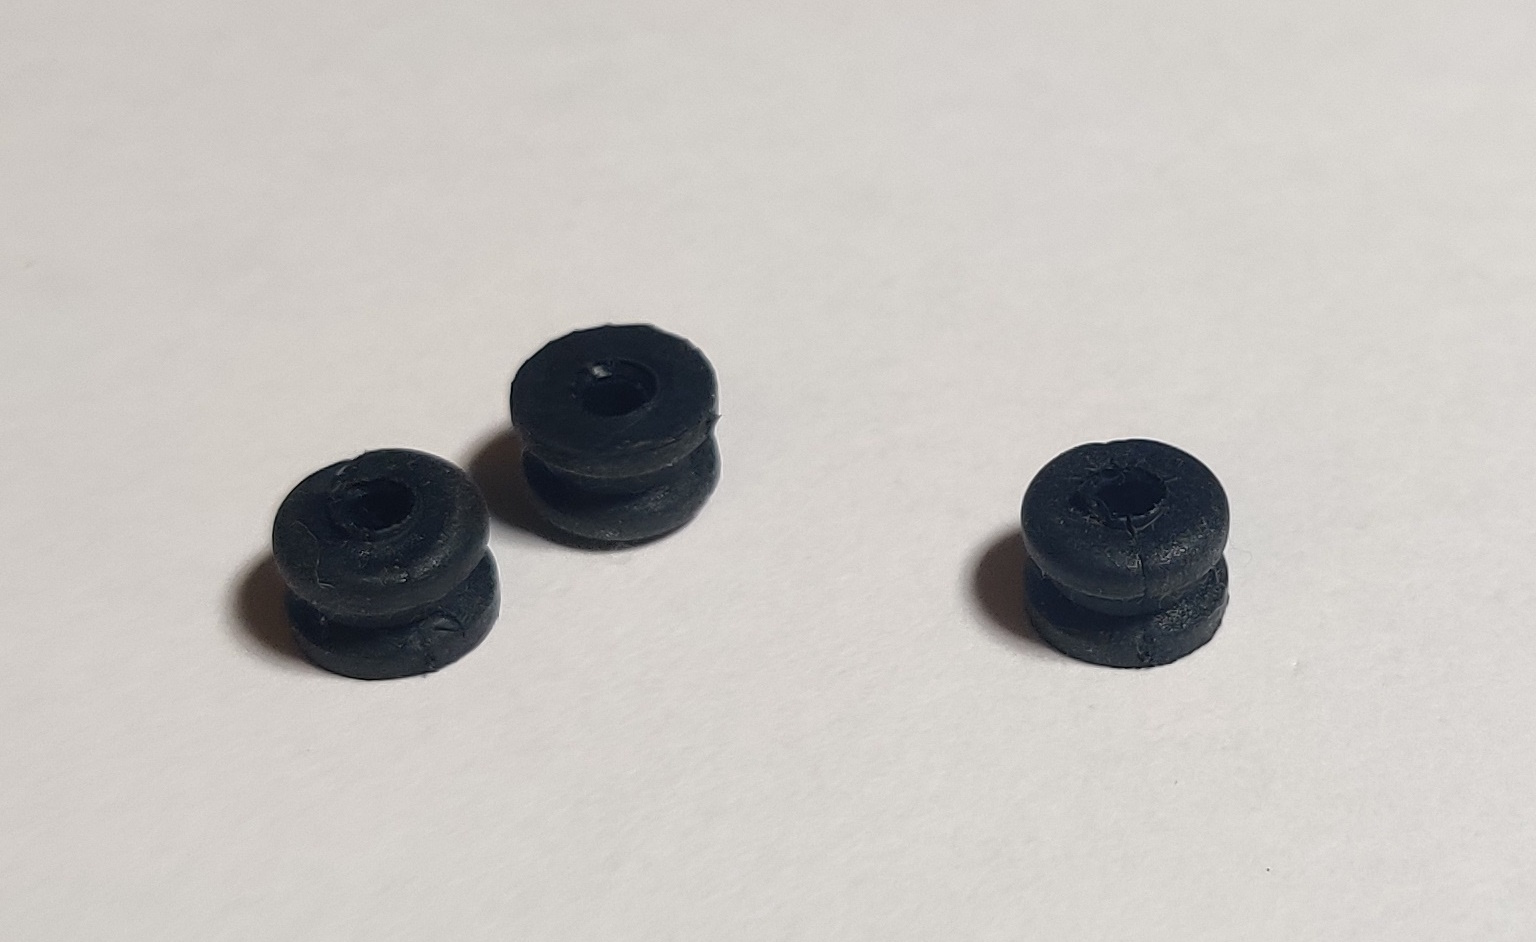
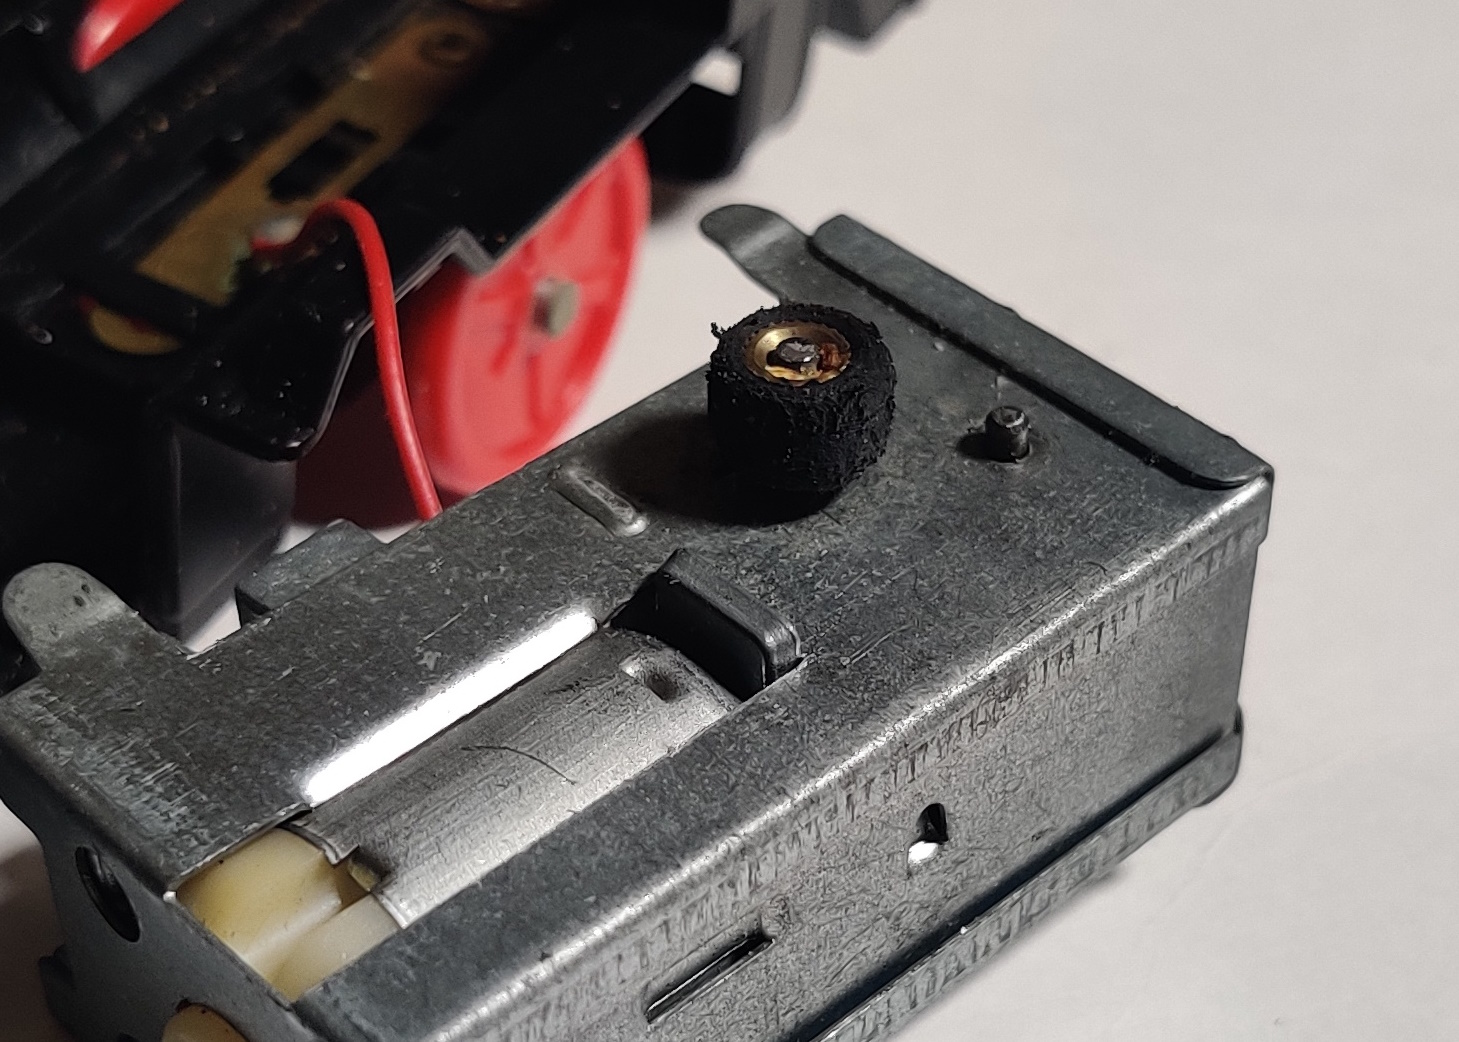
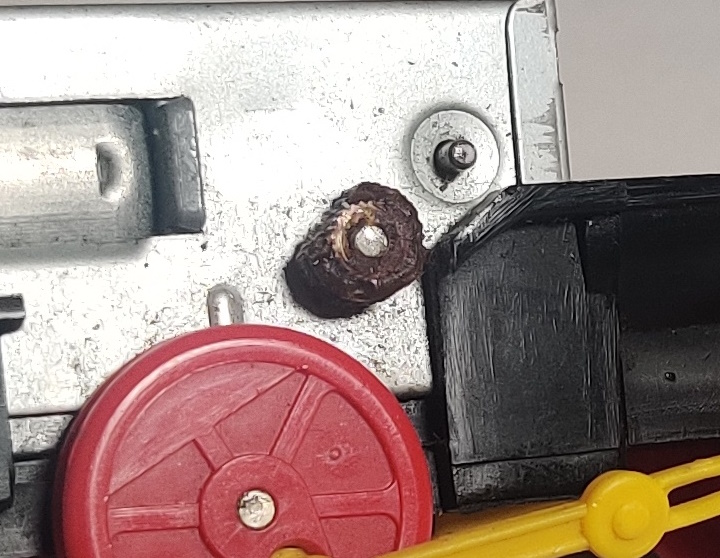
At this point, pretty much everything from the start of the rubber rim-drive tires to the last steam locomotives to use the rim-drive gearboxes in the mid 90s has its rubber components deteriorating. Rubber rim-drive wheels harden and crumble and wheel traction tires also harden up and discolor. Most traction tires can be replaced with the modern replacement tires available, although in the early days of powered engines some chassis used different much thinner black traction tires (that are surprisingly still usually serviceable as-is, in my experience) and into the 1970s engine wheels used thinner tiers that are a slightly smaller diameter. Modern traction tires can usually still be used, although some care needs to be taken to ensure the tire is sitting correctly in the wheel and is not "bunched up." The smaller rubber tires that transmit power from the gearbox to the driving wheels, however, do not have a modern replacement part available from Tomy. These tires did used to be included in older traction tire packs, but even new old stock replacements are just as old and degraded as tires on engines. There was not a suggested way to remove the drive spools from gearboxes - the intended way to replace the tires was to peel the old ones off the original spool and then carefully pull the new tire off the spool it was supplied on and transfer it to the original.

The method described in the immediately following section has since been superseded by the rubber tubing method shown lower on the page.
The method I have used in the past involves shaving down small rubber pulleys included in Erector sets until it is a nice soft rubber tire around the right size to replace the original tire on the brass fitting. I fit a pulley over a drill bit chucked backwards into a cordless drill and then run it against a nail file to smooth down the ridge of the pulley. The rubber used is nice and soft and provides great traction.
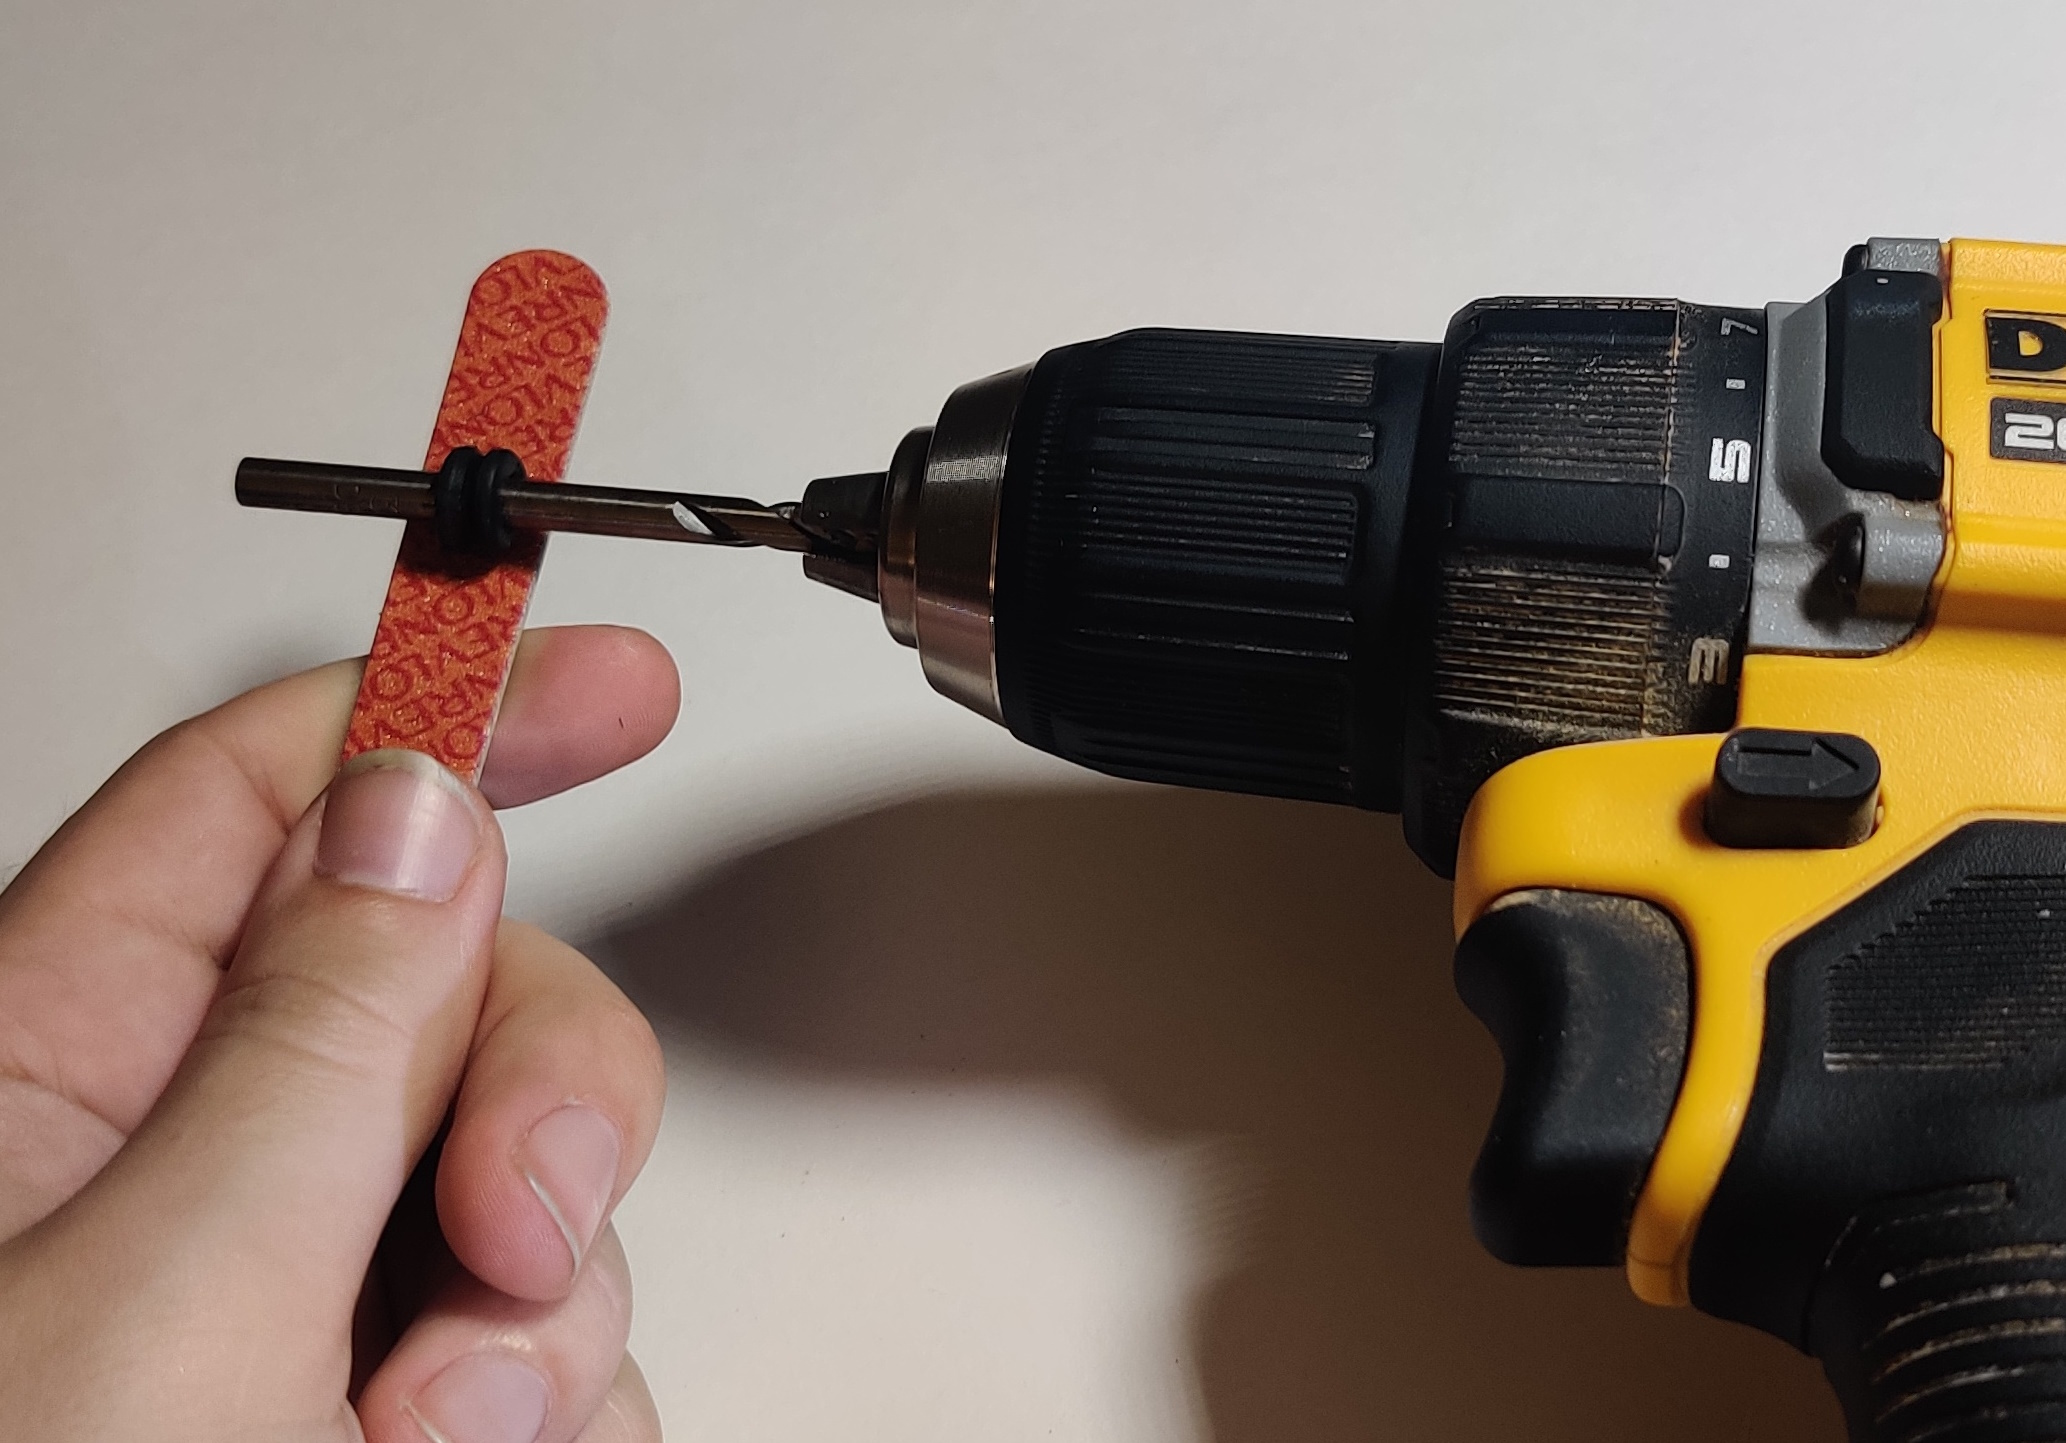
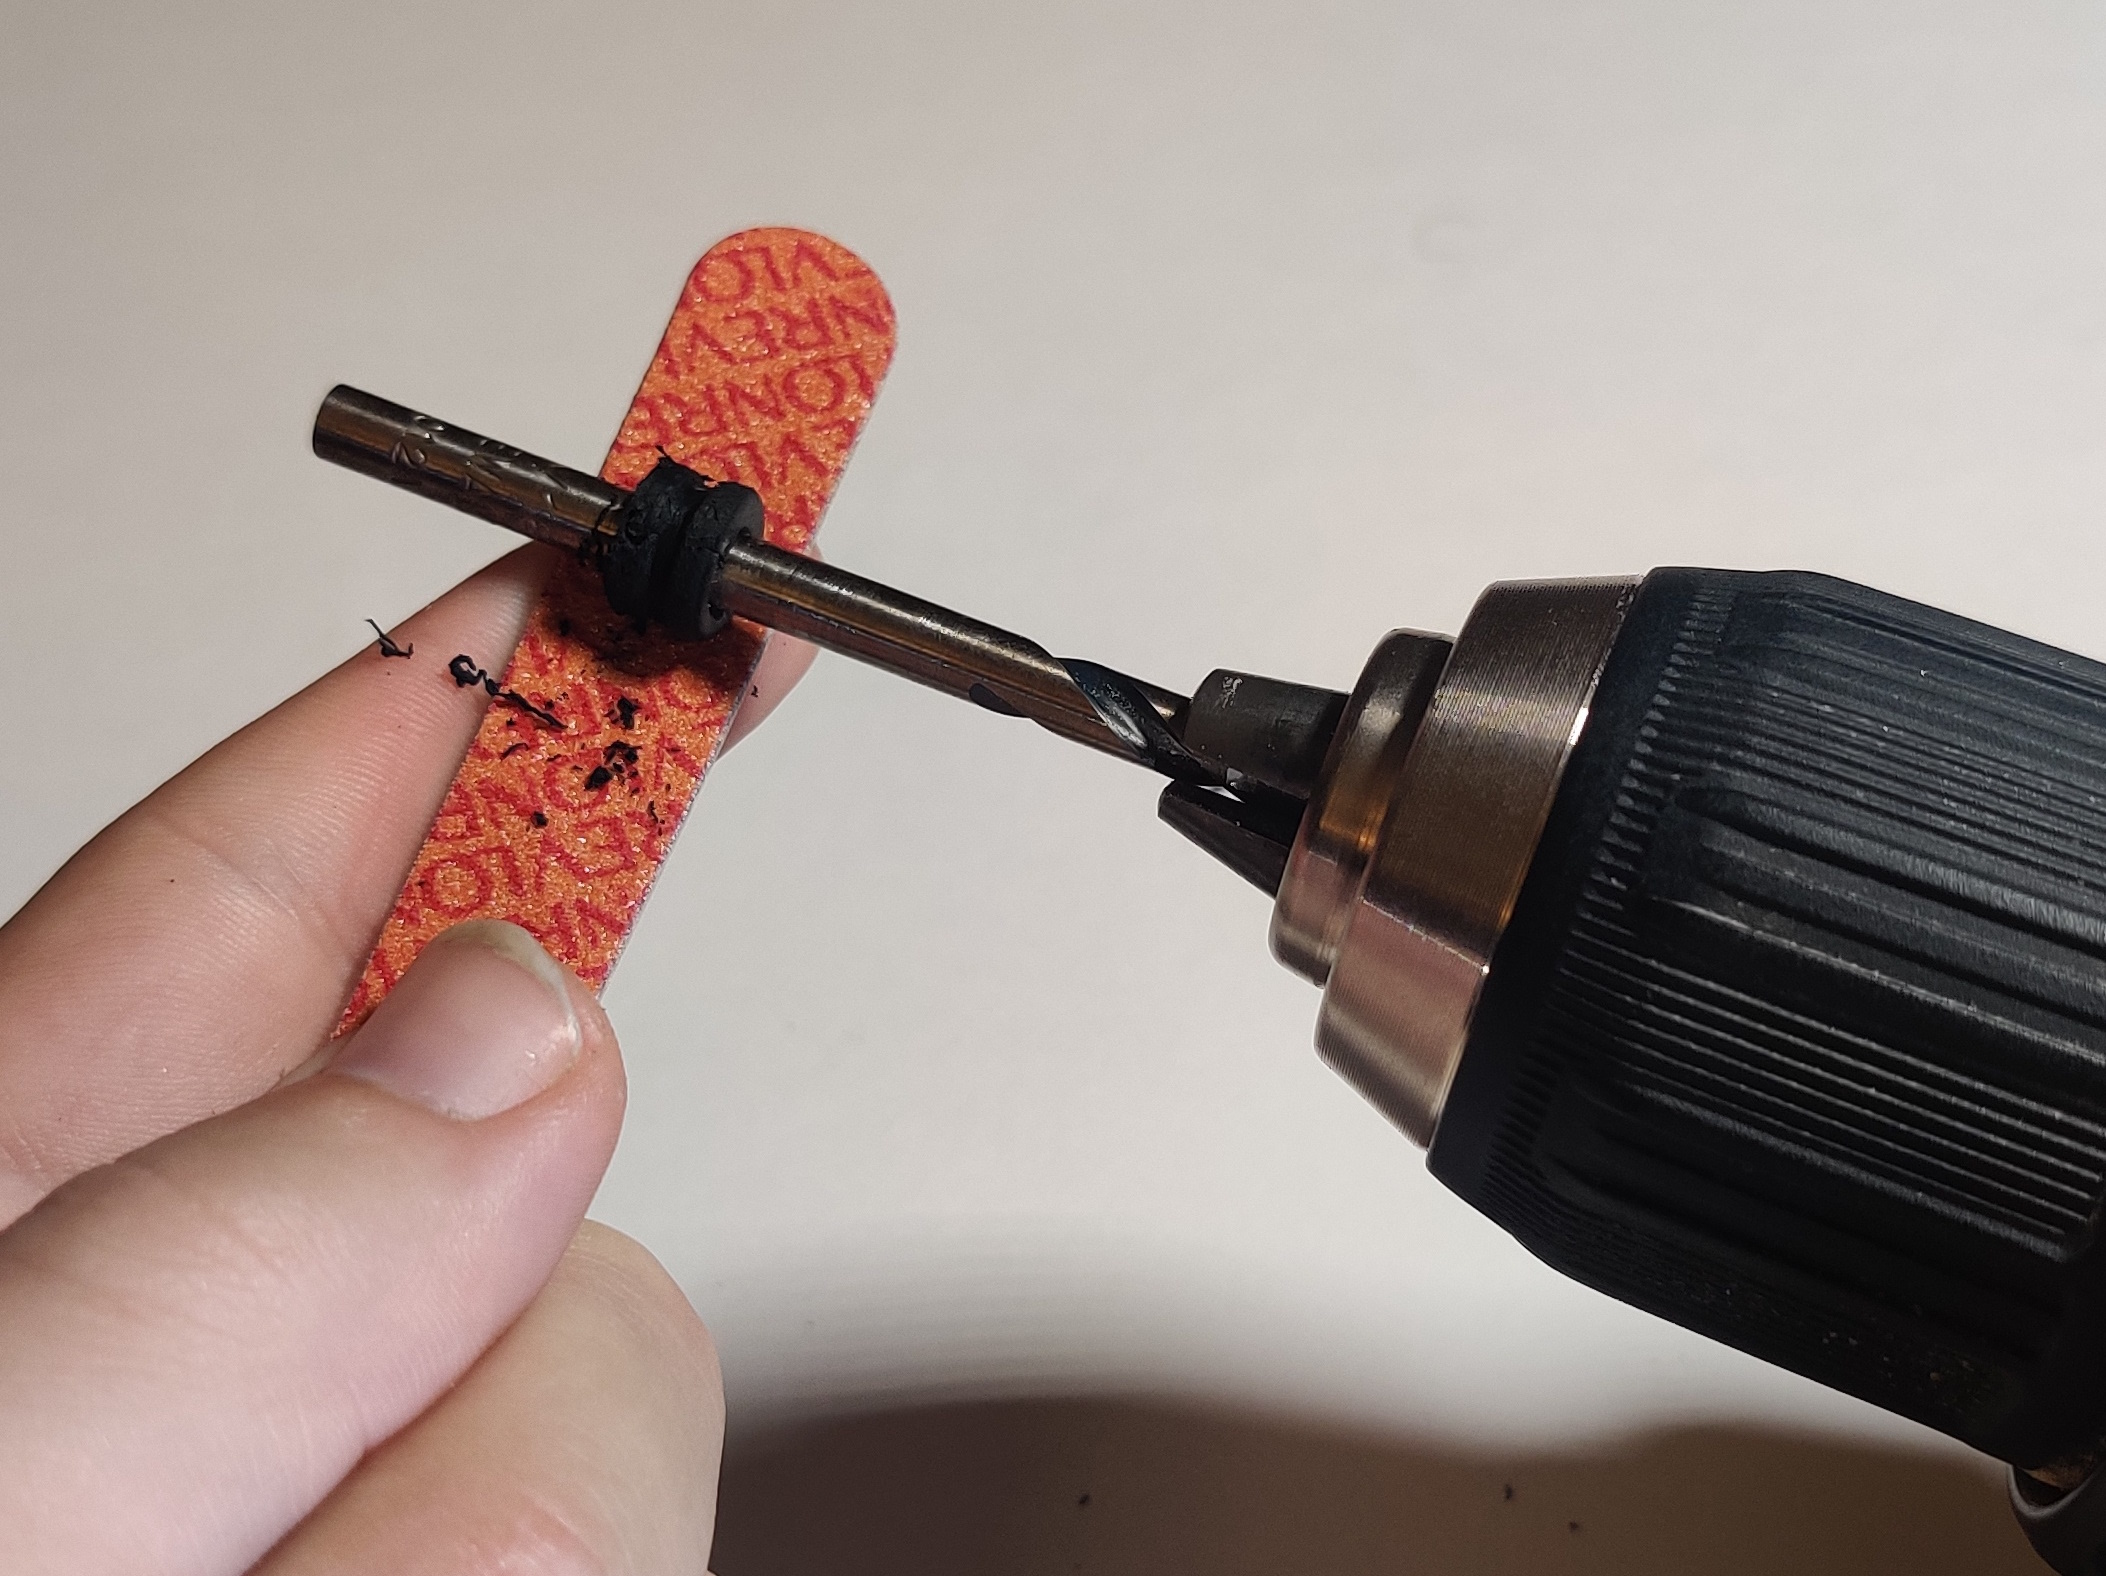

After cutting or shaving down the pulley walls of the pulley, coming in from the sides with the file can help clean up the edges. The pulley will become very soft and somewhat sticky and can develop larger strings of rubber that can be pulled off. The original tires are 7mm in diameter, although I usually aim for slightly larger.
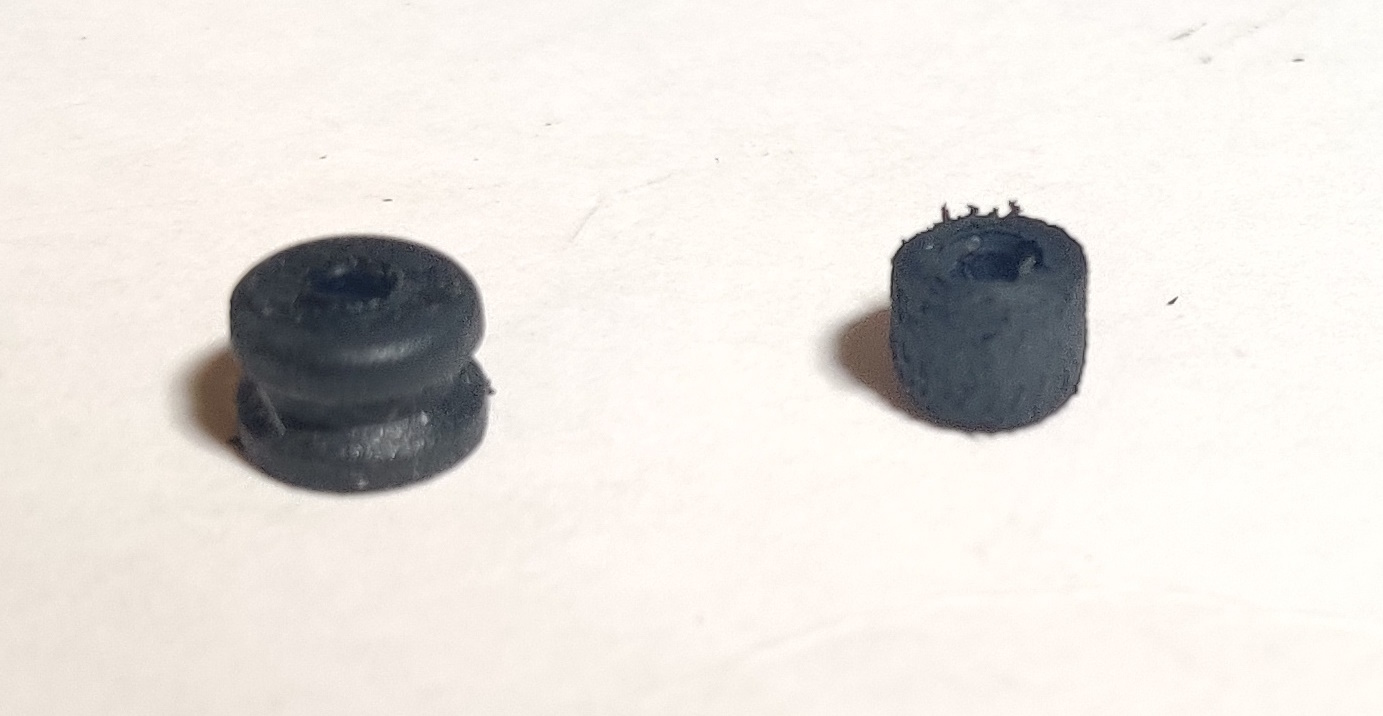
Remove any of the remaining original tire with some side cutters until you get down to the metal bushing inside. The bushing has a ridge running along its circumference that the tire was originally molded down into. Install the new tire over the brass hub. Repeat for the other rim-drive tire. You do not need to remove the gearbox to replace any of the rubber components on many models.
Make sure the gearbox is running and reinstall it if necessary. If you run the engine and it hops or jumps when running, the rubber rim-drive tire likely needs to be evened out. Brace the file against the running rim-drive tire and find the area that causes the file to shake or bounce against it, signifying an irregular thickness of the tire in a particular area. Let the gearbox run so the higher points of the tire rub against the file without shaving down the already thinner section until the engine runs more smoothly.
New method of "coating" bad rim-drive tires
August 22, 2023I wanted to investigate less destructive methods of replacing rim-drive tires (in terms of consuming Erector/Meccano set components, not destroying Plarail gearboxes). One thought (and method I have seen on some second-hand engines) was to use a plastic tubing that fit over the metal hub of the traction tire, as now shown below. I generally prefer this method, but I also wanted to be able to avoid having to destroy rim-drive tires that had dry rotted but were relatively intact otherwise. I figured a layer of heat shrink tubing may give the tires a little more grip against fresh driving wheel tires.
I first tried this method on a made in Thailand C12 with a broken power switch. This gearbox had one tire that was relatively intact (though it had no grip) while the other had a chunk missing from one side of the tire.
The intact tire was easiest to cover with a single tube of heat shrink. The original diameter of the tires is 7mm, but I wasn't all that concerned with ending up slightly larger. I bought a cheap variety set of heat-shrink tubing and found that "7mm" tubing fit over the intact 7mm tires loose enough to be easy to get on while still shrinking down tightly enough to hold. Be sure to leave a gap between the tubing and gearbox body so the tubing is not constantly rubbing against it (if there is hair or carpet fluff caught up between the rim drive tire and the gearbox body (there usually is, in my experience) picking it out with a flat screwdriver, needle, or tweezers before fitting the tubing is a good idea). Heat up the tubing evenly and it should end up nice and smooth. In theory, the tubing would probably work better if it was scored with ridges like the original tires, but I wasn't sure if there was a good way to add the ridges.
I cut the remnants of the other tire off the other rim and ended up stacking up two layers of 5mm diameter tubing, a layer of 6mm tubing, and then the same 7mm tubing as the other side. If you do need to replace the entire tire (as opposed to "resurfacing" an intact one), leaving the portion of the tire embedded in the brass hub is probably a good idea so the heat shrink does not shrink down into the gap (I dug it out on this one and ended up with more uneven tubing, although it still ran perfectly fine).
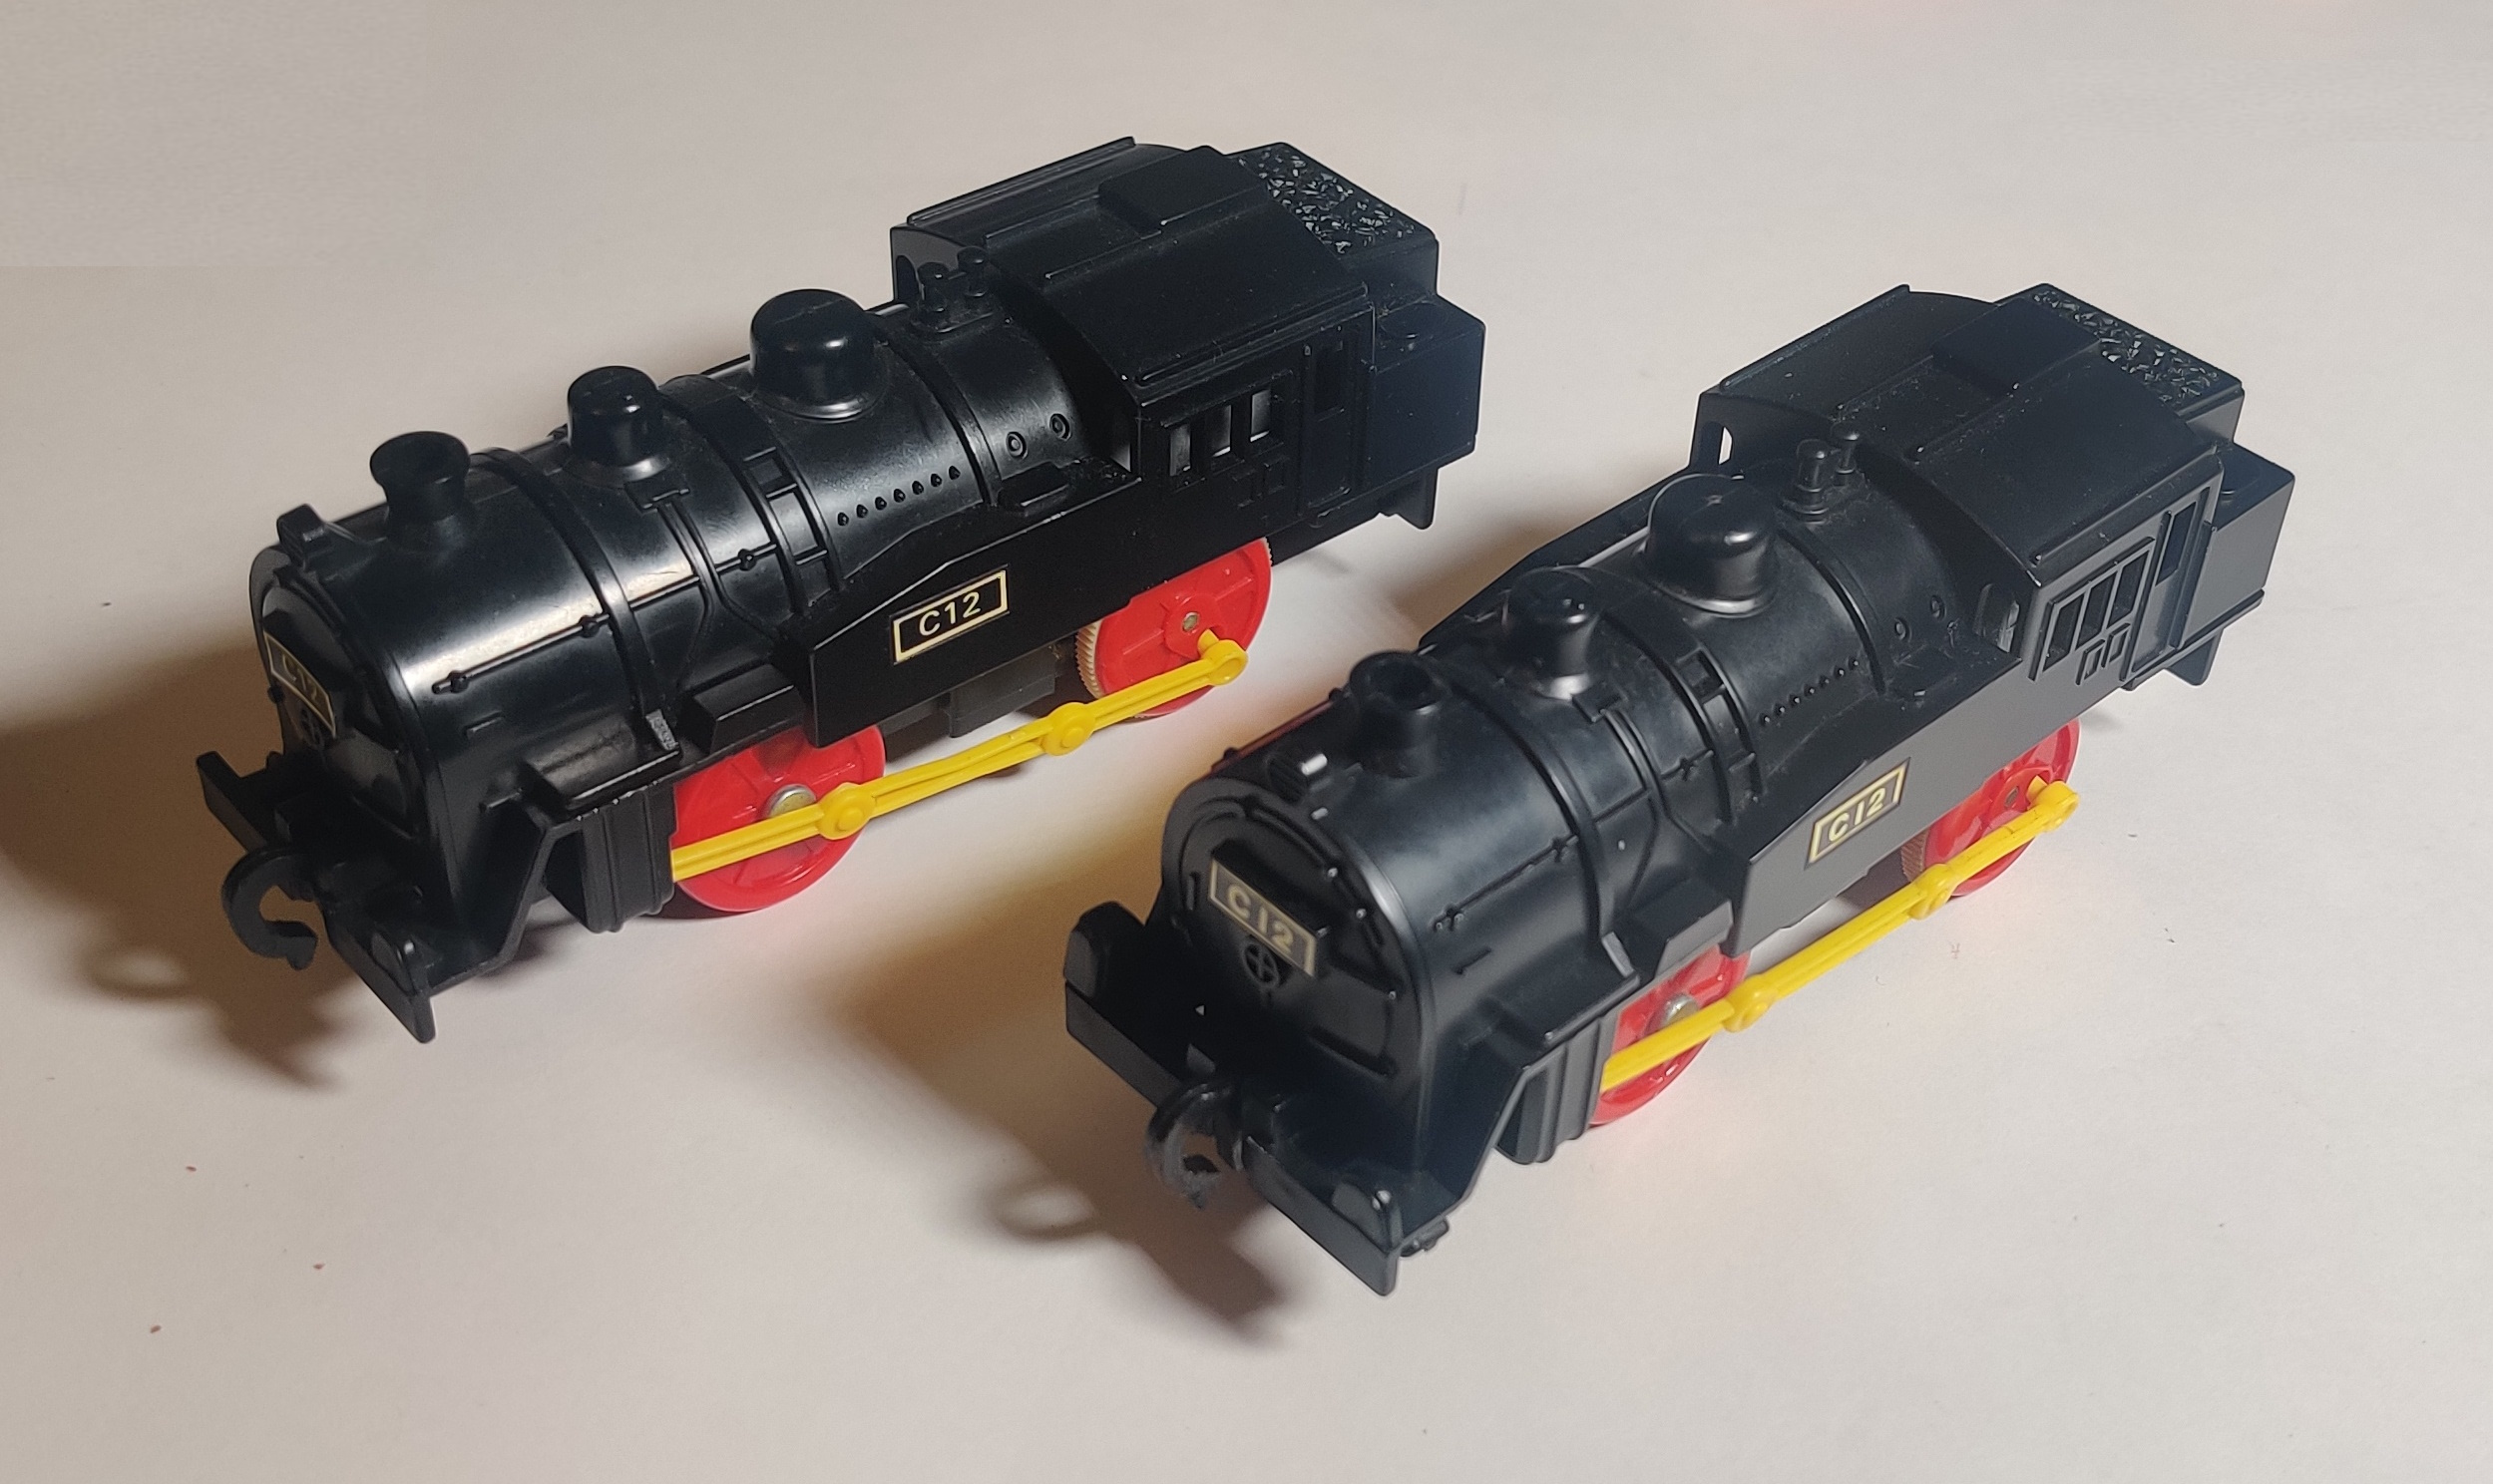
The engine ran well, especially after slightly filing down the rim drive tires. I took the same approach to an older Japan-made C12 with nice, intact rim-drive tires and added a single layer of heat shrink. One of the reasons I decided to use heat shrink is that in theory I could cut it off the original inner drive wheel if, for whatever reason, I needed to study or look at original drive tires. I had some issues with the tubing shifting side to side on the Japanese gearbox. I think leaving the tubing slightly long so it can curl slightly over the ends of the tire or hub helps to keep it in place.
Another reason I wanted to try heat shrink is that I suspected it would work better on the milky plastic rim-drive gearboxes in use from the later 70s to the early 90s which have more shrouded tires. This 1992 DD51 had one tire missing a large chunk while the other was mostly intact.
The remnants of the tire on the left side were removed and replaced with the same stacked layer system as the metal gearbox above. The other side had a smaller gash that I decided to try to fill with a cutoff piece of tubing to "patch" it before shrinking the layer of heat-shrink down around it. It worked out alright.
I also tried the procedure on a nice later 70s L Limited Express with the metal gearbox. The original tires were in okay physical condition and were not crumbling although they were worn down in the middle of their span from the wheel riding against them. The wheel traction tires on this engine were completely hard and spun on the wheels, as is common for some older locos. These engines all worked nicely on flat ground but, as tested later, can not always make it up sloped rails. As with the other method described above, if you run into issues with jumping, take a nail file and brace it against the engine near the rim-drive tire and bring it in closer until just the highest portion of the wheel that is acting as a cam and making the engine jump is making contact and wearing down. The relatively low power from the motor and gearbox should help prevent you from taking too much off. I also found that a razor blade can help take off overhanging excess.
I decided to try this method on the rim-drive 200-series Shinkansen in my 1981 Tohoku Joetsu Shinkansen Deluxe Set and after heat shrinking over the original tires I found that it still could not manage to get up the slope rails in the set. I first tried adding slits into the tubing to mimic the treads of the original tires, but found this to be fairly tedious, prone to splitting the heat-shrink tubing, and largely ineffective at increasing traction. I had tried the other engines on flat rails but not on slopes. Both of the C12s I tried worked fine on the slopes pulling a few cars, as did the DD51 with the same style of plastic rim-drive gearbox as the 200 series. I then replaced one of the tires with the rubber pulley method described above and it was able to make it up the rails. I think the much more soft rubber of the pulleys lends itself much better to gripping the wheel's traction tire, and will probably look into other small rubber components I could use instead.
I weighed in the engines to see if this may play a role, as I did find that with some extra pressure the 200 series could make it up the rails. I suspect it may be the motor or gearbox internals themselves that have degraded and made the gearbox harder-running. The headlight in parallel with the motor will also be drawing some current that could be running the motor. I will eventually try pulling the rim-drive hubs off the axles with a pinion puller and get inside the gearbox proper. I weighed in a few of the rim-drive engines I had fixed just to see if weight may have had a significant impact. The Japan and Thailand-made C12s weighed in at 172 and 169 grams respectively, the DD51 with plastic gearbox weighed in at 174 grams, and the 200 series was actually the heaviest at 178 grams. Although putting more weight above the rear driving wheels would probably increase traction, I think making sure the rim-drive tires engage well with the traction tires on the wheels is a better method for increasing traction.
New method of replacing bad rim-drive tires
December 2023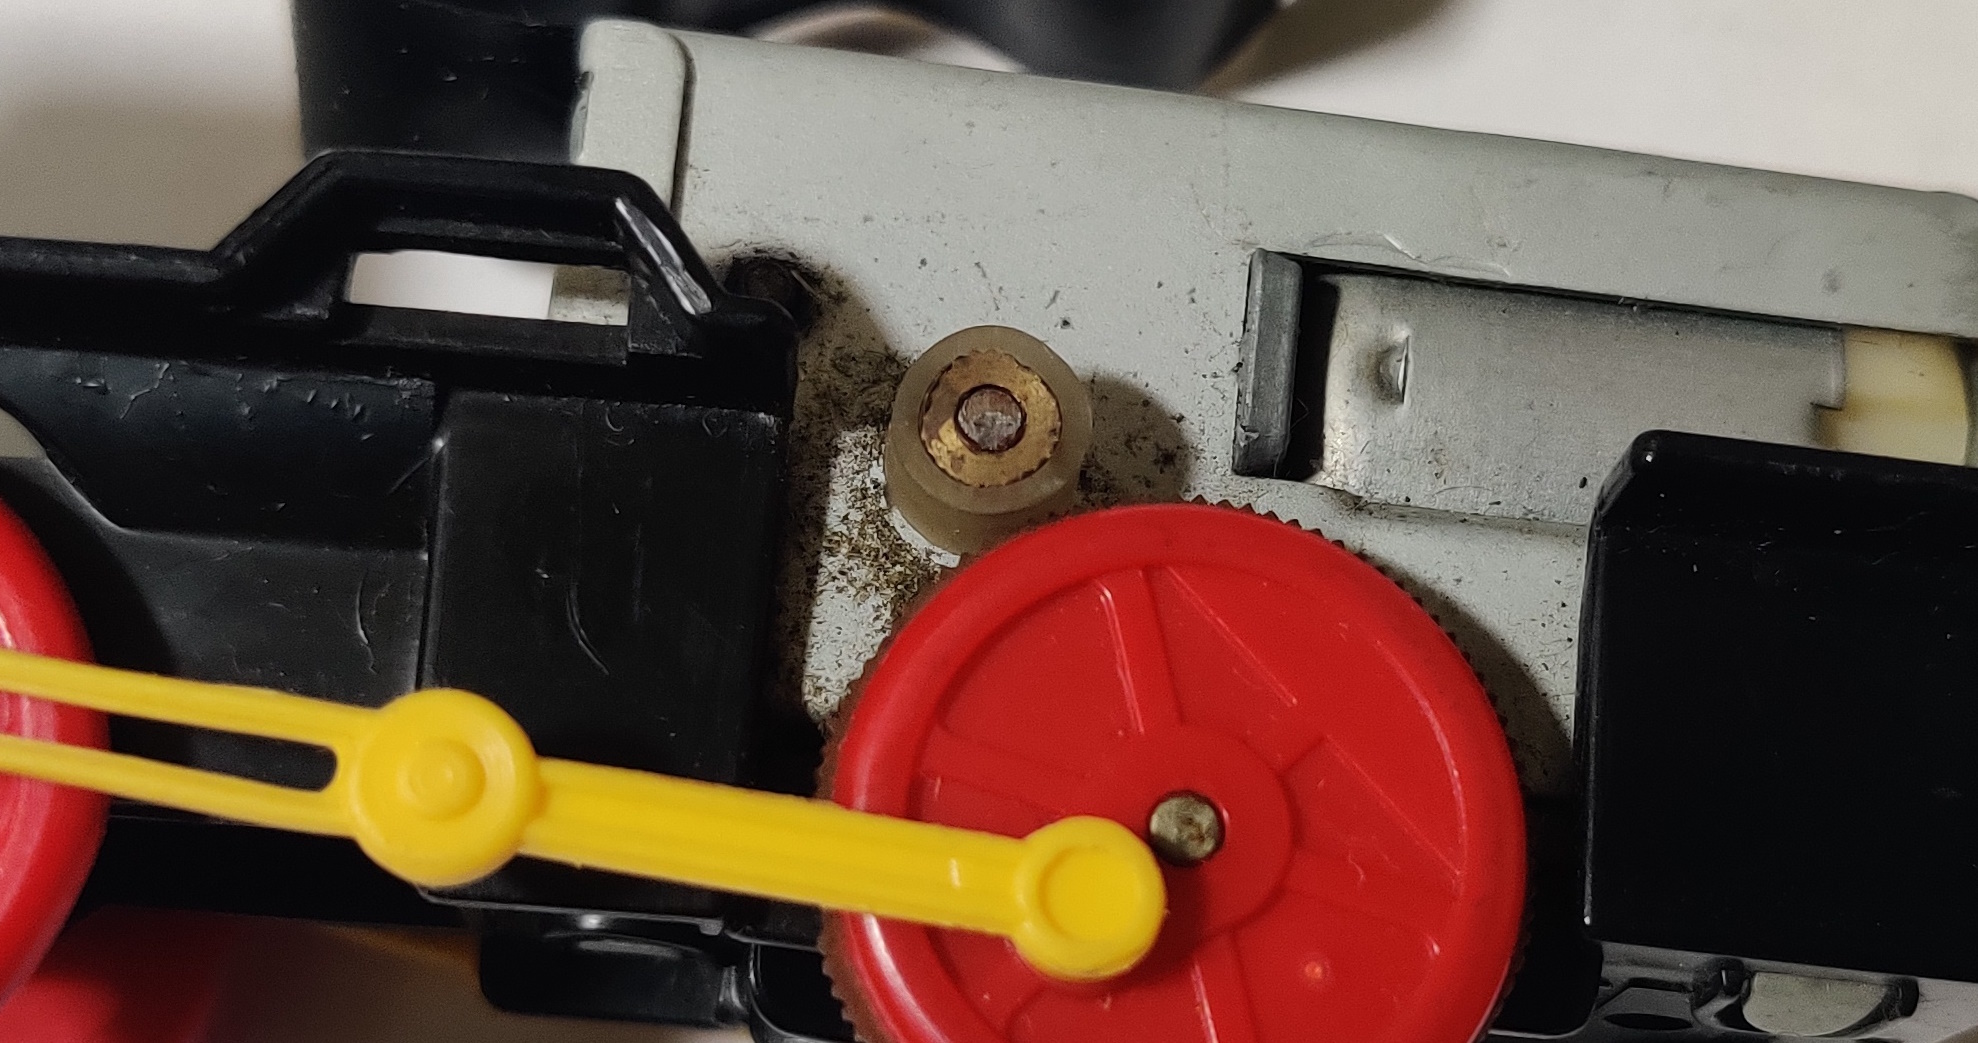
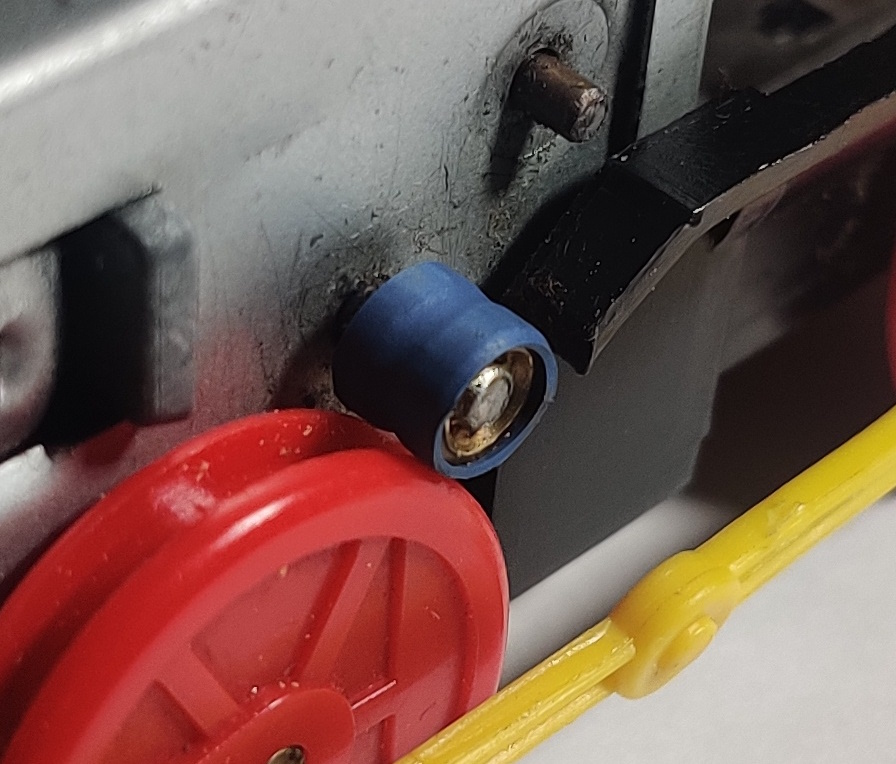
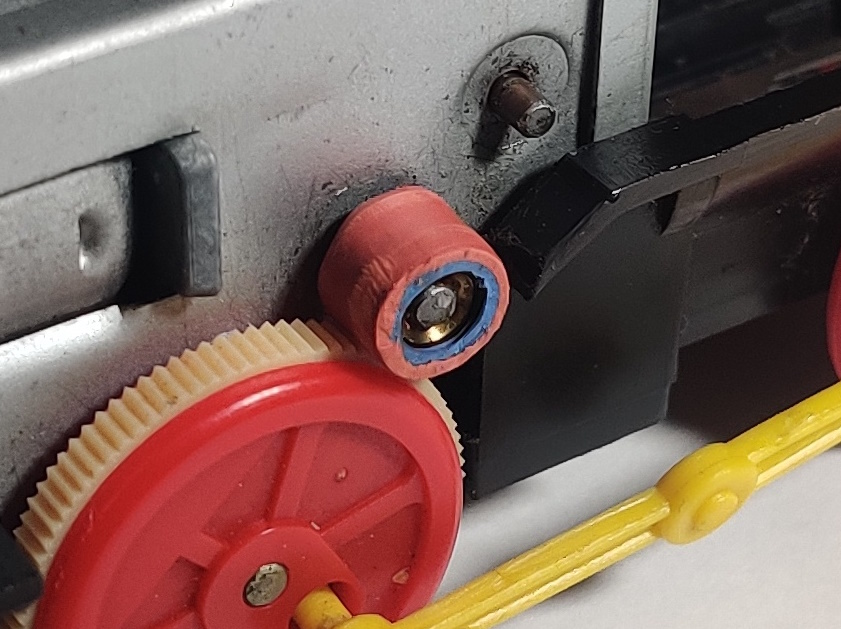
I have had some old Plarails come in with rim-drive gearboxes that have been repaired at some point in the past with rubber tubing. Usually this is a clear and smooth rubber which in some cases is perfectly functional like on the pictured D51 and in other cases does not seem to properly fit or is too smooth and slippery and the power transmission is not sufficient. I do, however, see the ease of acquisition and replacement that off the shelf rubber tubing provides, and I wanted to see if I could find some readily available tubing that would have a decent amount of traction.
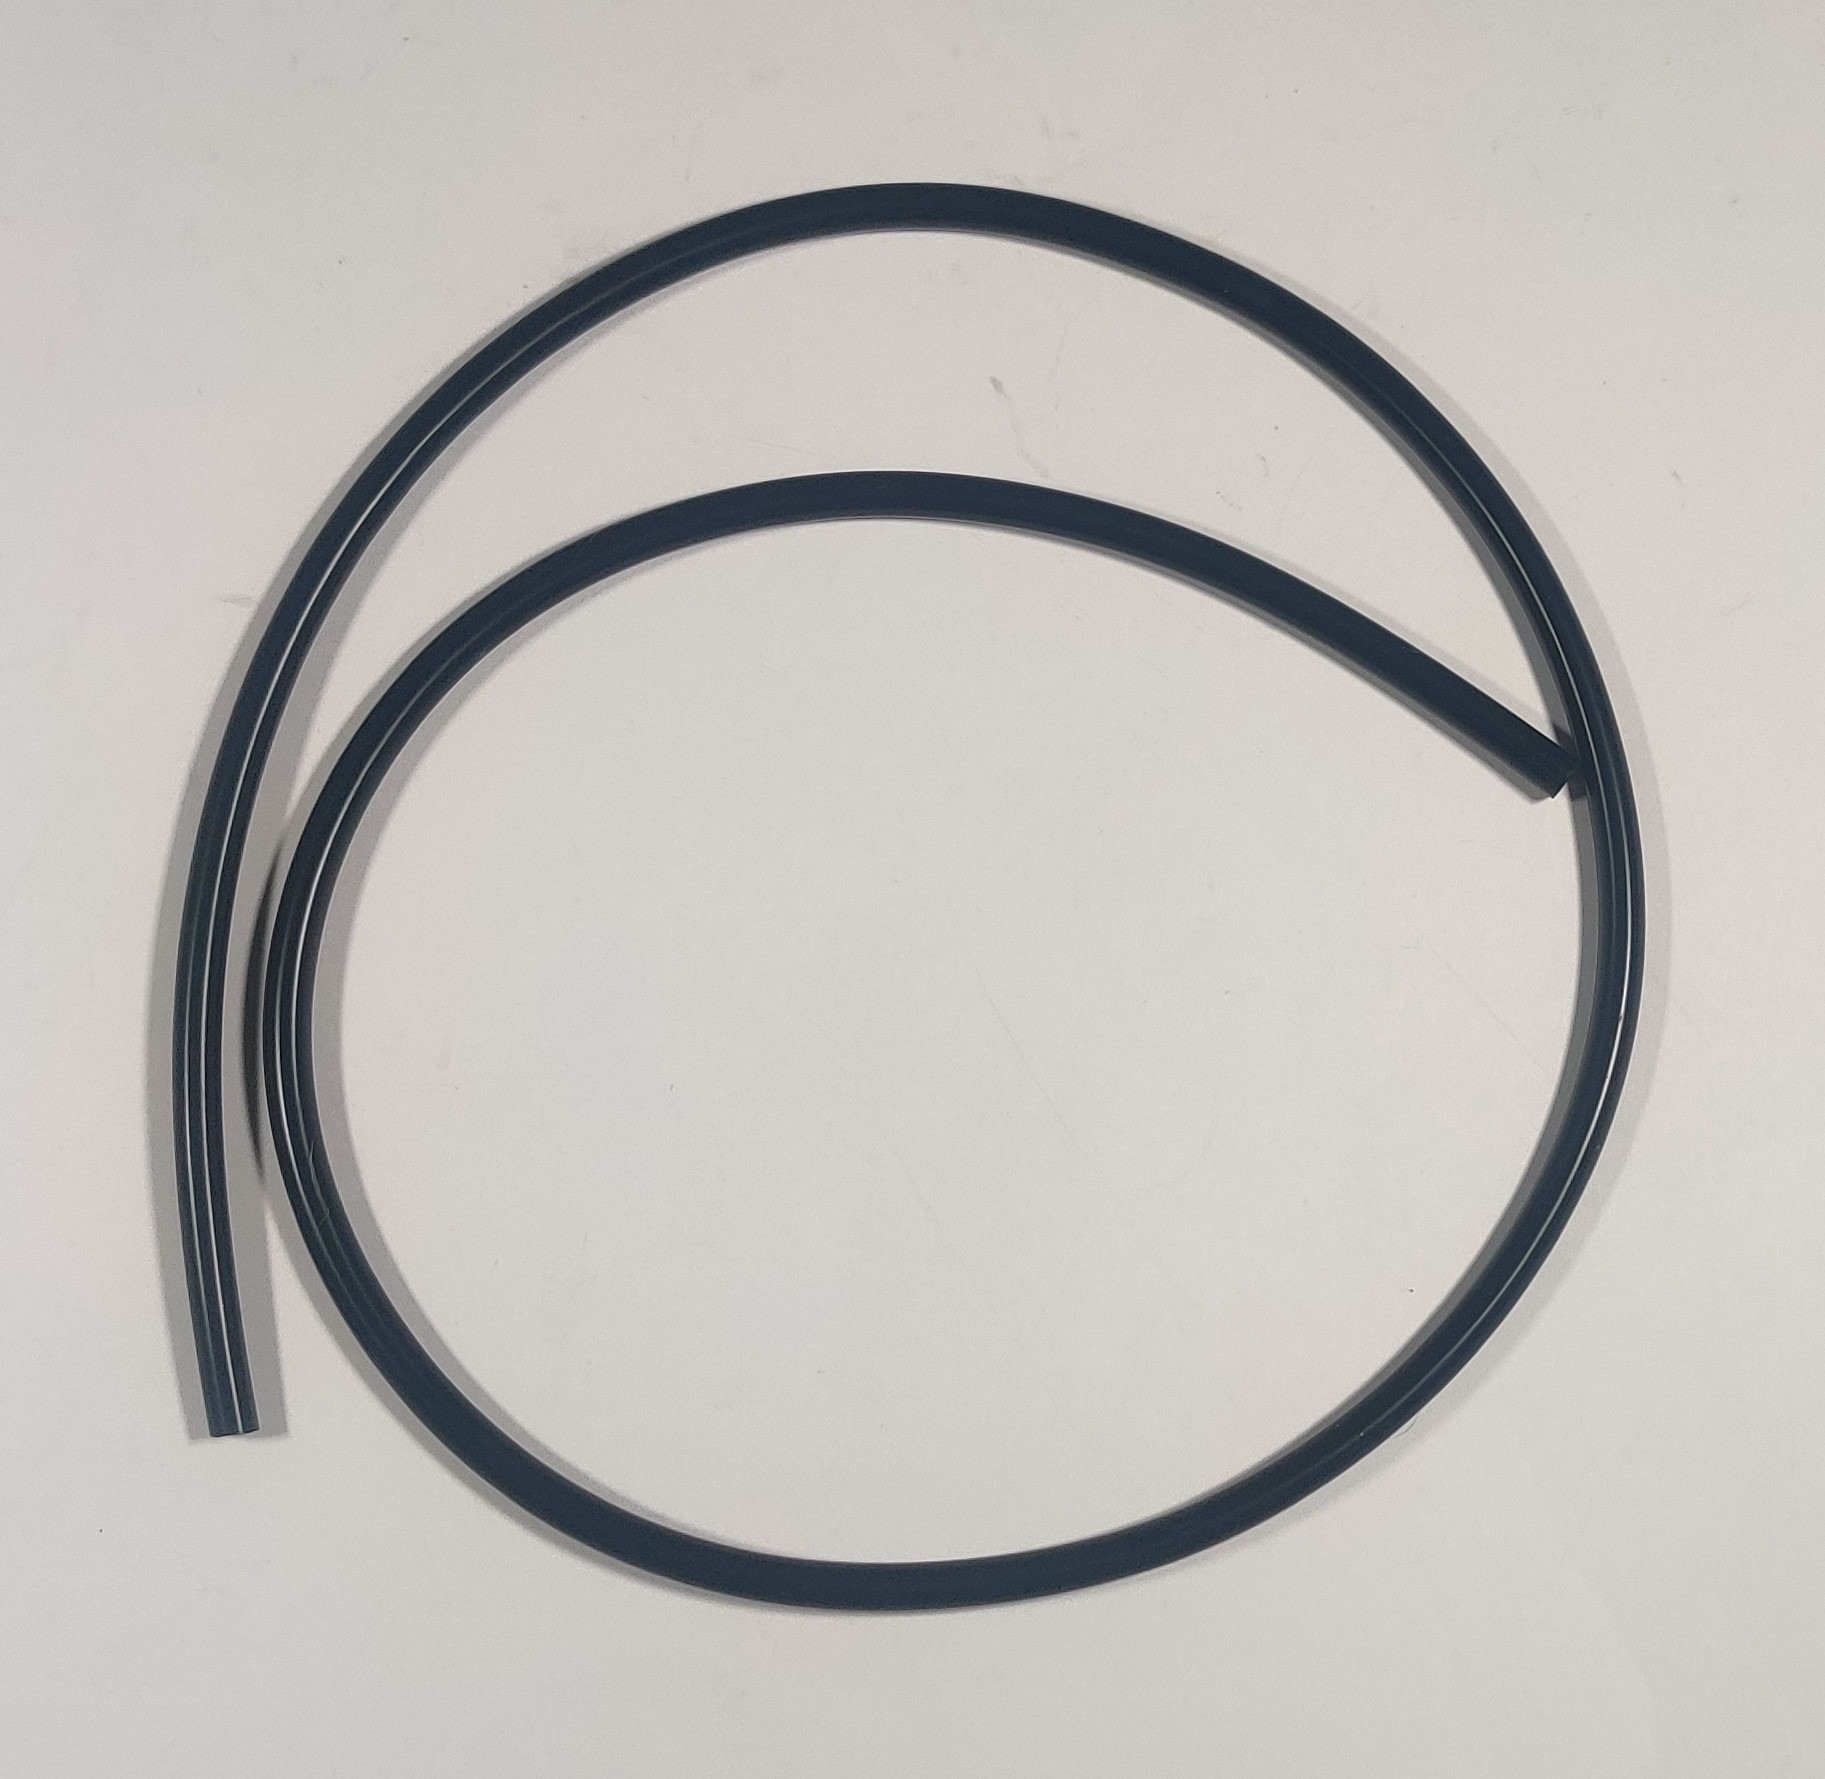
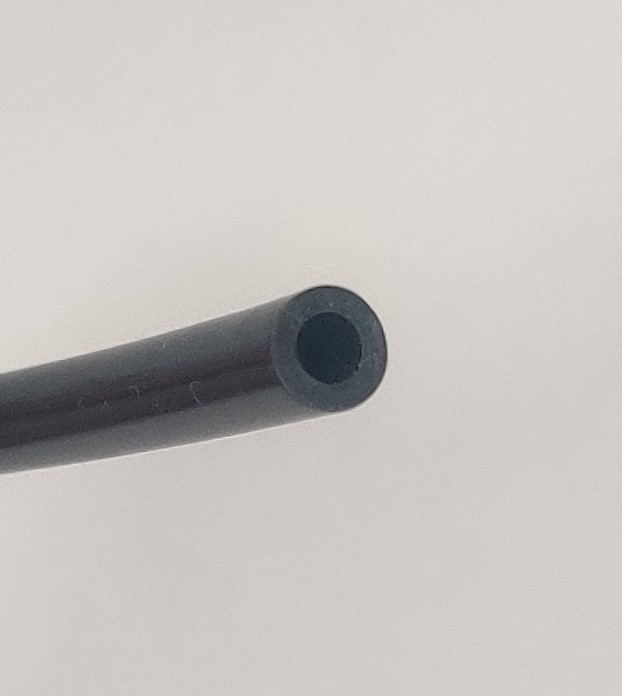
I decided to see what I could readily order in the correct size and ended up with a meter of 4mm inner diameter and 7mm outer diameter silicone rubber air hose, which fits the brass pulleys of the old power gearbox and is approximately the same diameter as the original tires.
I sanded the smooth surface of the tubing down to be slightly rougher but I am not sure what, if any, appreciable effect it had on grip. At some point if I acquire a small spring scale I will try out a pulling test with some engines using some of these different methods (to be honest, I suspect the soft rubber of the Erector set pulley may be the best-performing replacement, but this is an unsustainable long-term method, and I think this tubing will probably perform almost as well and probably even more closely to the originals when they were new 40 years ago). It may also be more feasible to cut or form a treaded surface into this tubing than the thin heat shrink tubing method to mimic the original tires and help the gearbox output tires and wheel traction tires mesh like gears.
The main caveat to this method is that it requires removing the original rim-drive tires. If they are already wrecked, this is not really an issue, and this will probably be my method for gearboxes that come to me with ruined friction drive tires. For "nice" sets of rim-drive tires I will probably continue to wrap them in a single layer of heat shrink tubing that could be cut away with minimal harm to the original tire if I wanted to remove it for whatever reason. I may go back and replace gearboxes with several layers of heat-shrink around the brass hubs with this tubing the next time I have them out.