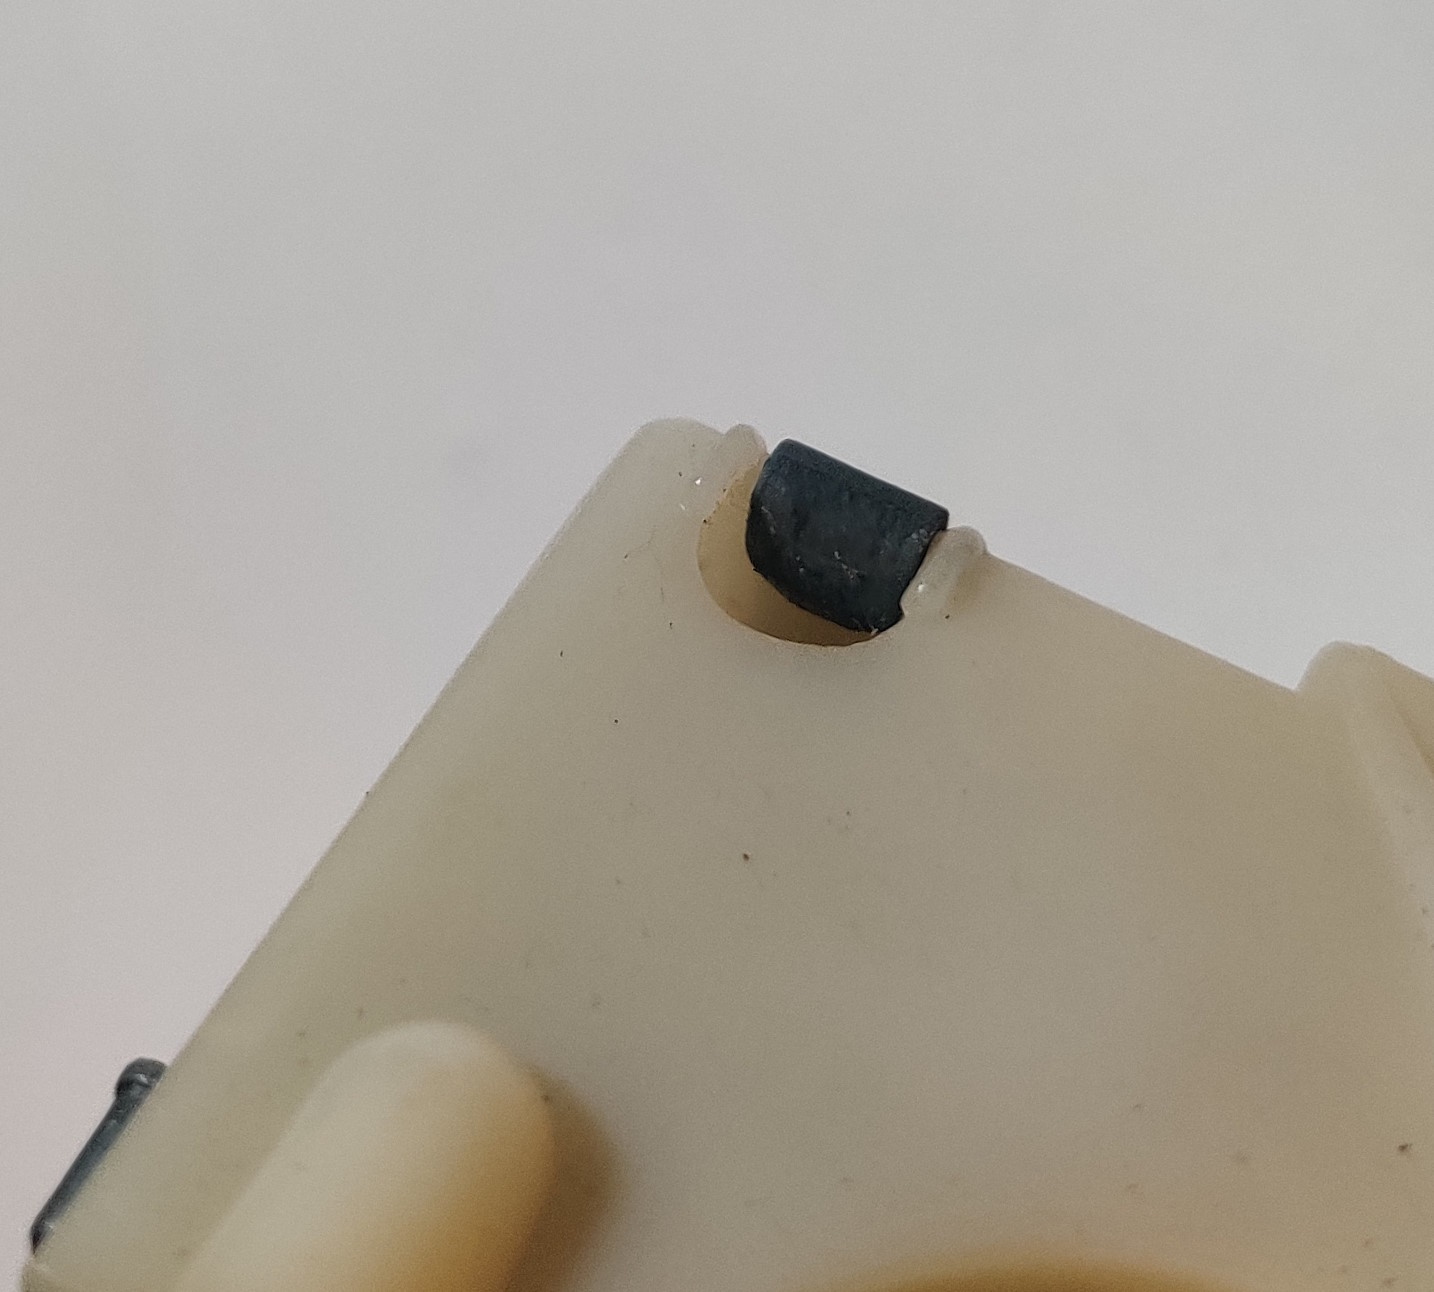
fall inside a hole
Round-Trip Gearbox Repairs
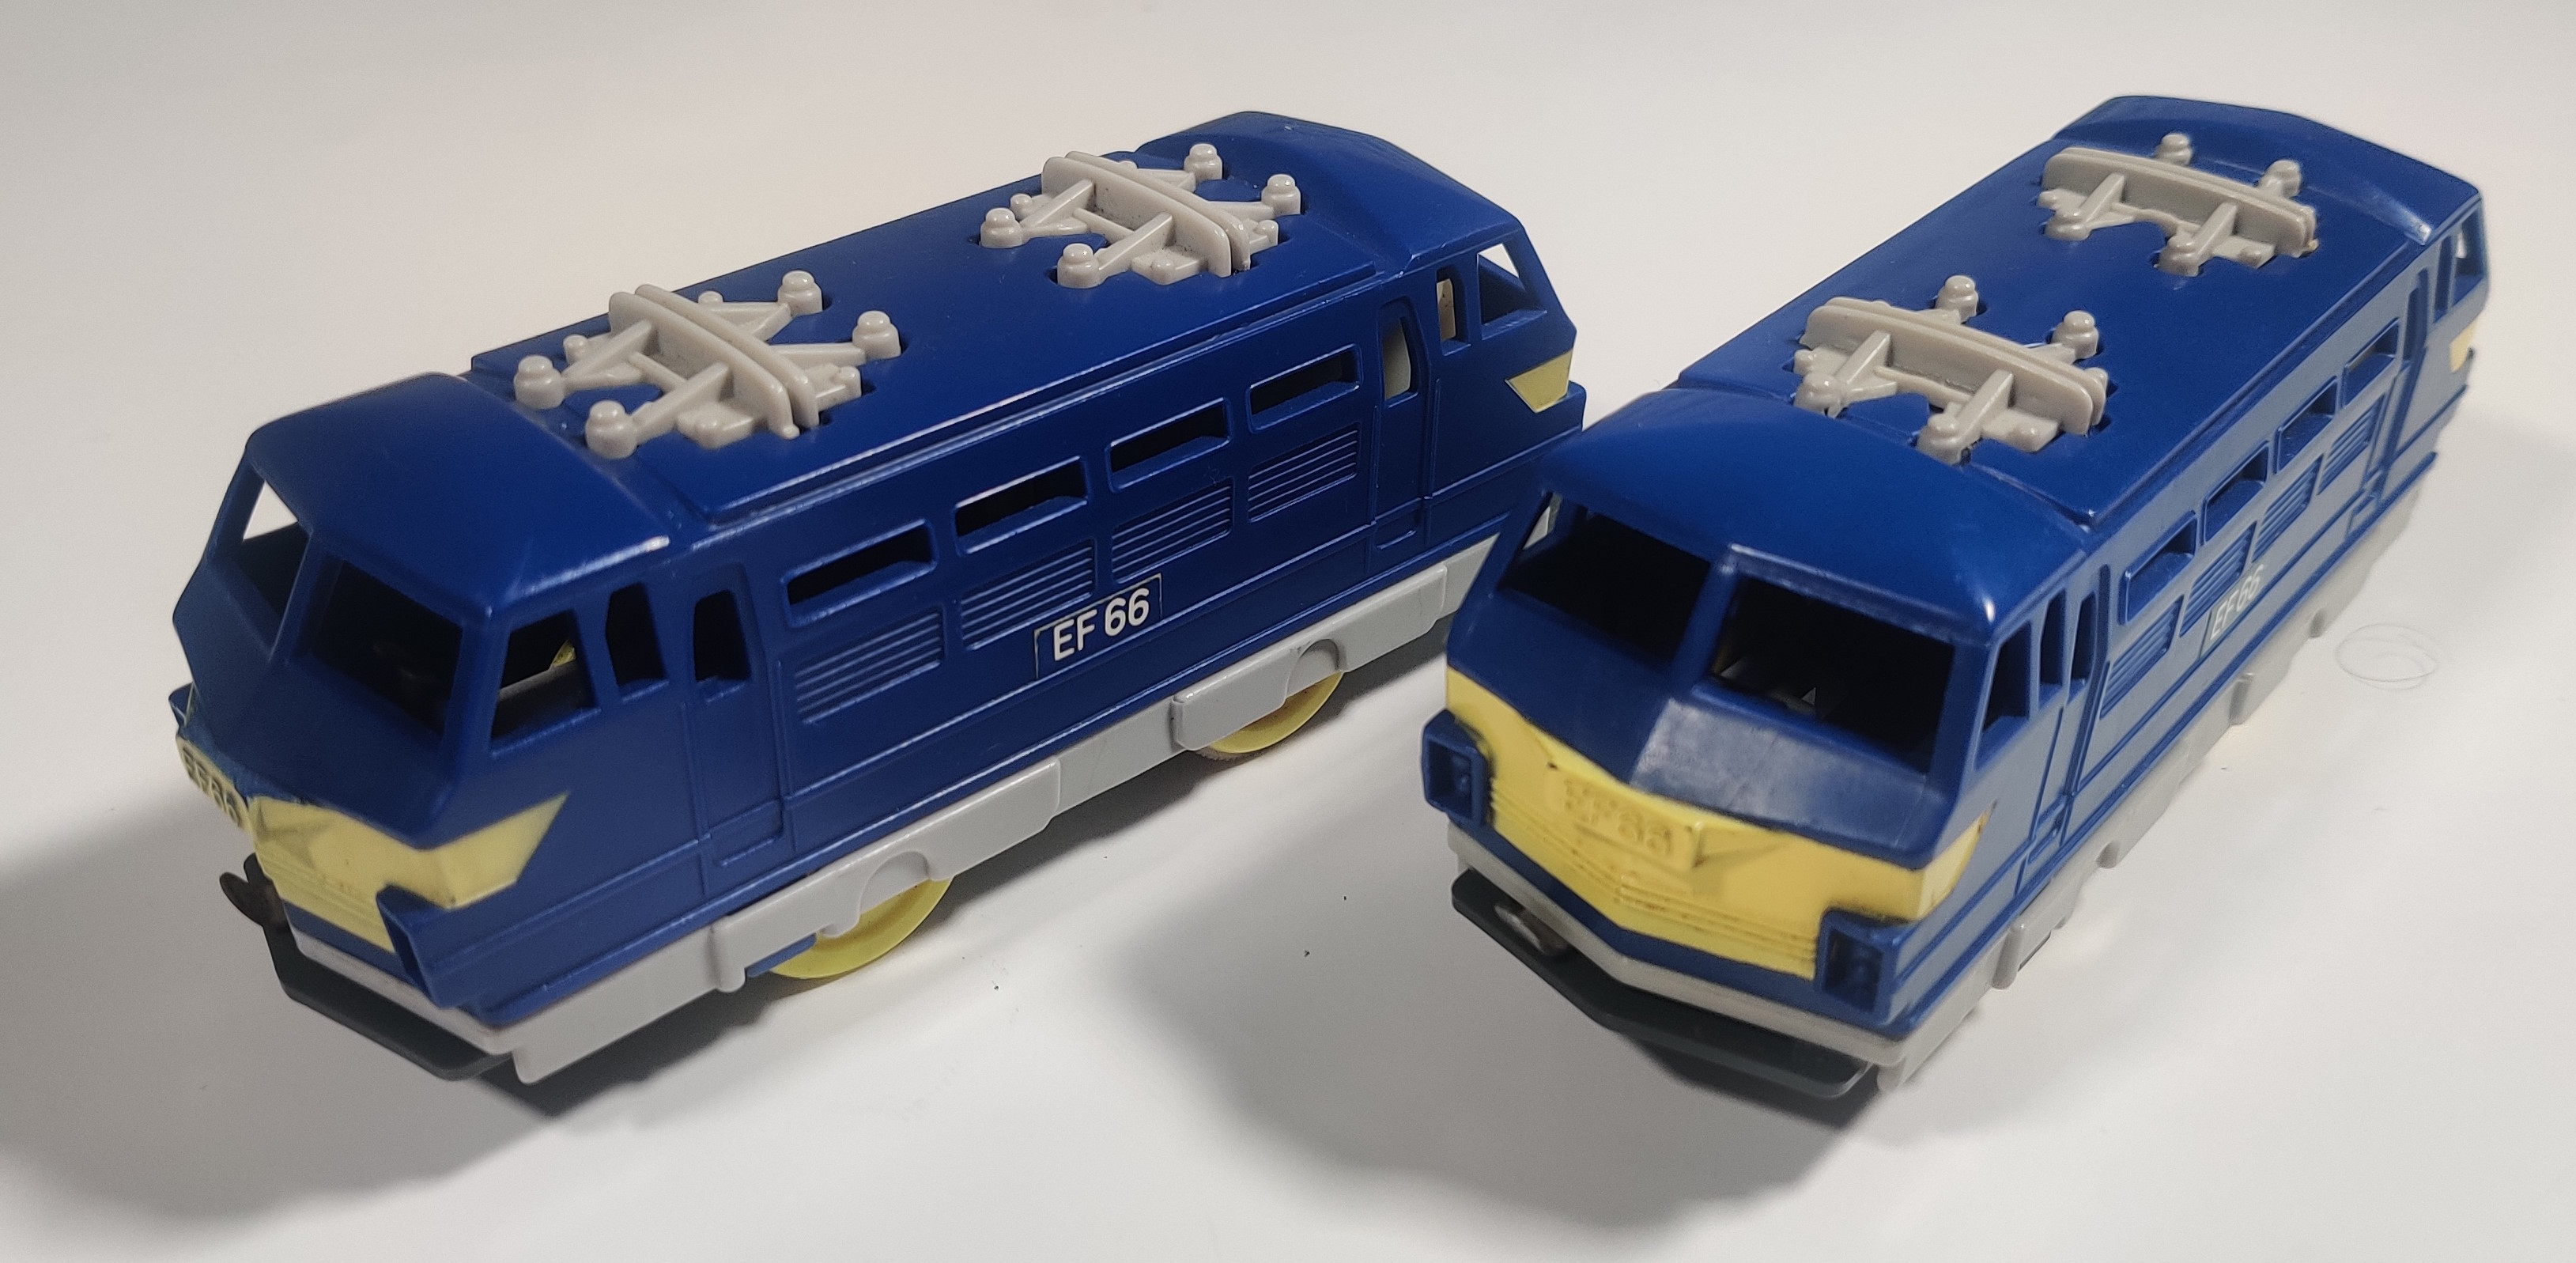
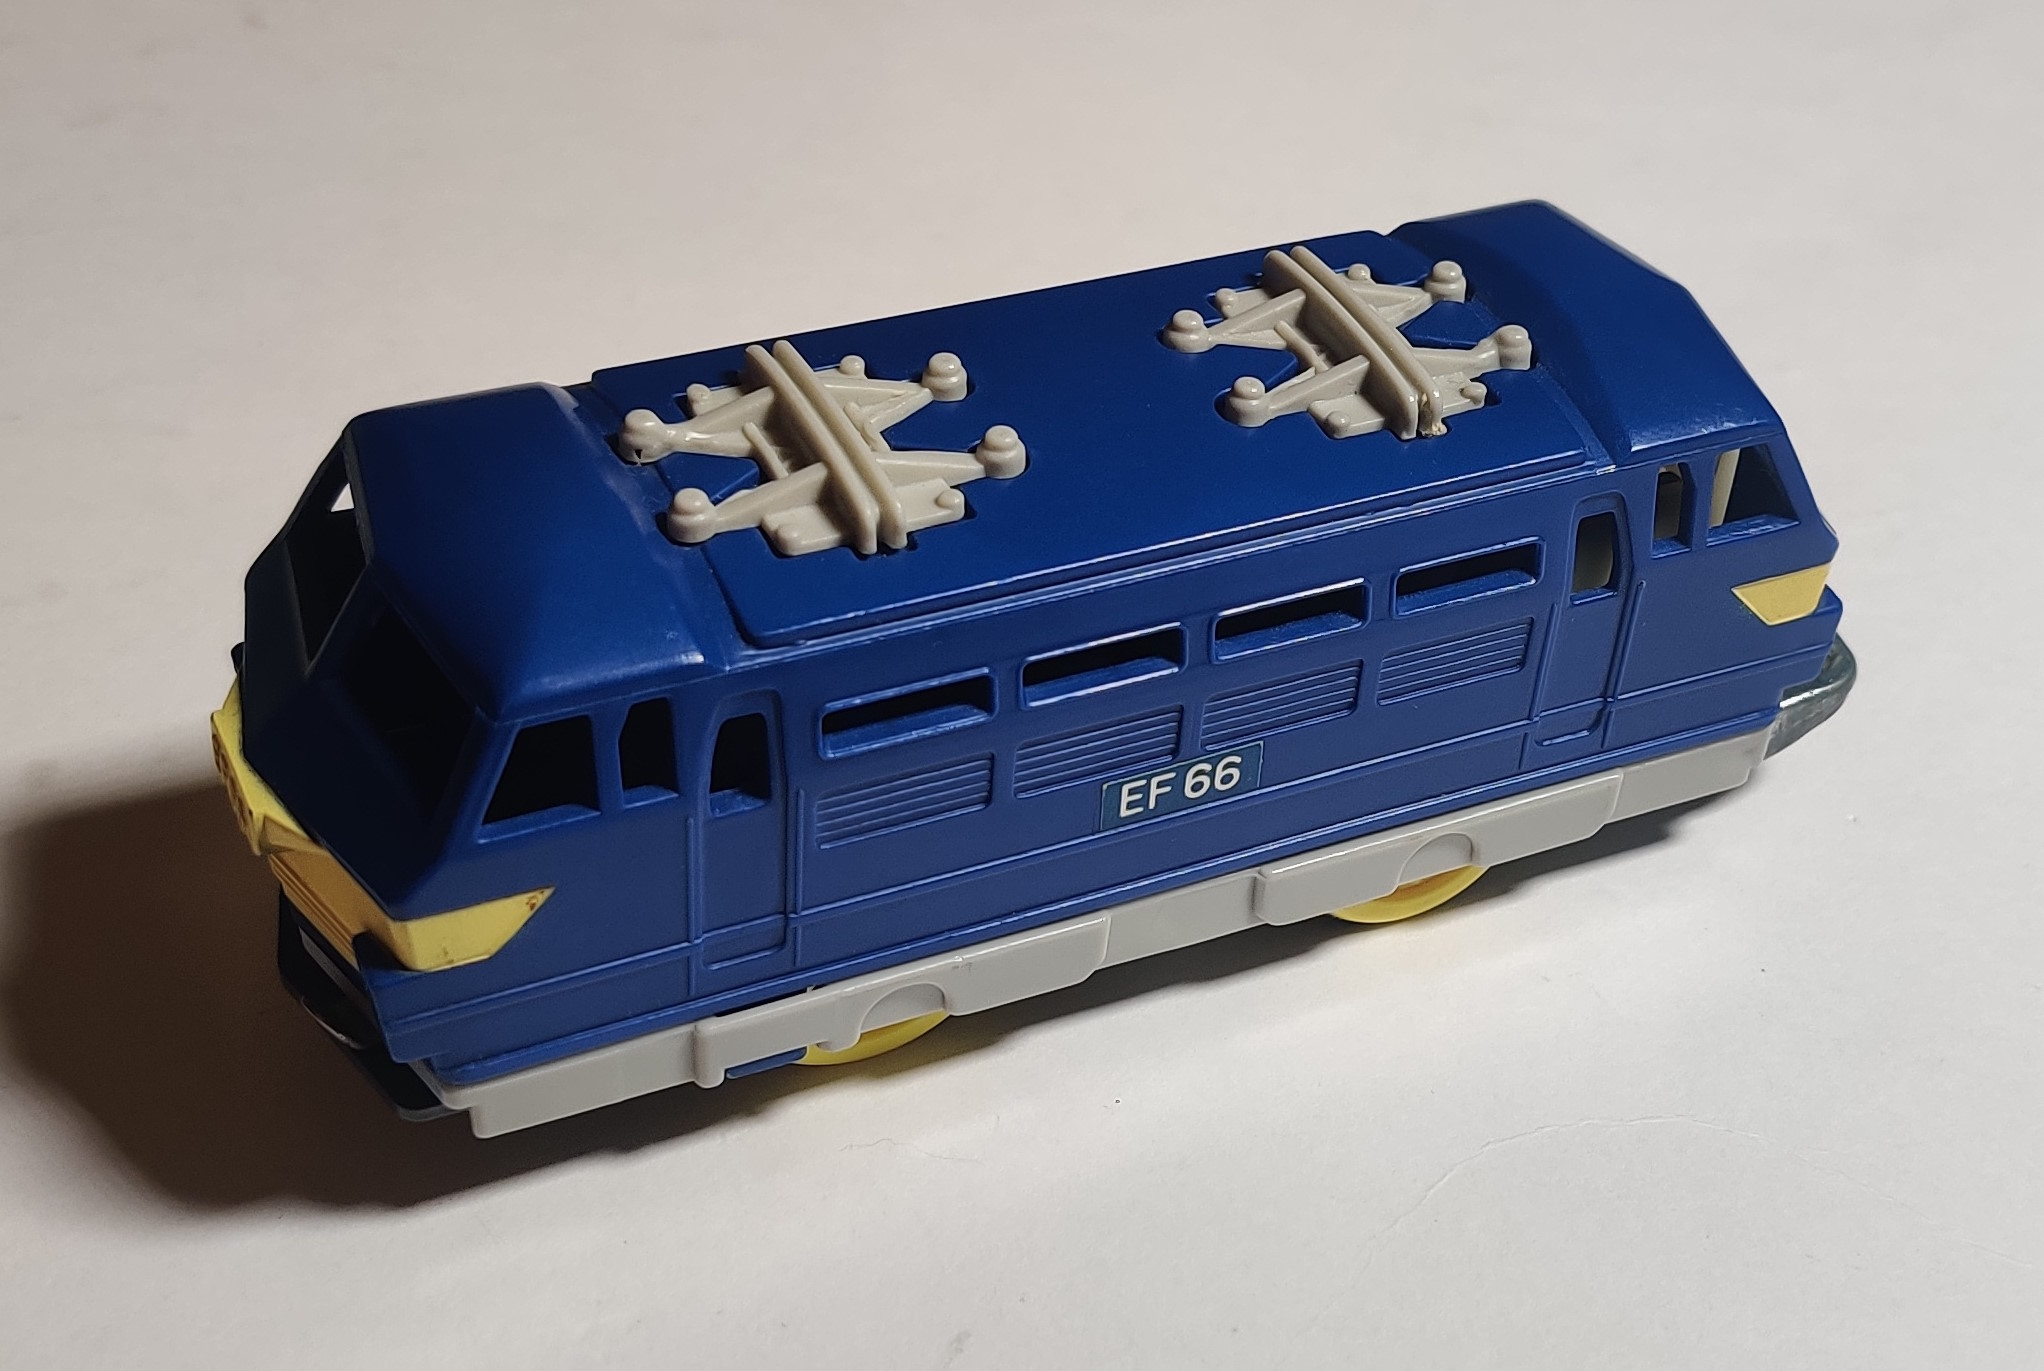
The おうふく oufuku or later 往復 "round trip" Plarail series began in the mid 1970s and the last EF-66s were produced in the early 1990s. The individual release EF-66 is the easiest Round-Trip Plarail to find and there are at least two gearbox variations.
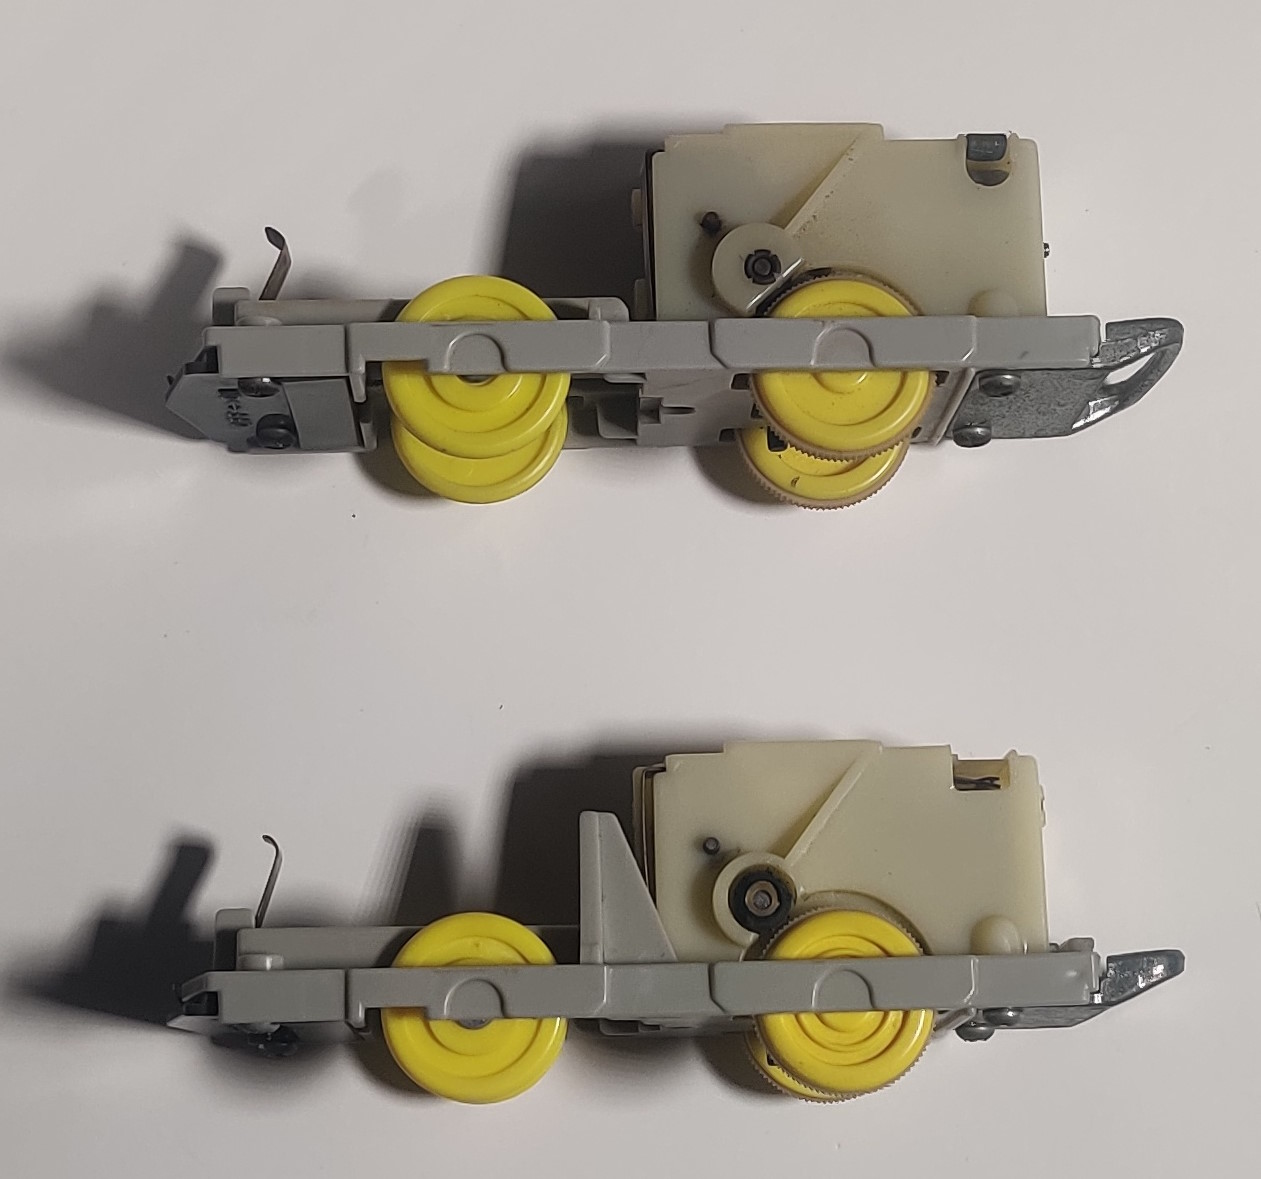
Due to their age even the early 90s round-trip gearboxes will likely need their rubber friction-drive tires replaced. The earlier type of gearbox has the rim-drive tires encased inside the gearbox casing and must be disassembled to replace them. The later style of gearbox has external drive tires and does not necessarily have to be disassembled to be replaced. Both styles were used during different eras of Round-Trip EF-66, with the older ED-70 Electric Locomotive using the older internal type.
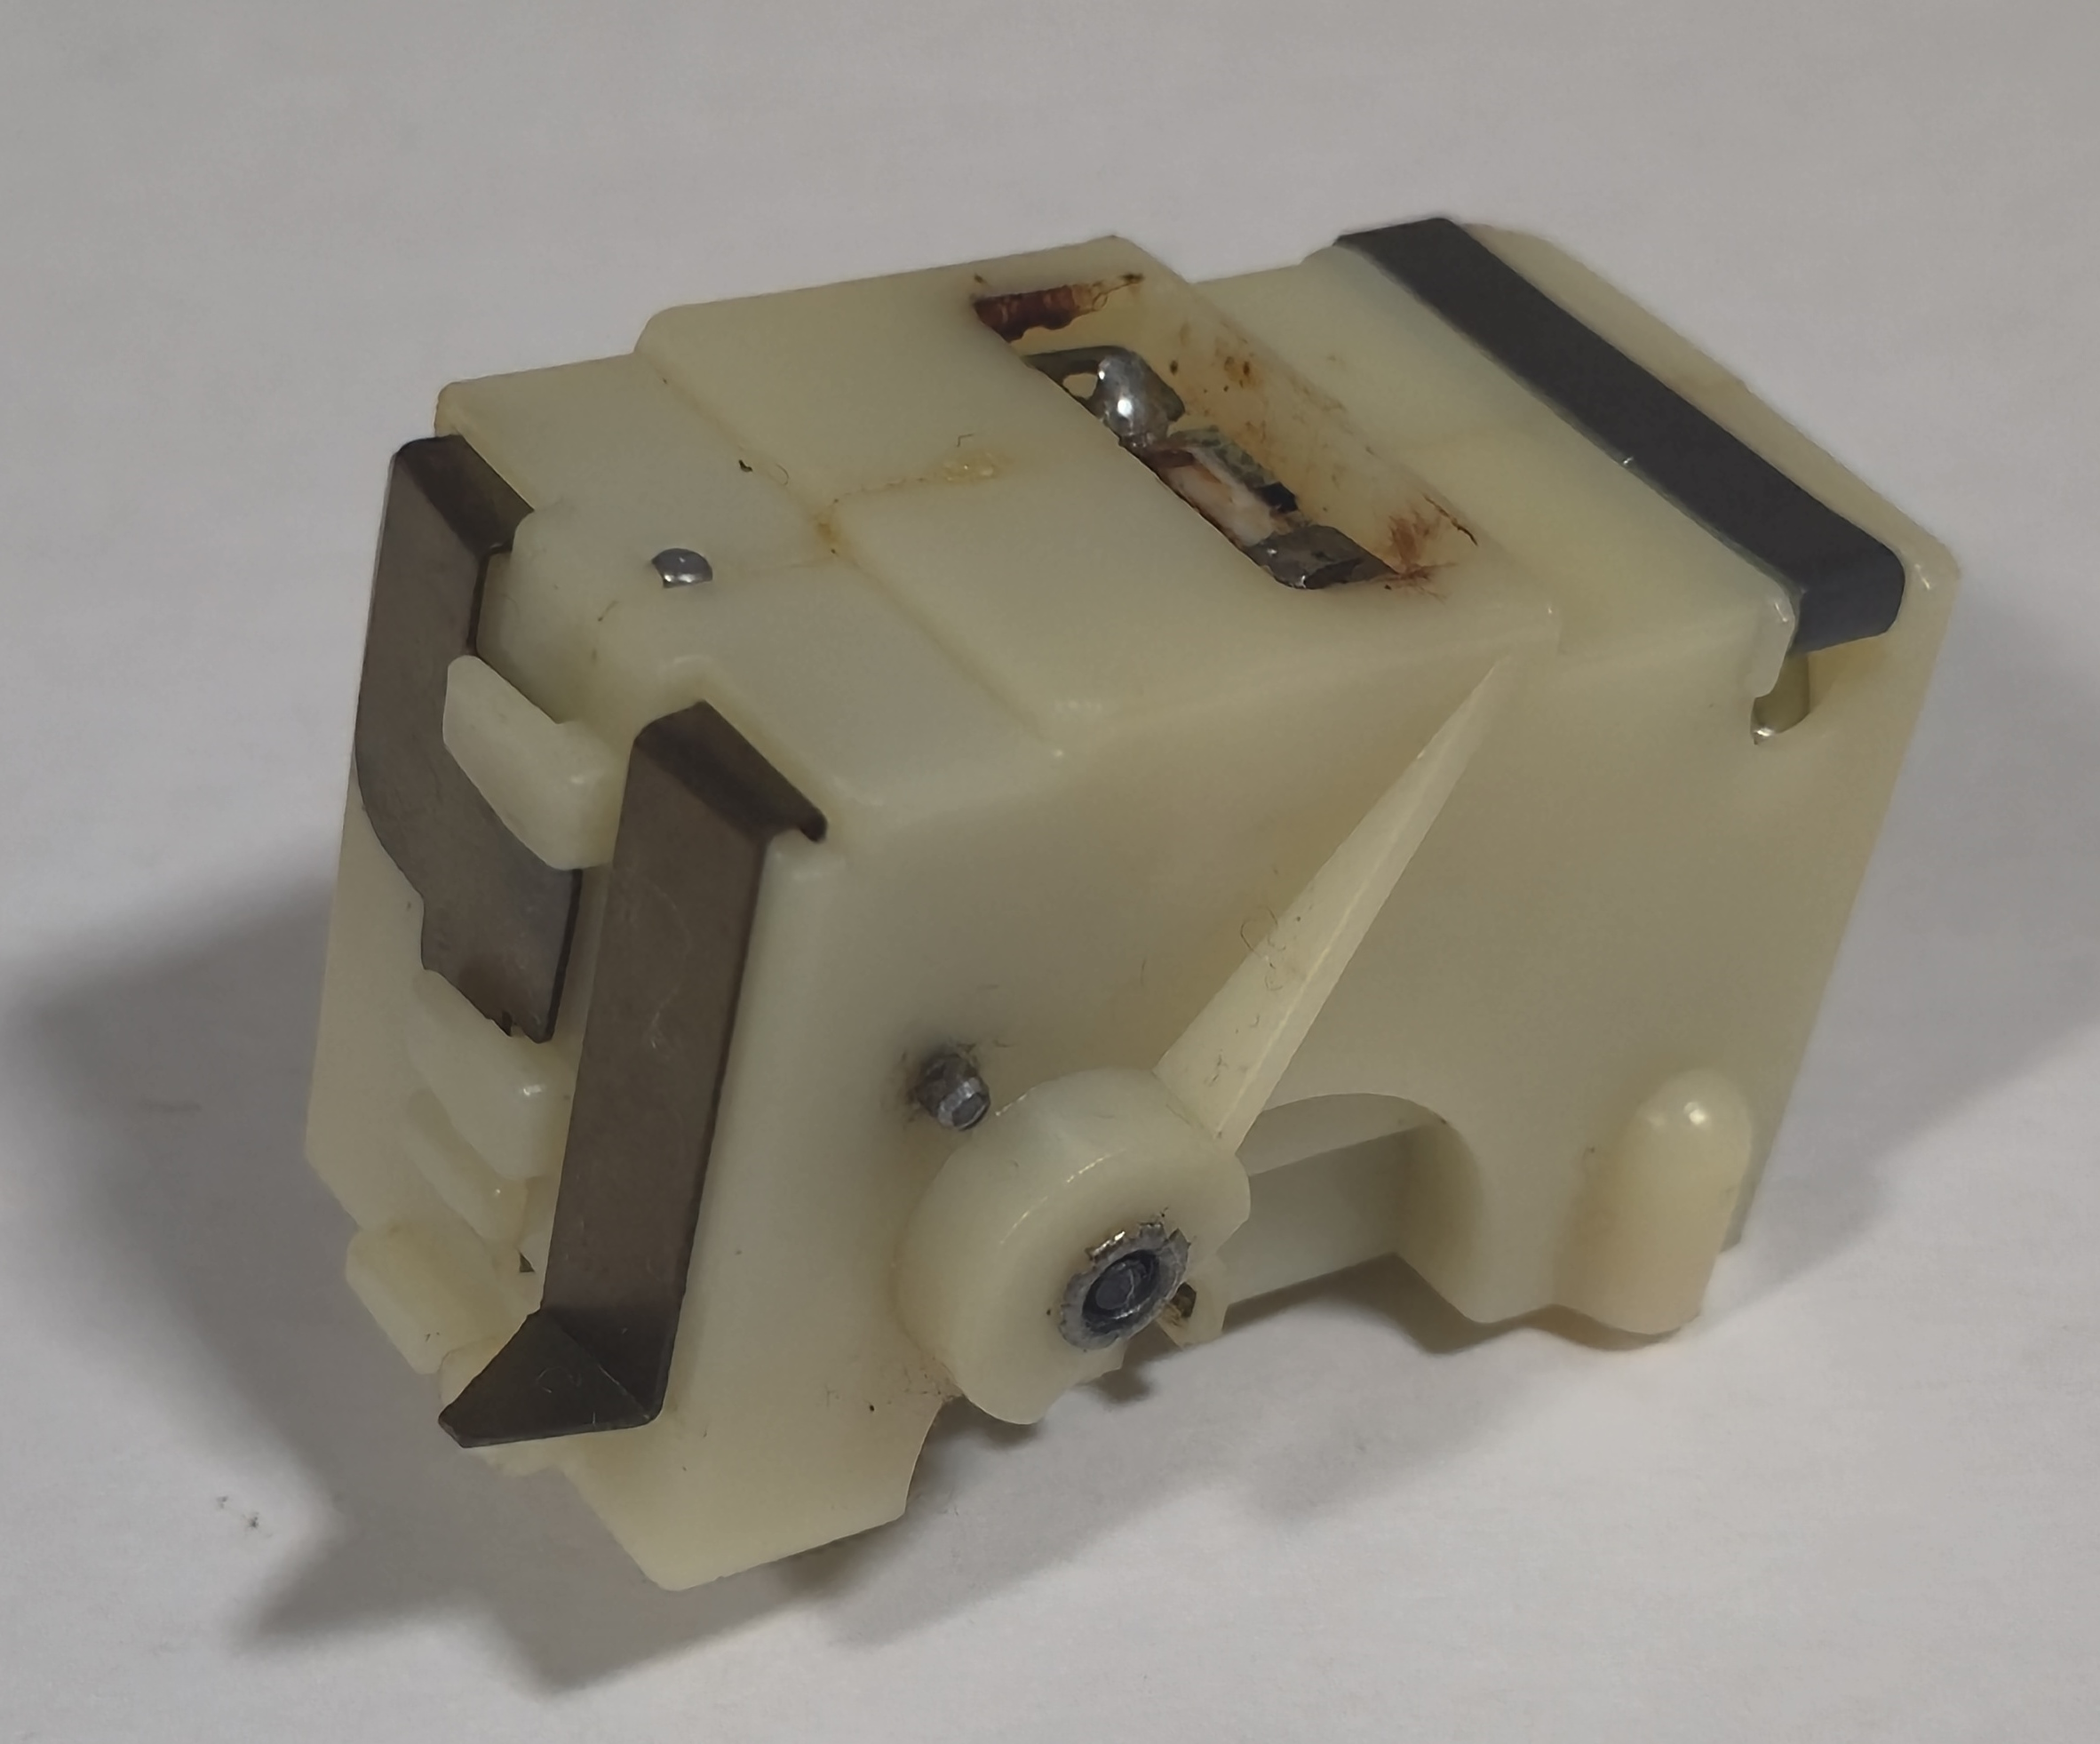
Internal drive gearbox
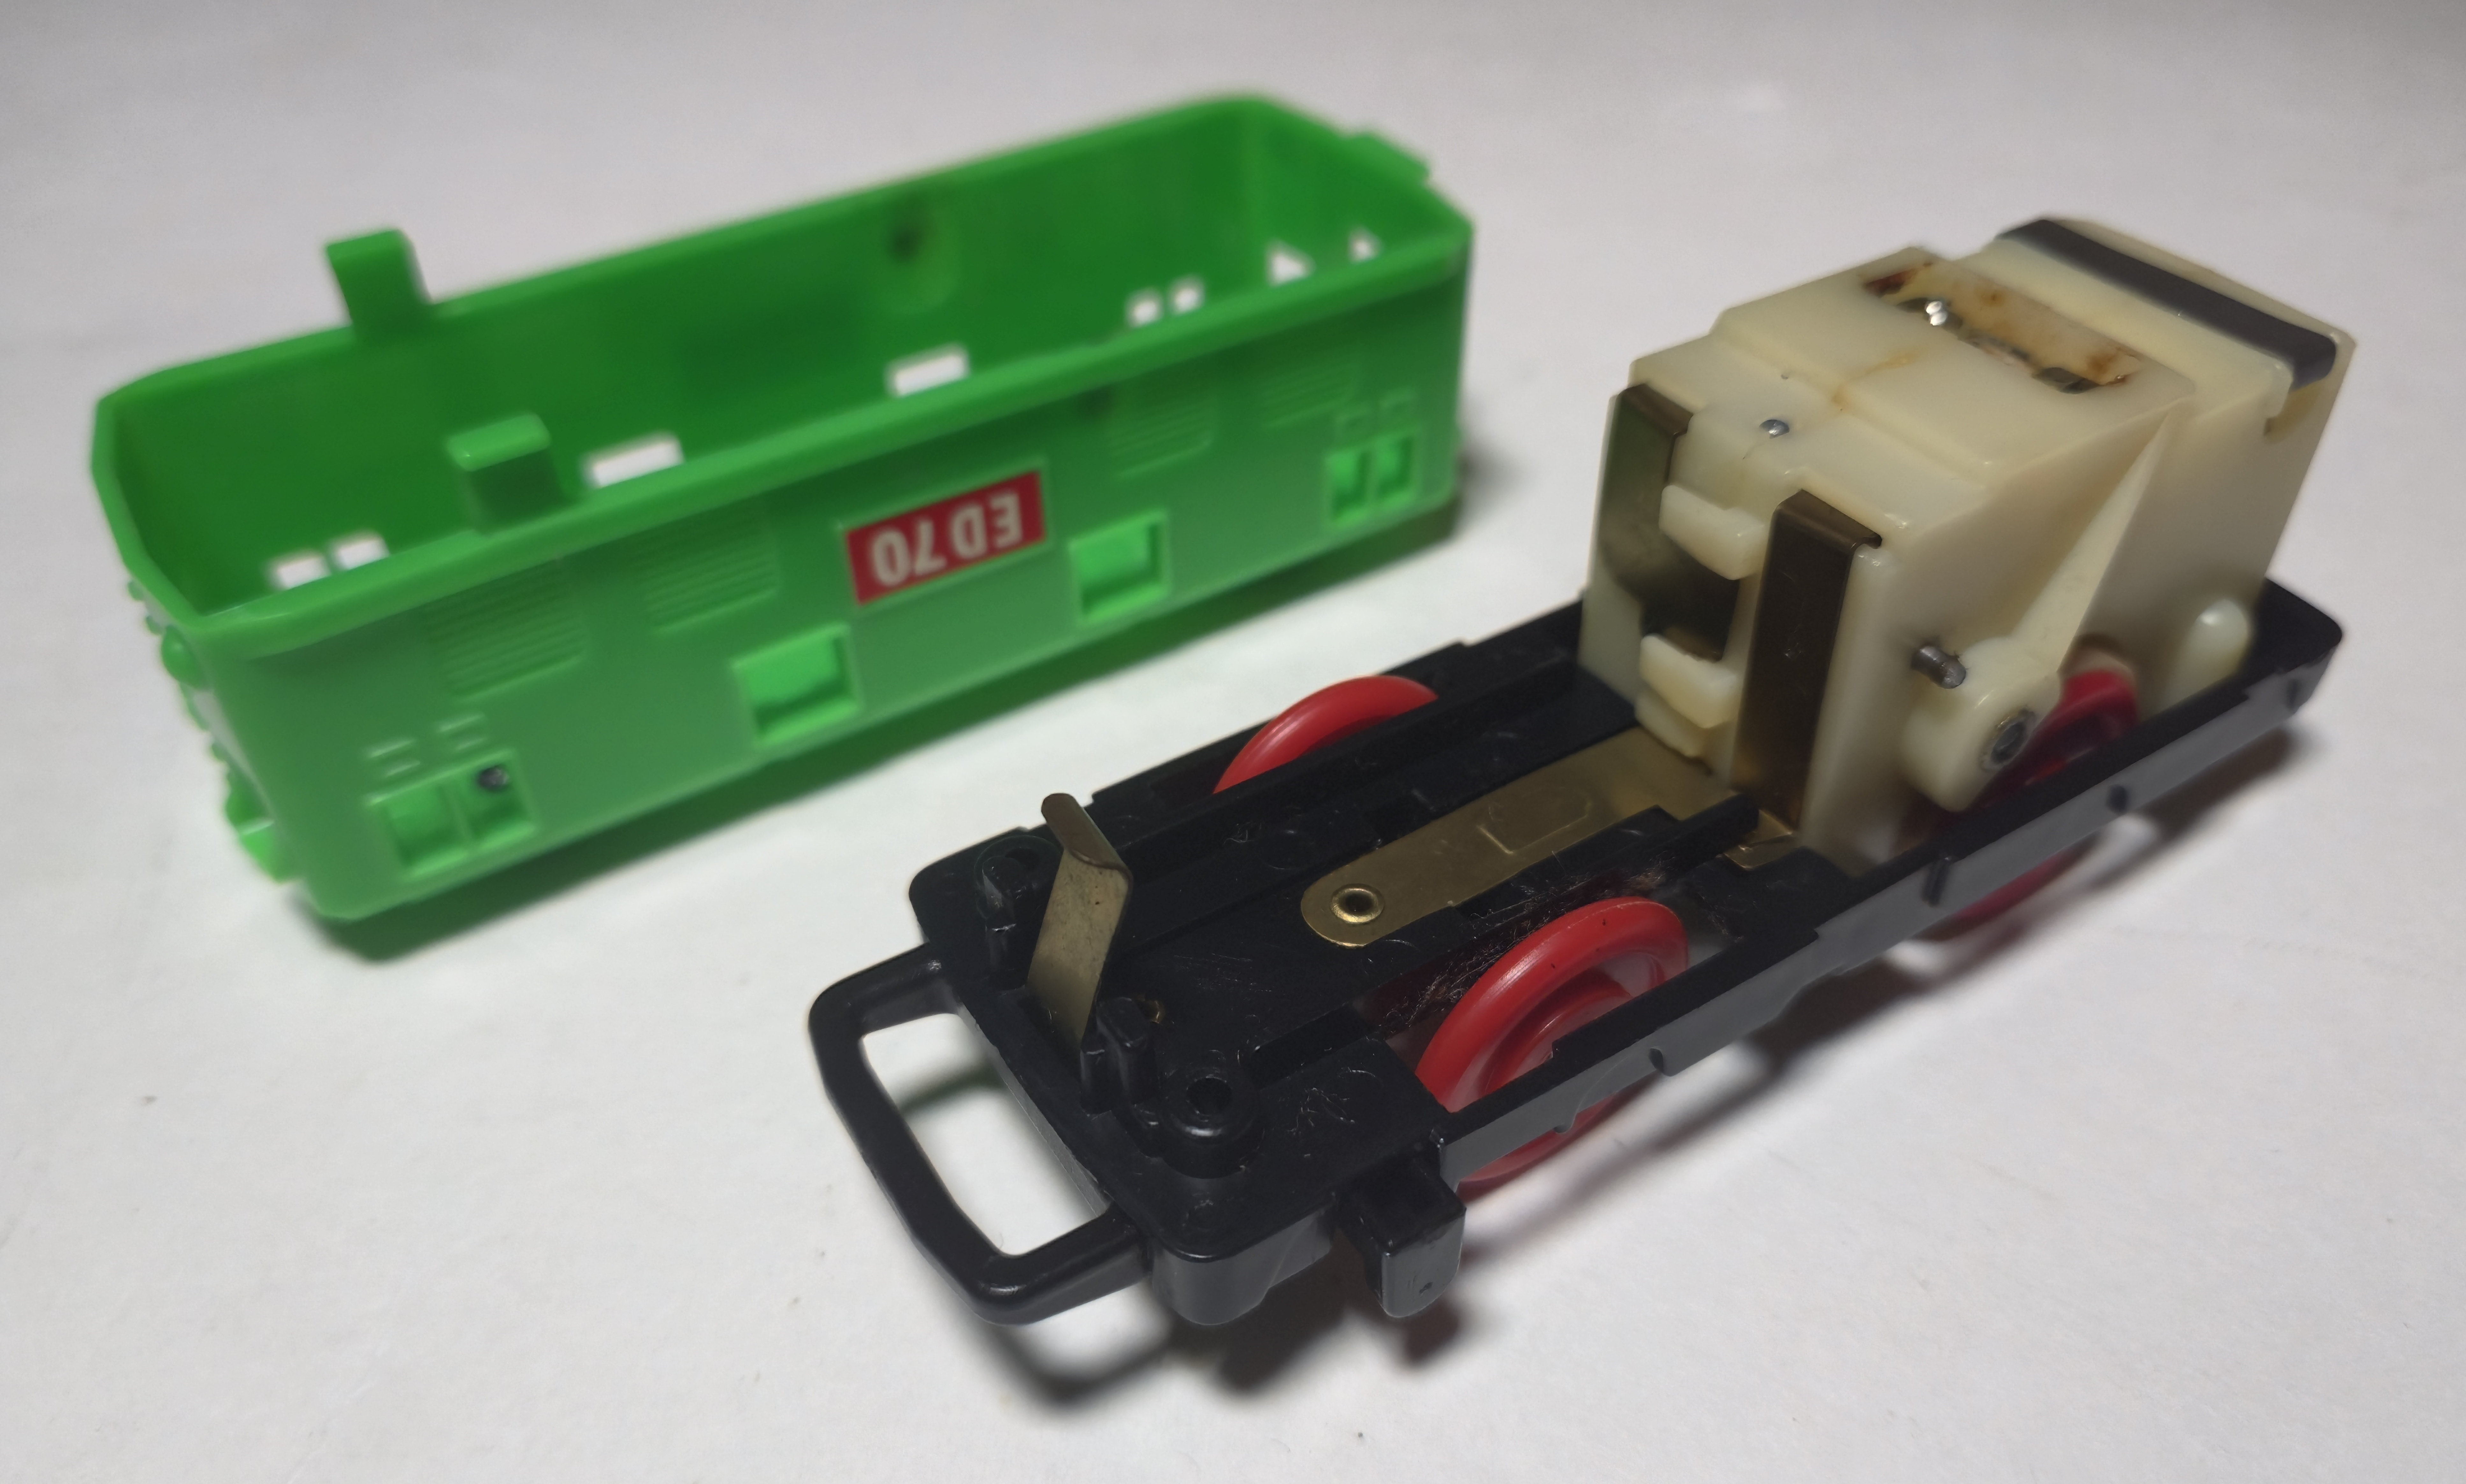
The ED-70s and older EF-66s use a gearbox with friction-drive tires that are contained within the gearbox casing, unlike most other old-power gearboxes.
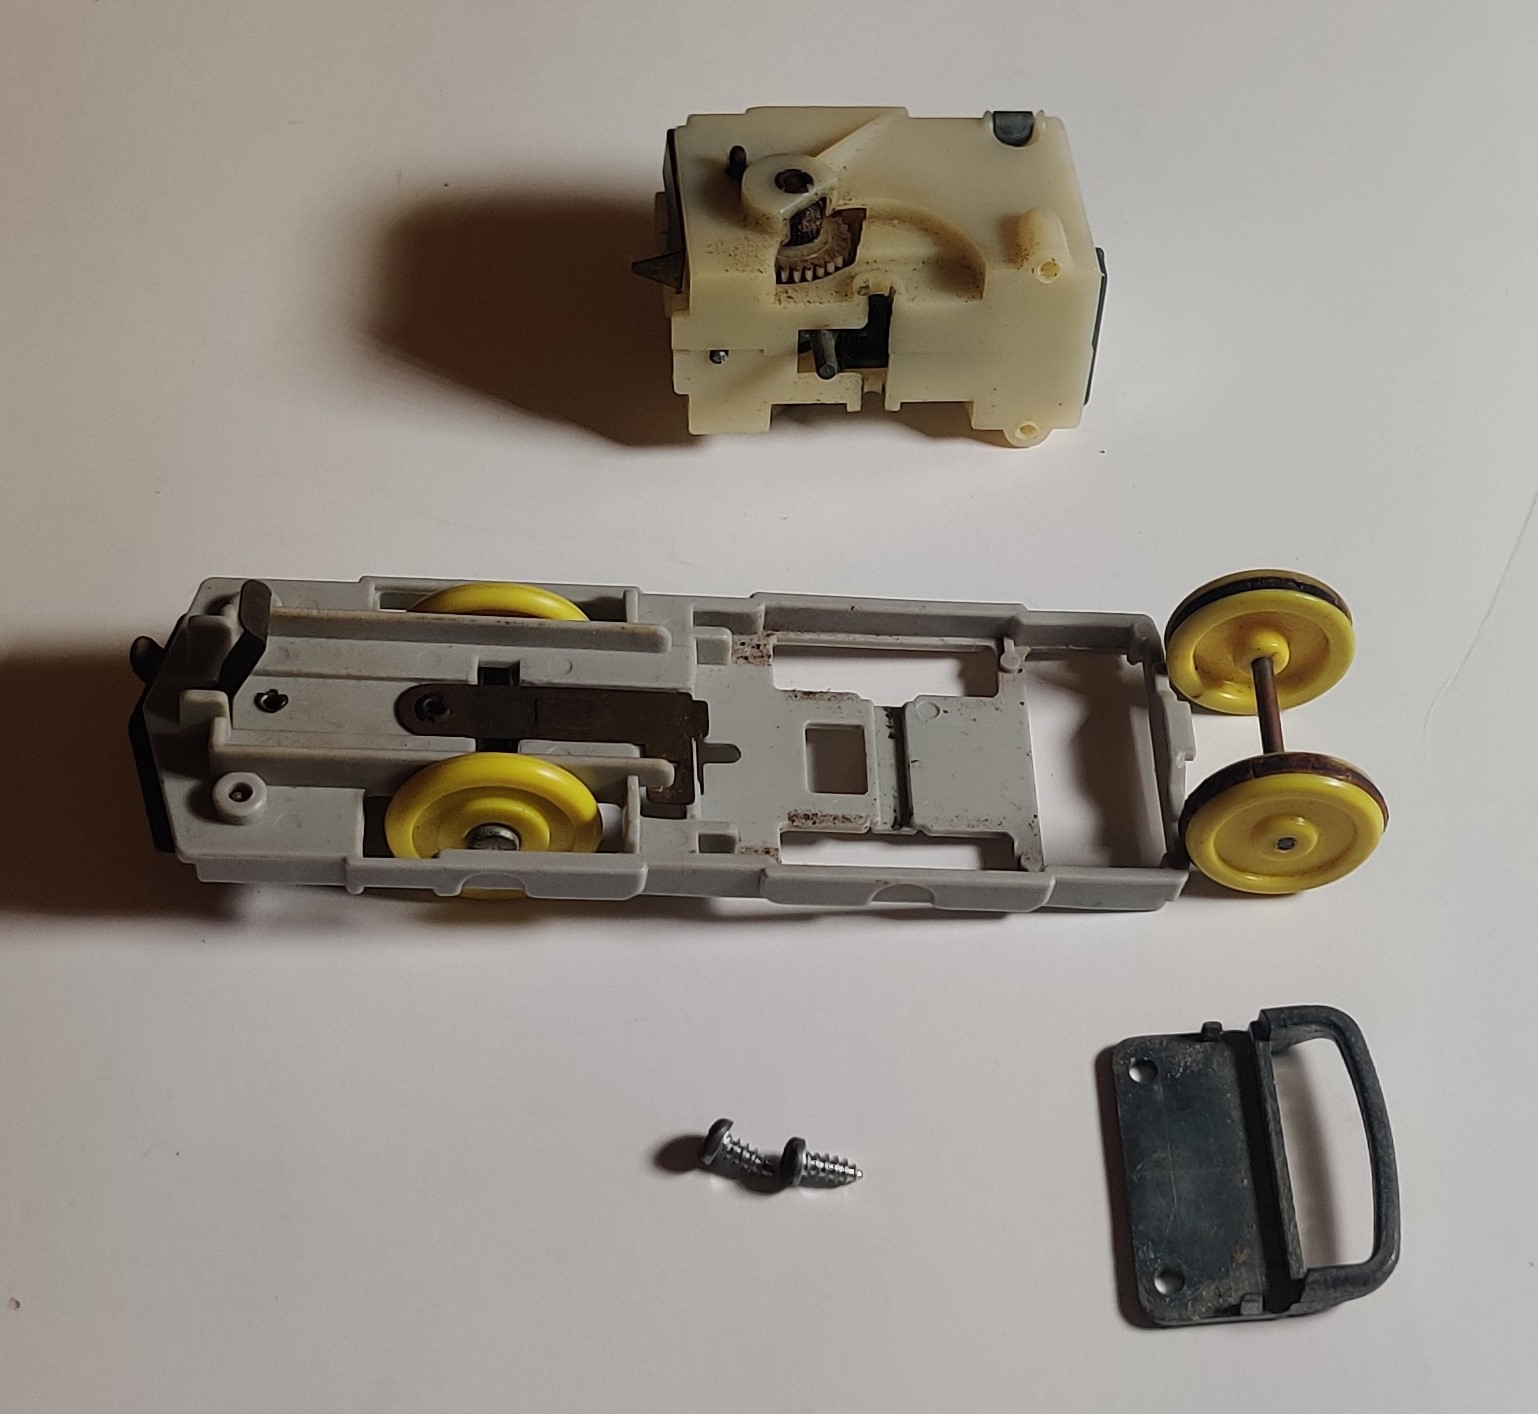
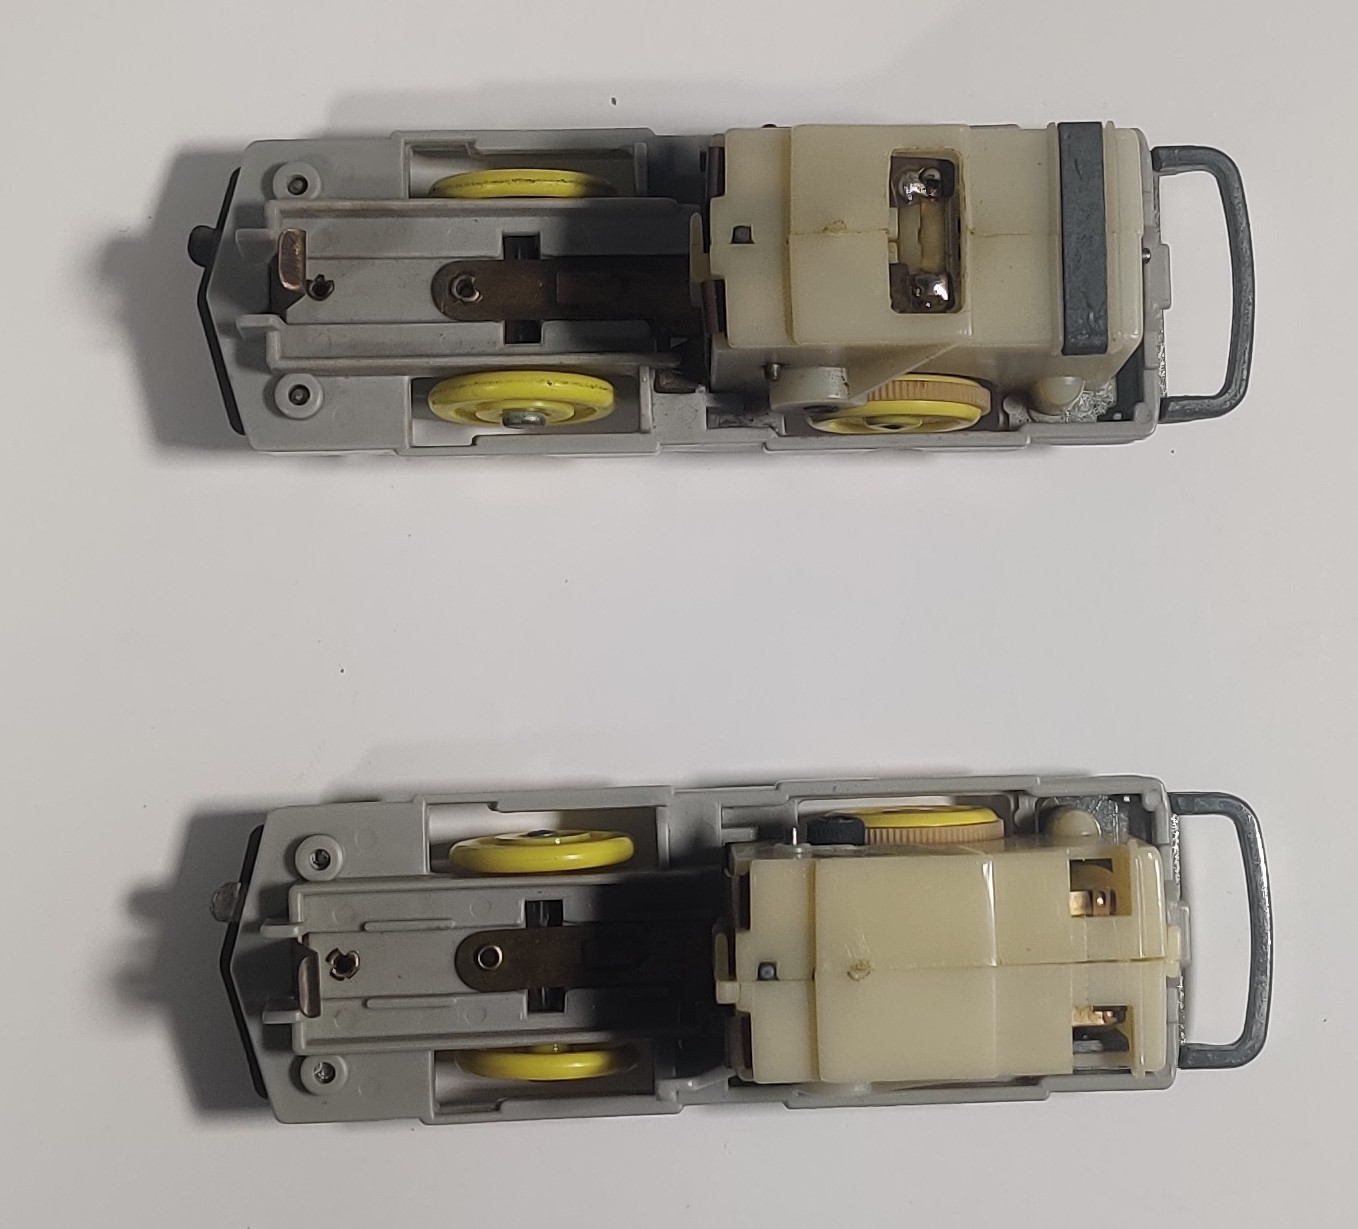
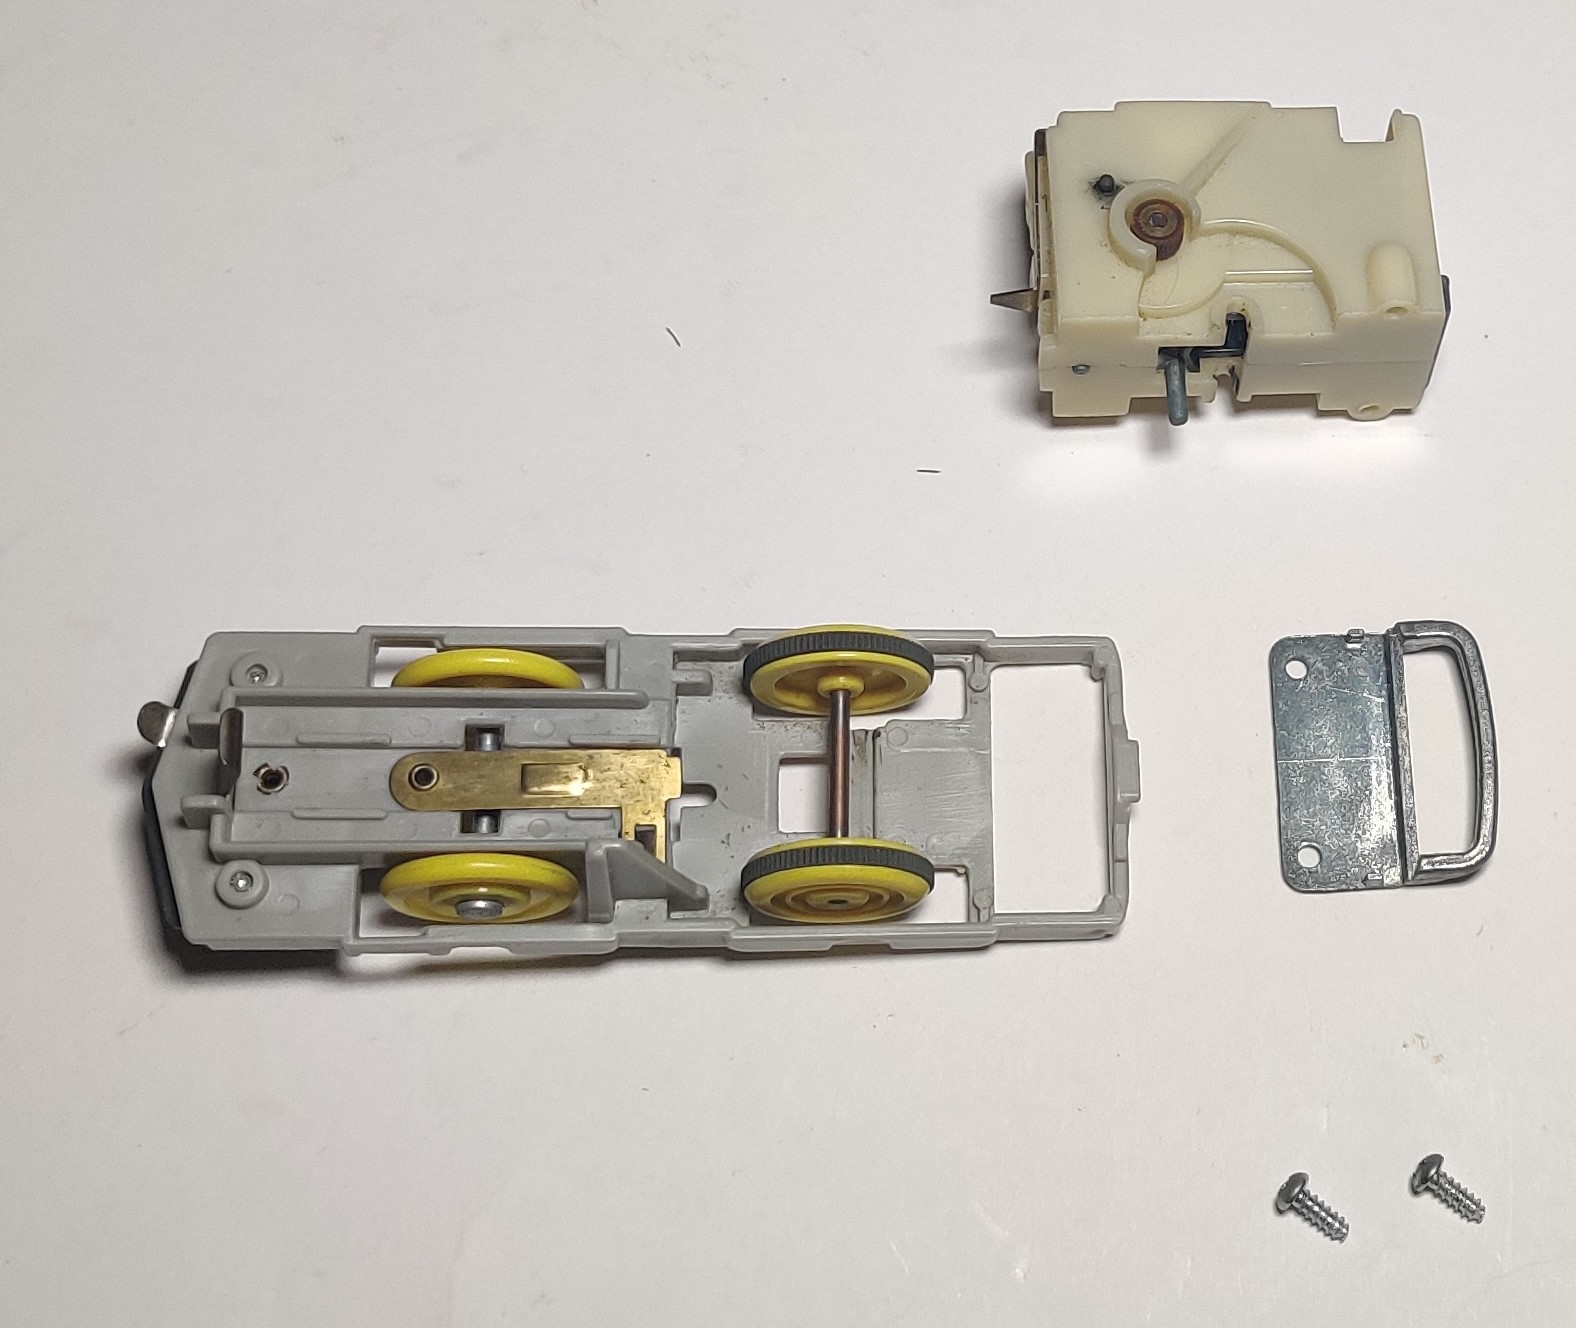
On the EF-66, two screws in the metal rear coupling sandwich the chassis to the gearbox. On the ED-70s, it comes out like most other gearboxes.
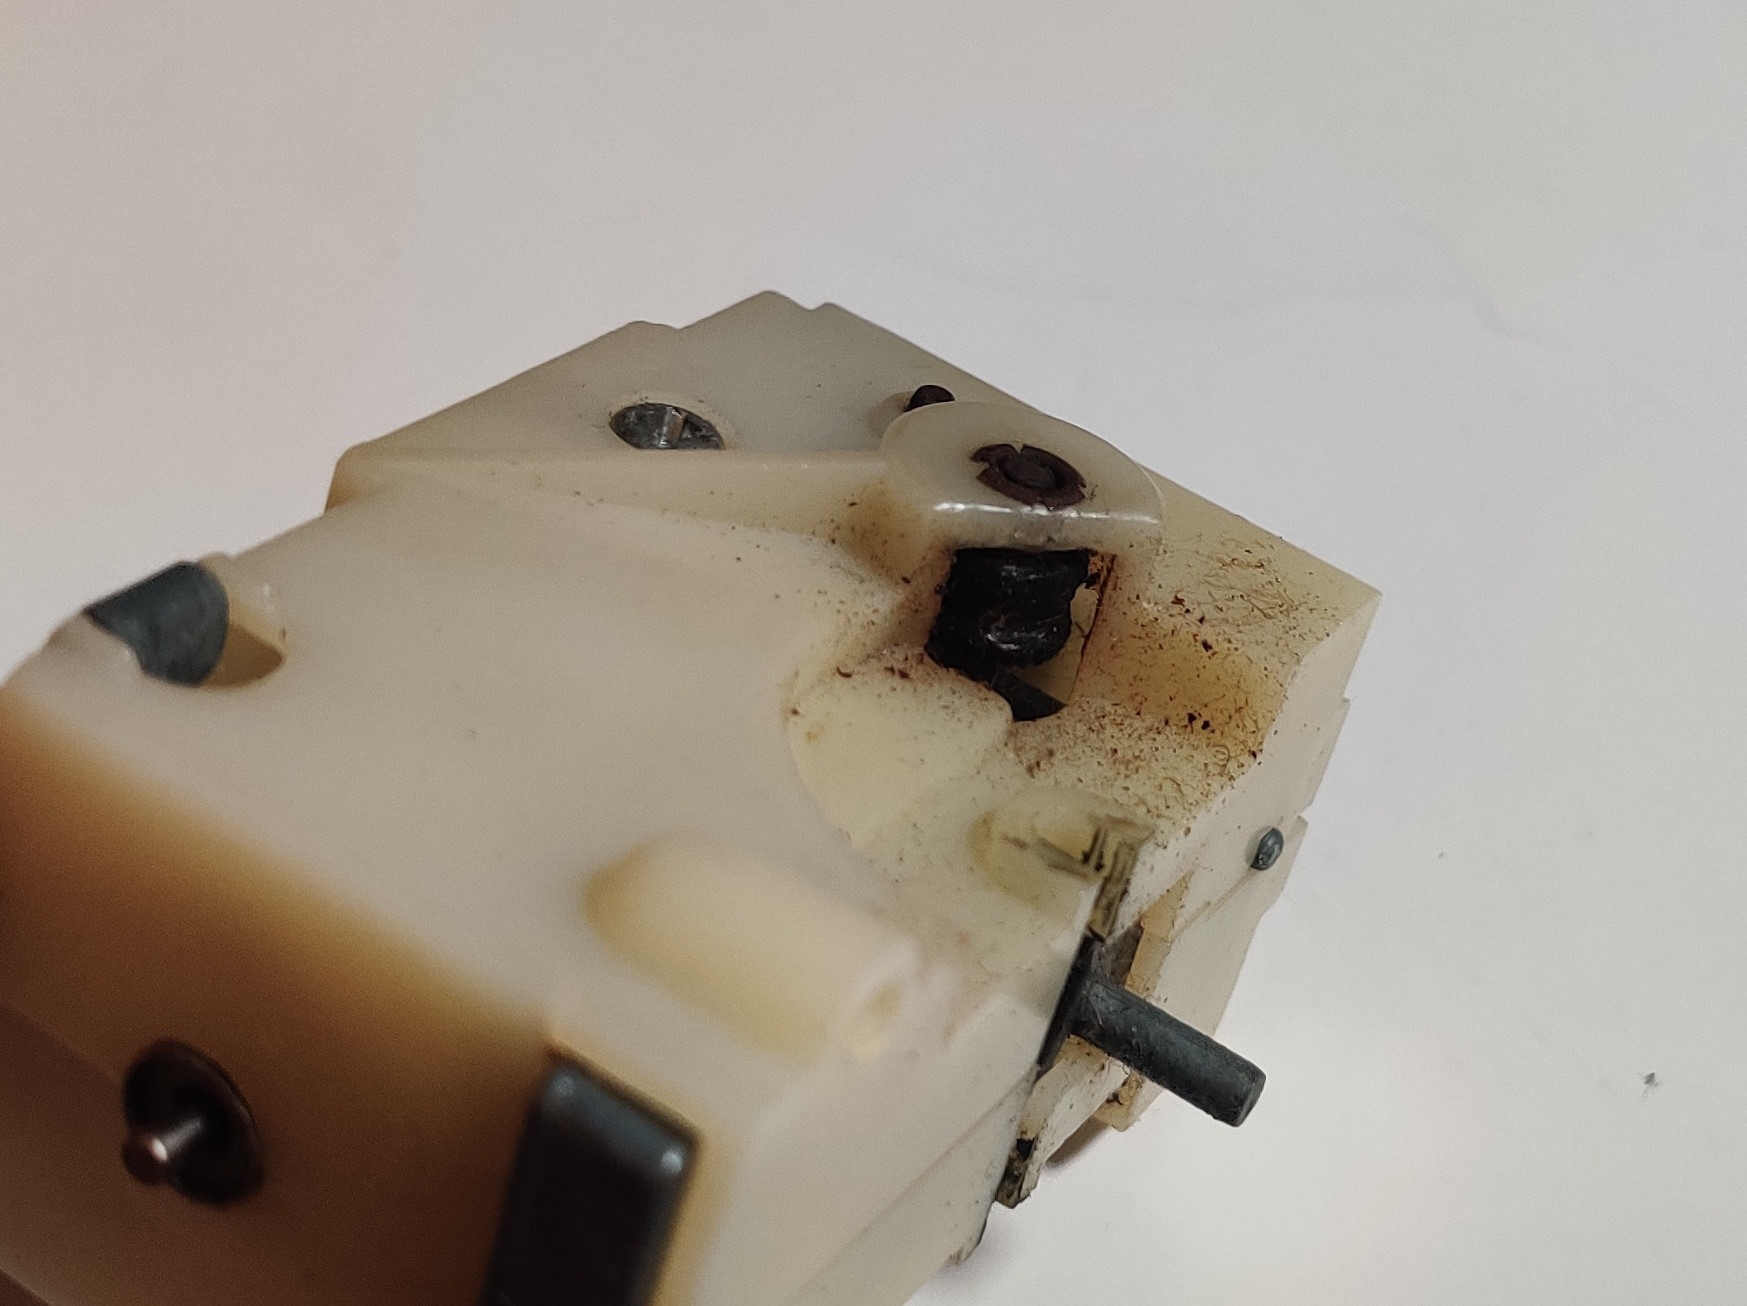

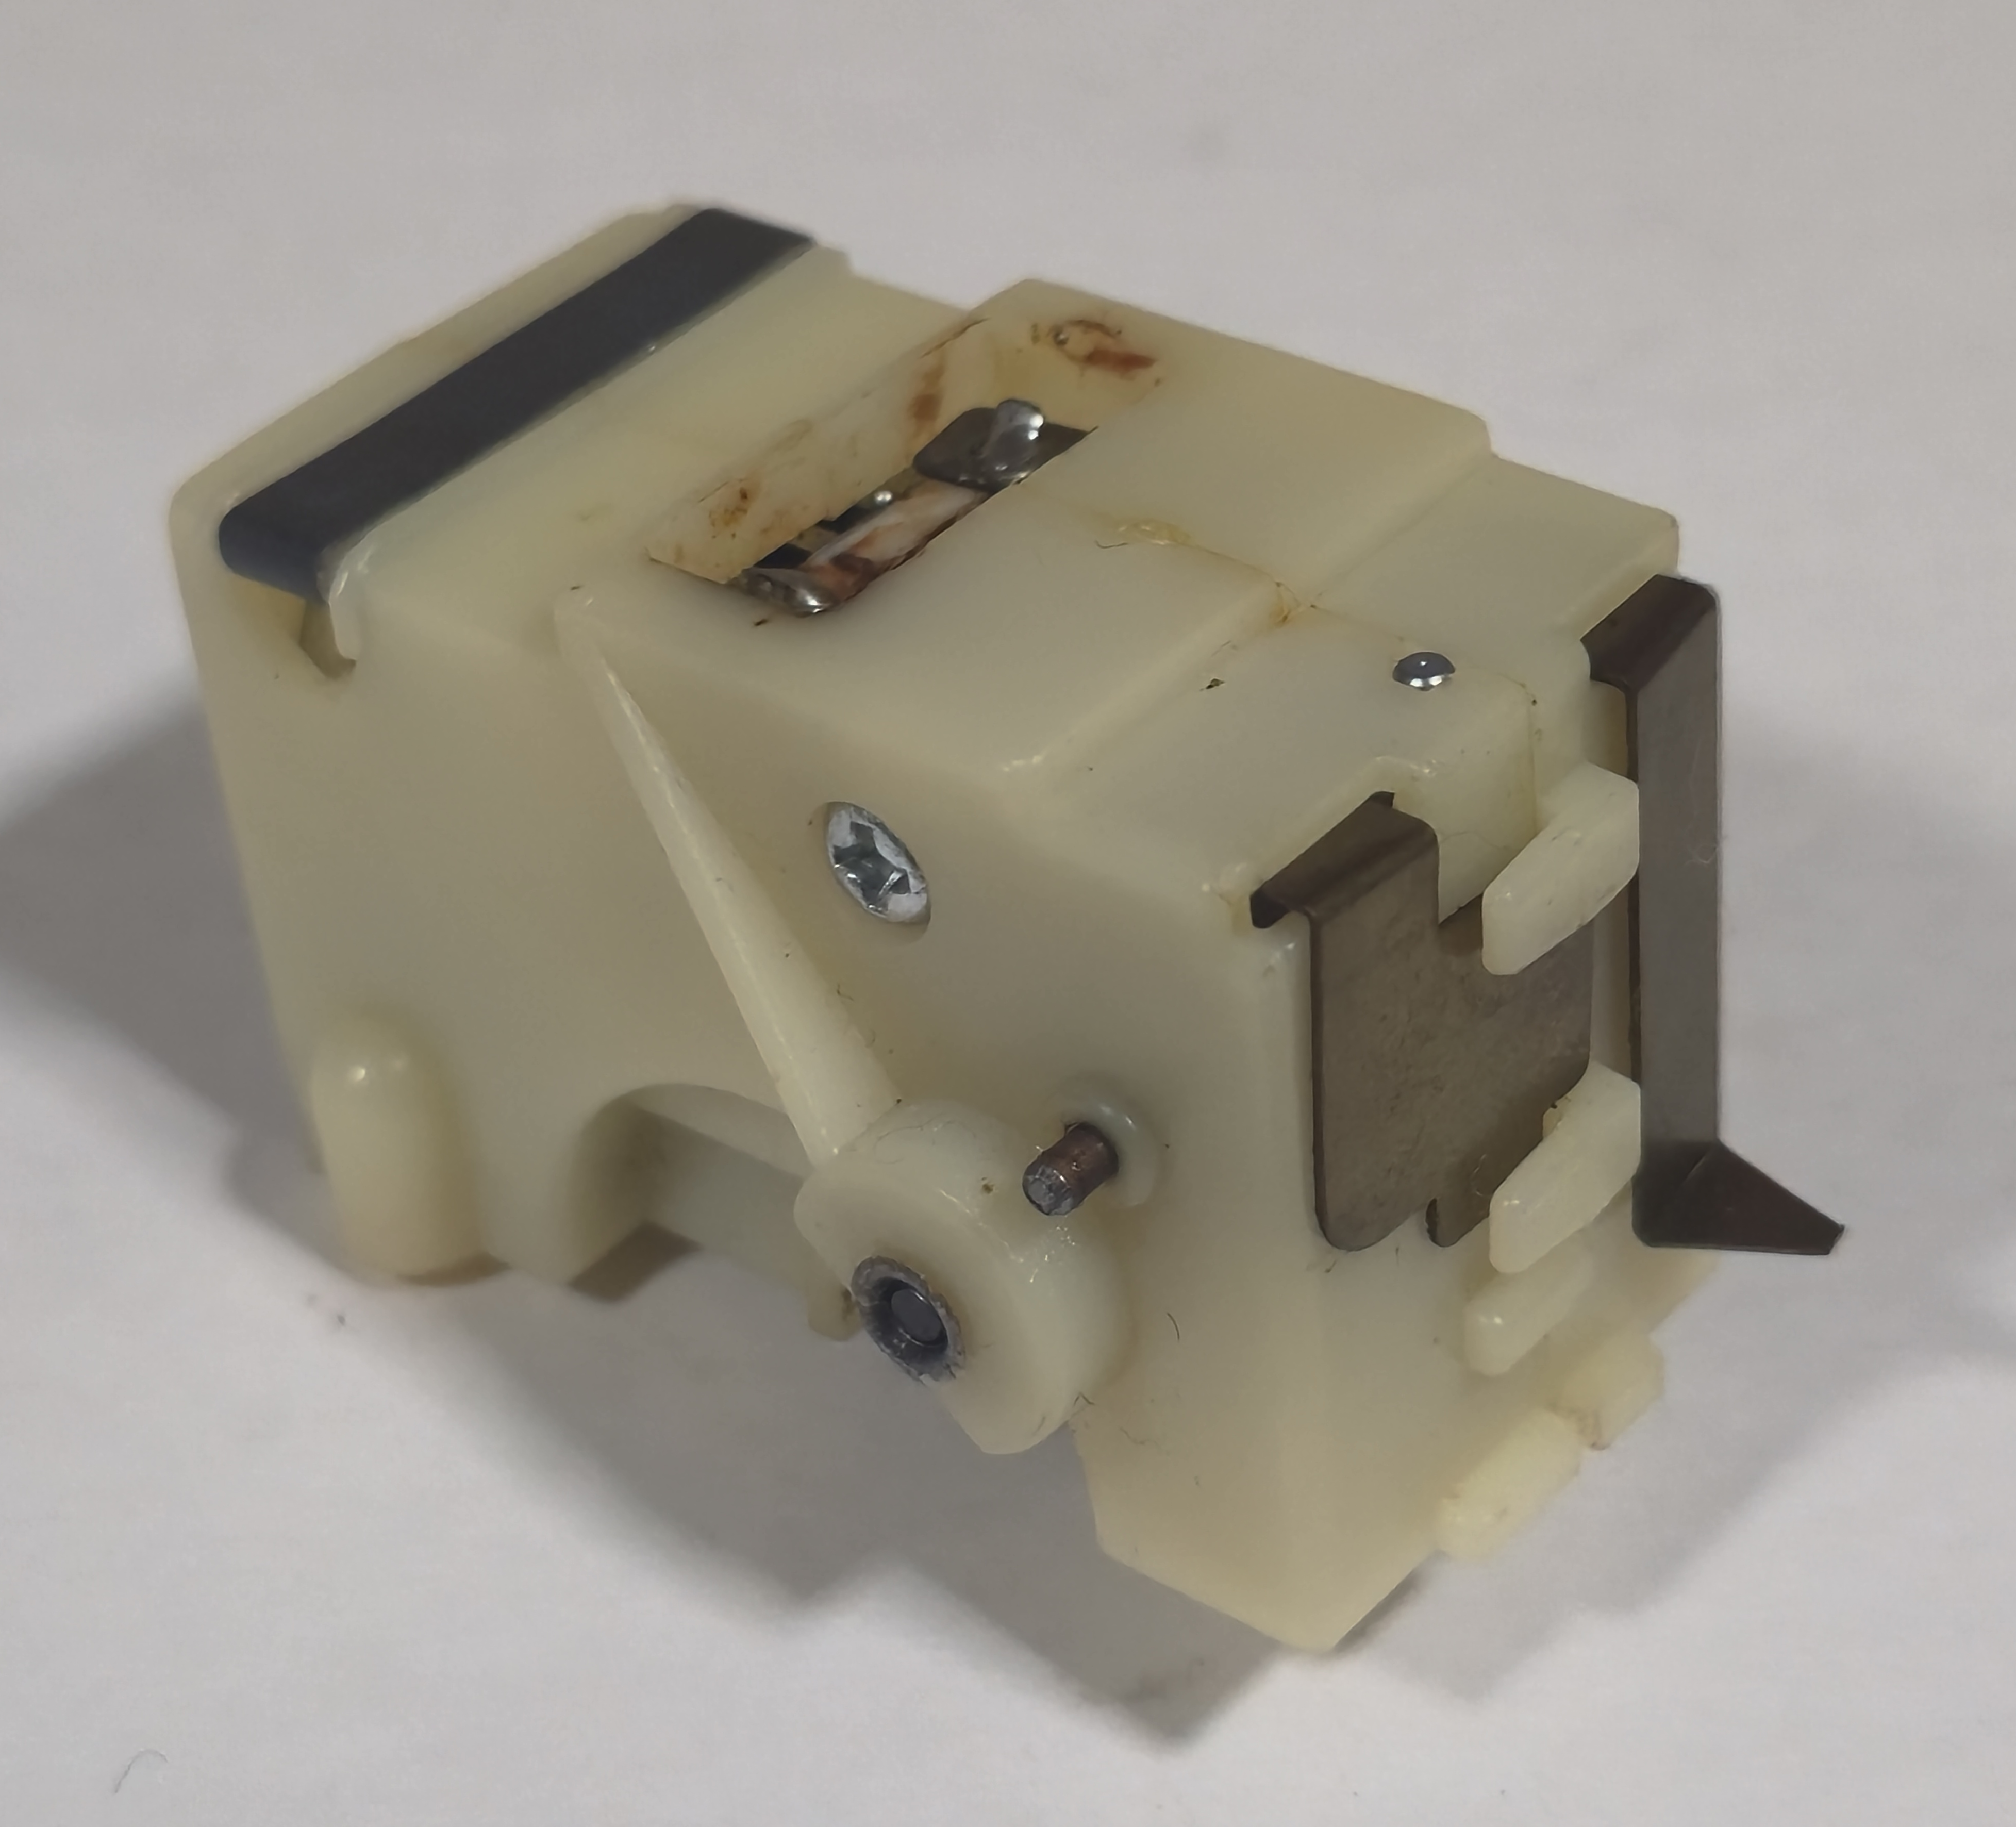
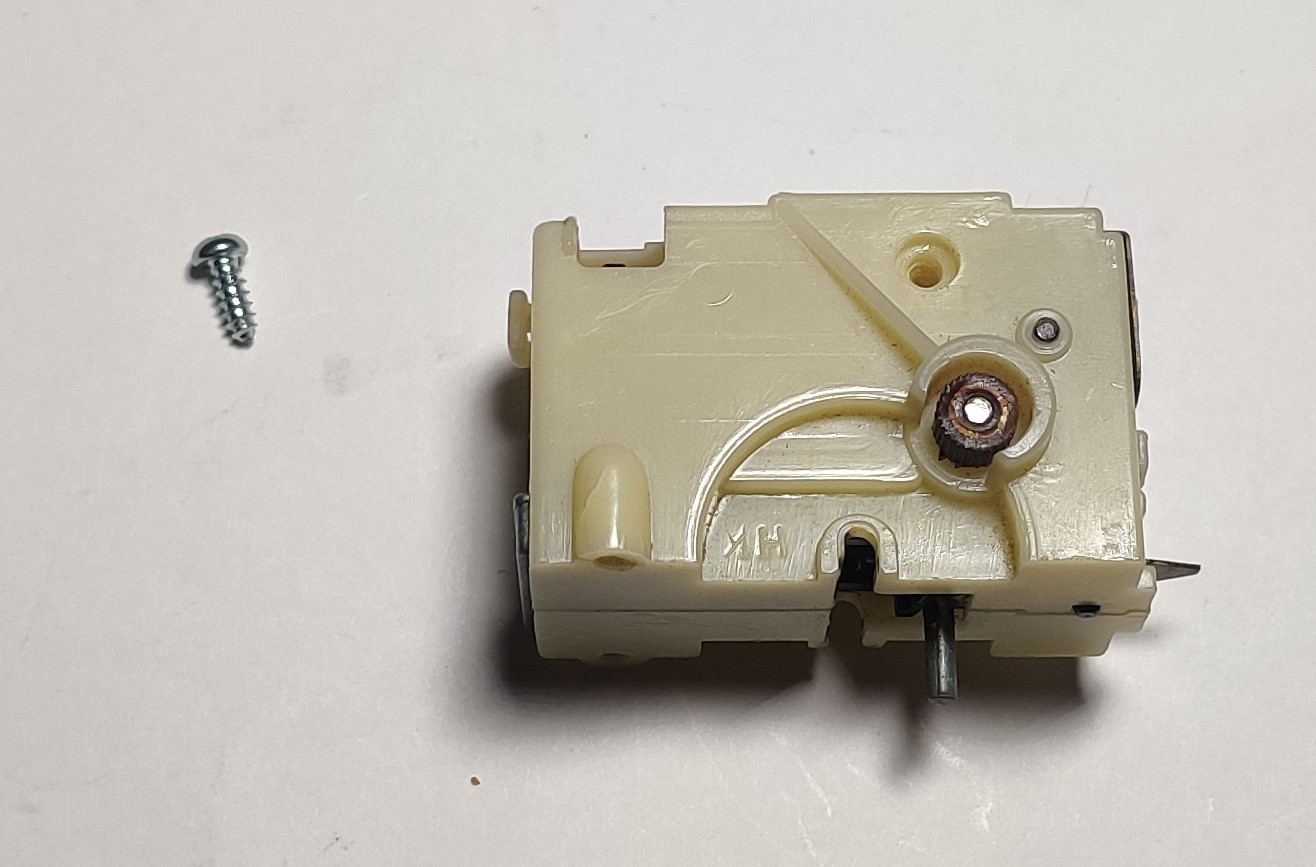
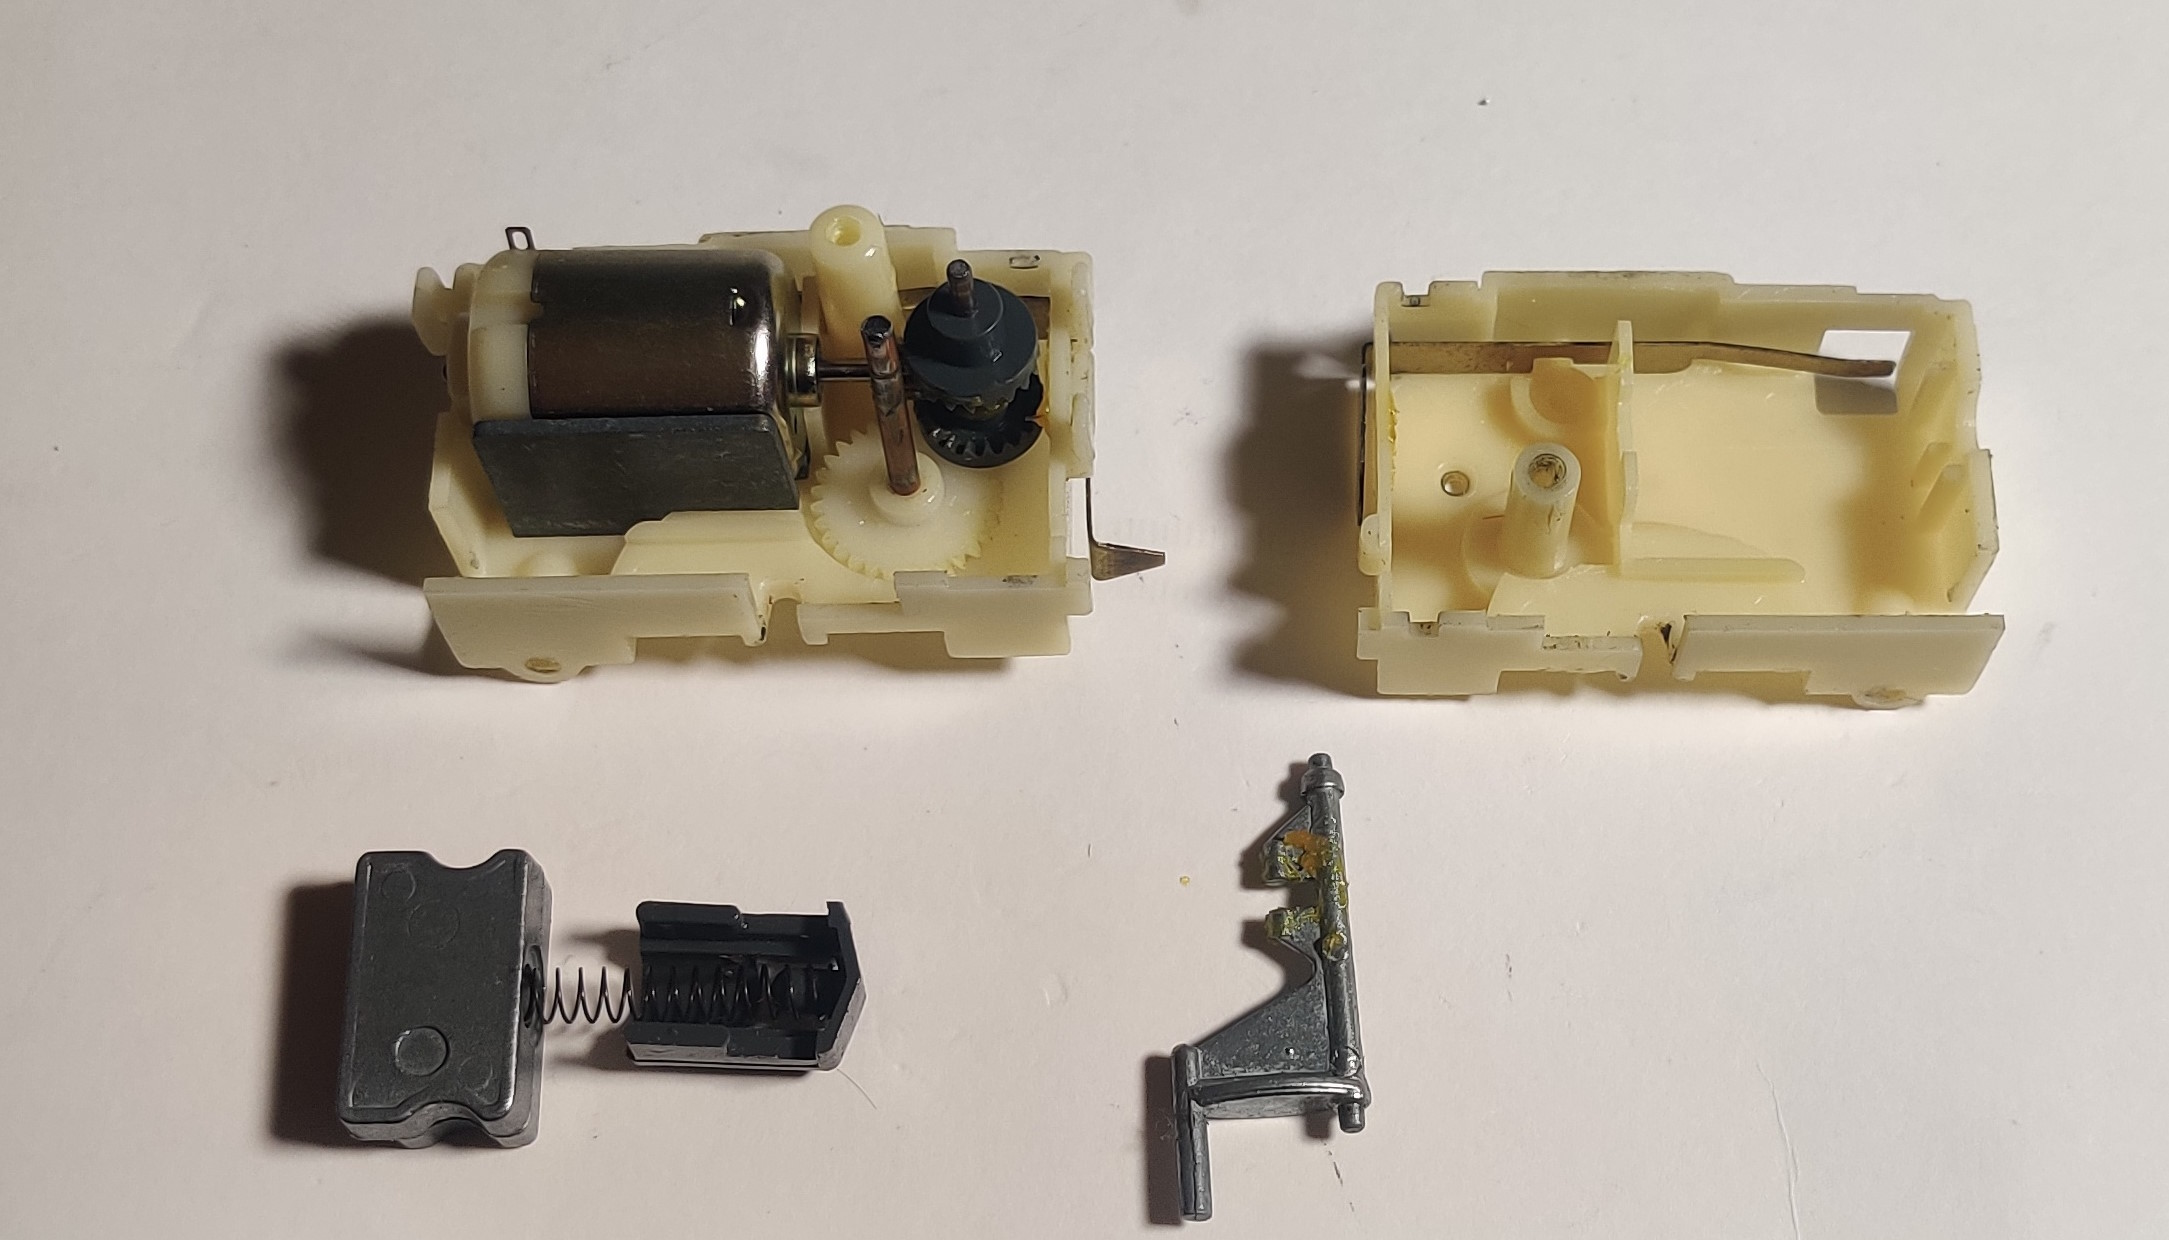
The drive tires will probably be visibly rotted. A screw on one side and a metal strap hold the gearbox closed as well as the solder joints on the motor. Heat up the solder on the right motor contact until the tab comes free from the cupped brass contact. Remove the screw and either pry the tab of the strap out or pull the gearbox apart from the bottom. This will probably drop all the components out, but all of the shafts and gears will likely be covered in carpet fluff, hair, and degraded rubber drive tire debris that need to be cleaned anyways.
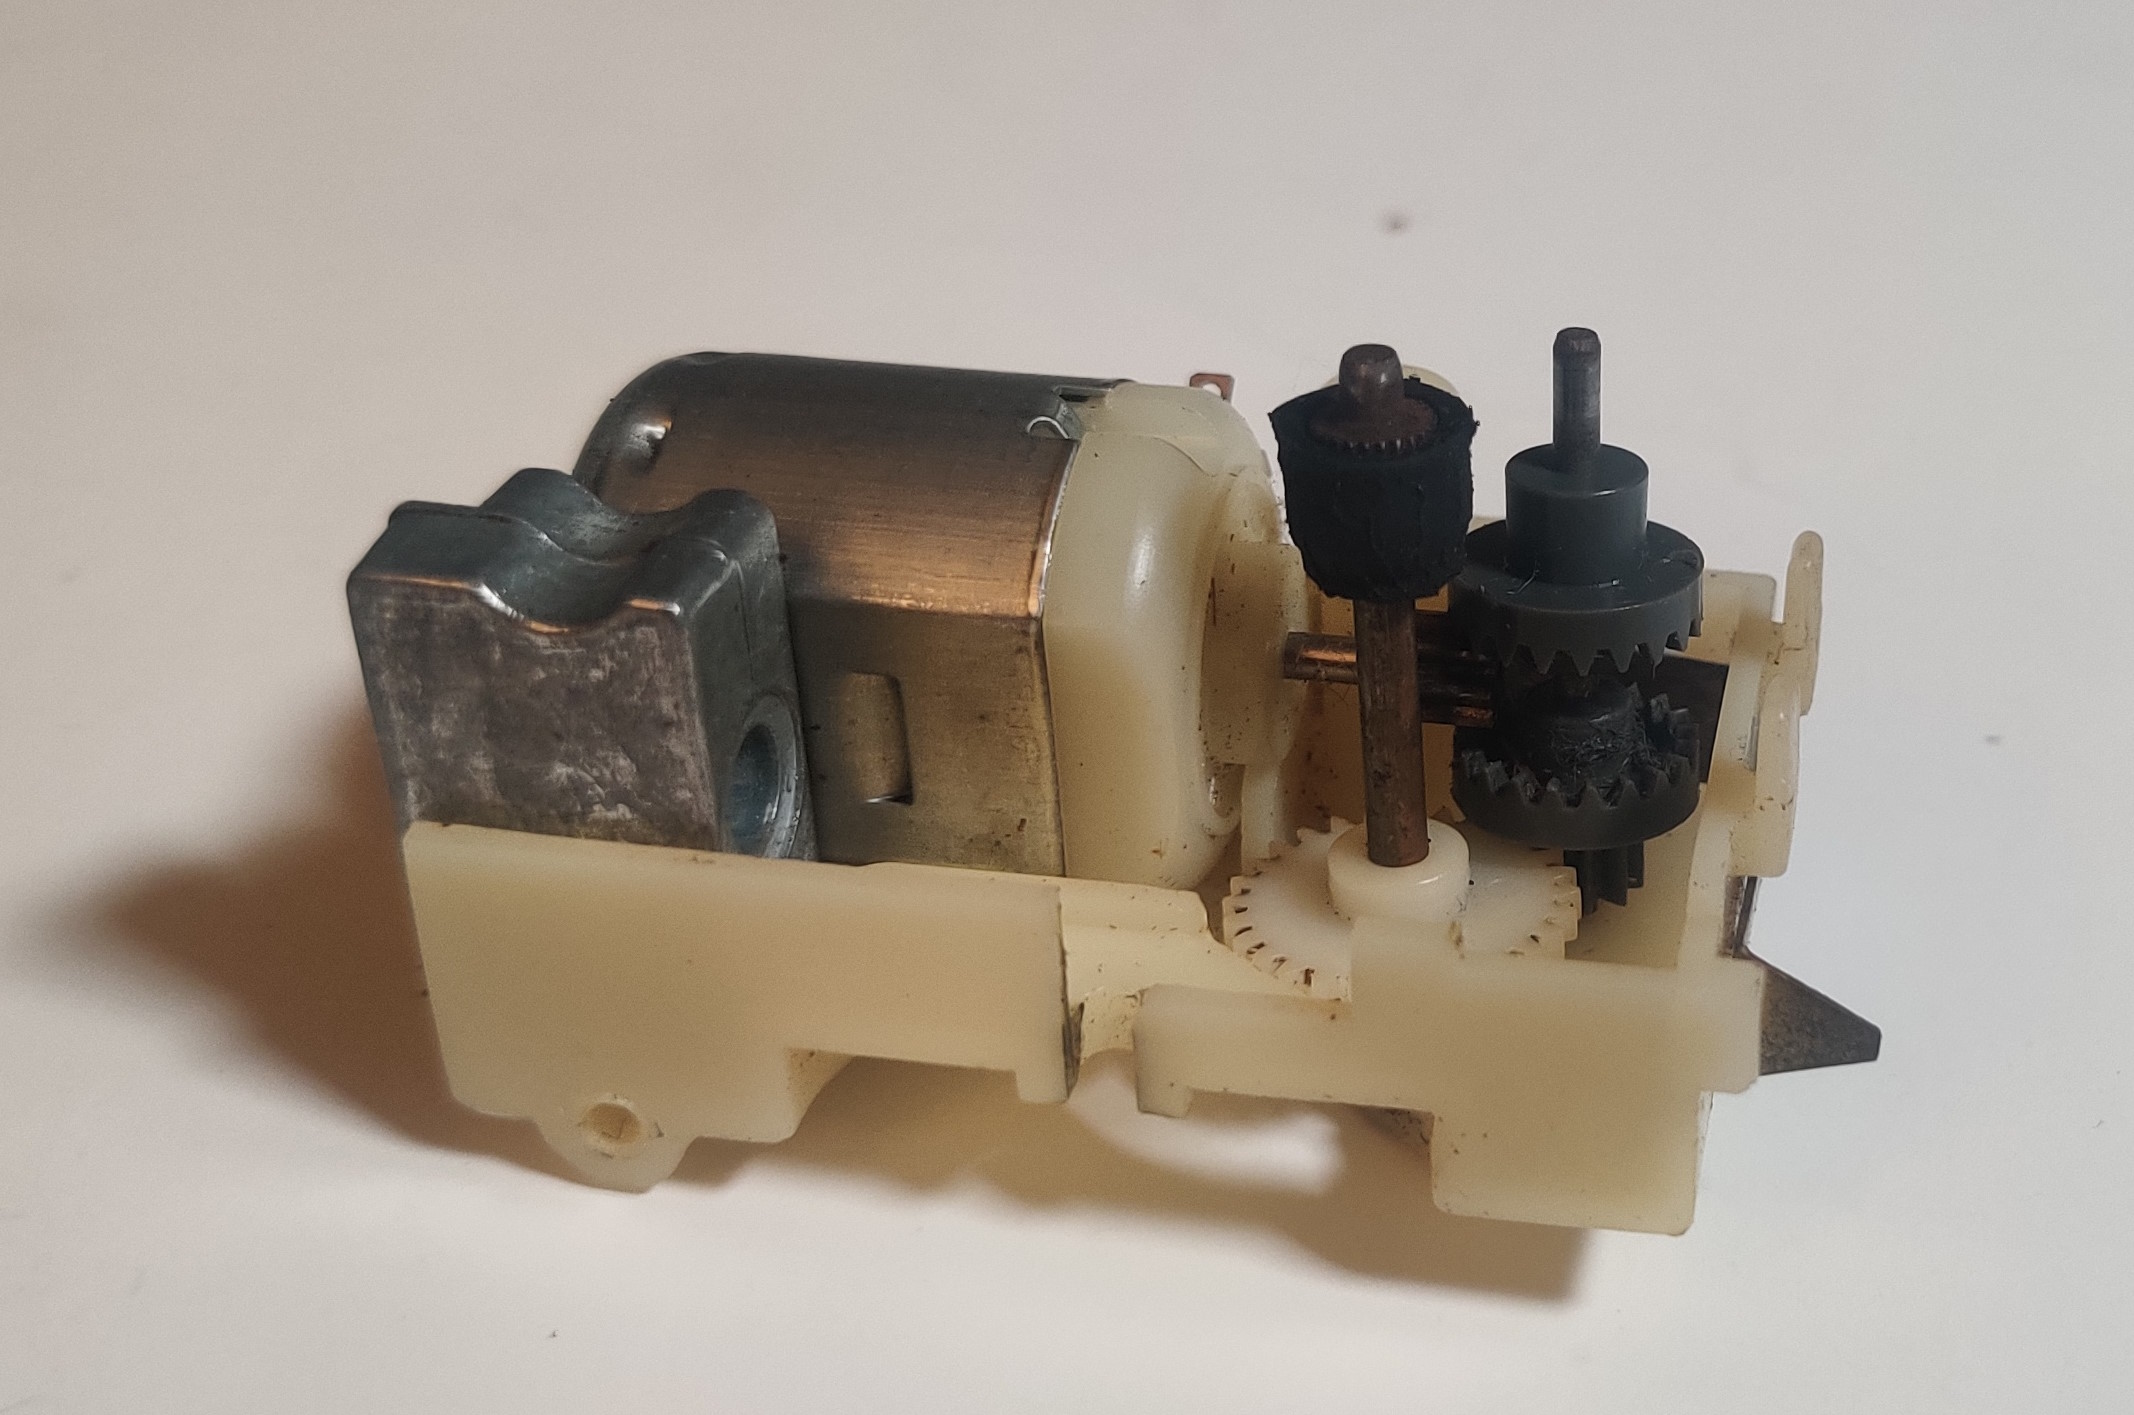
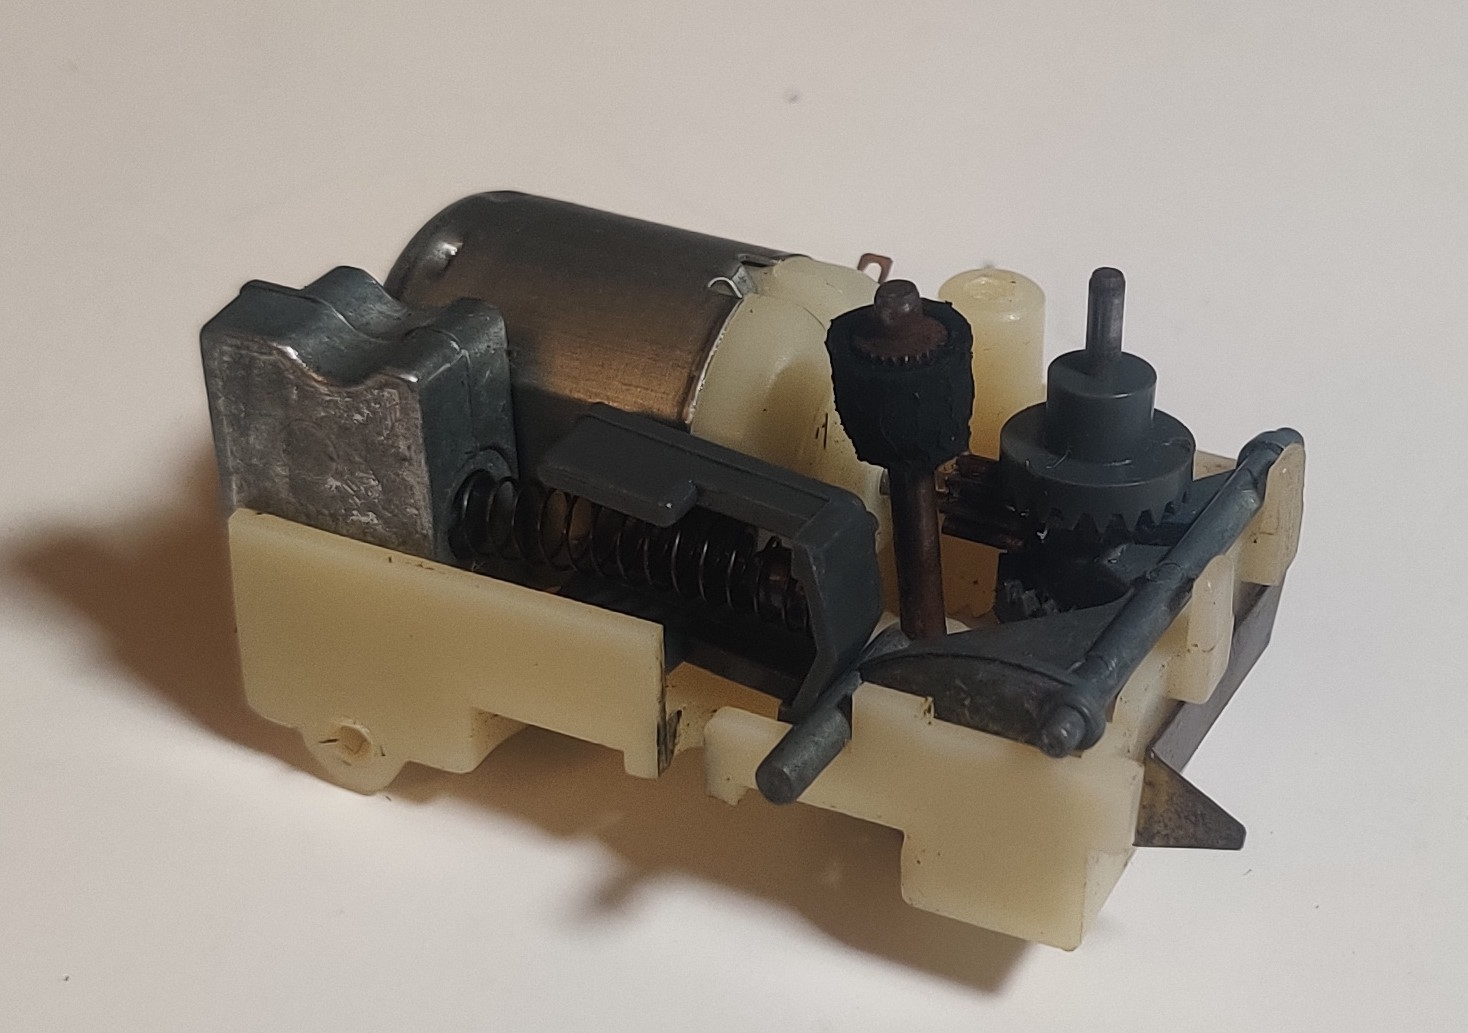
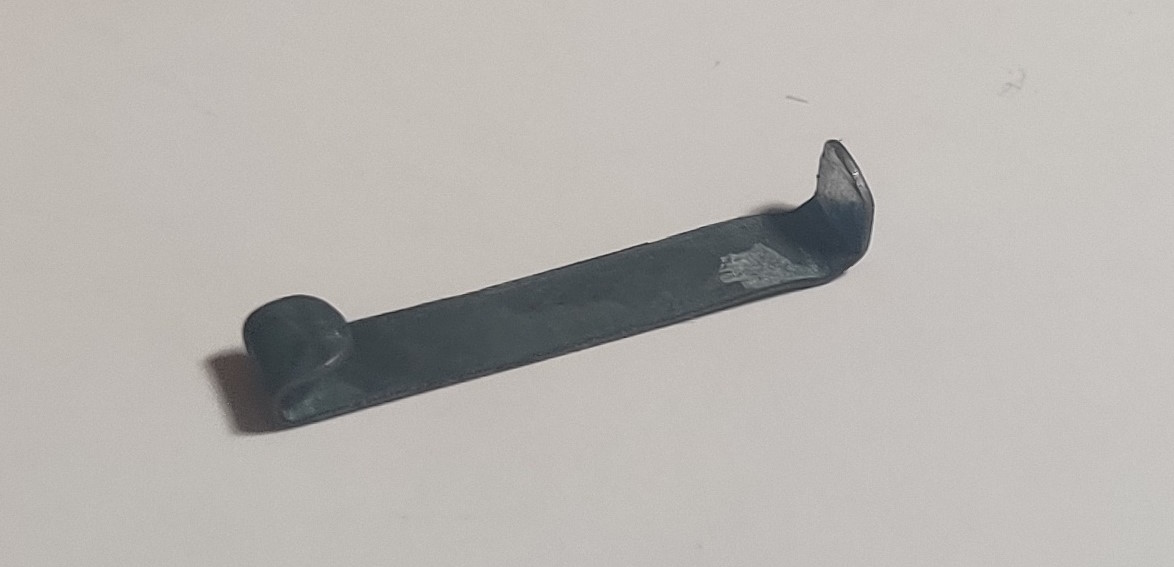
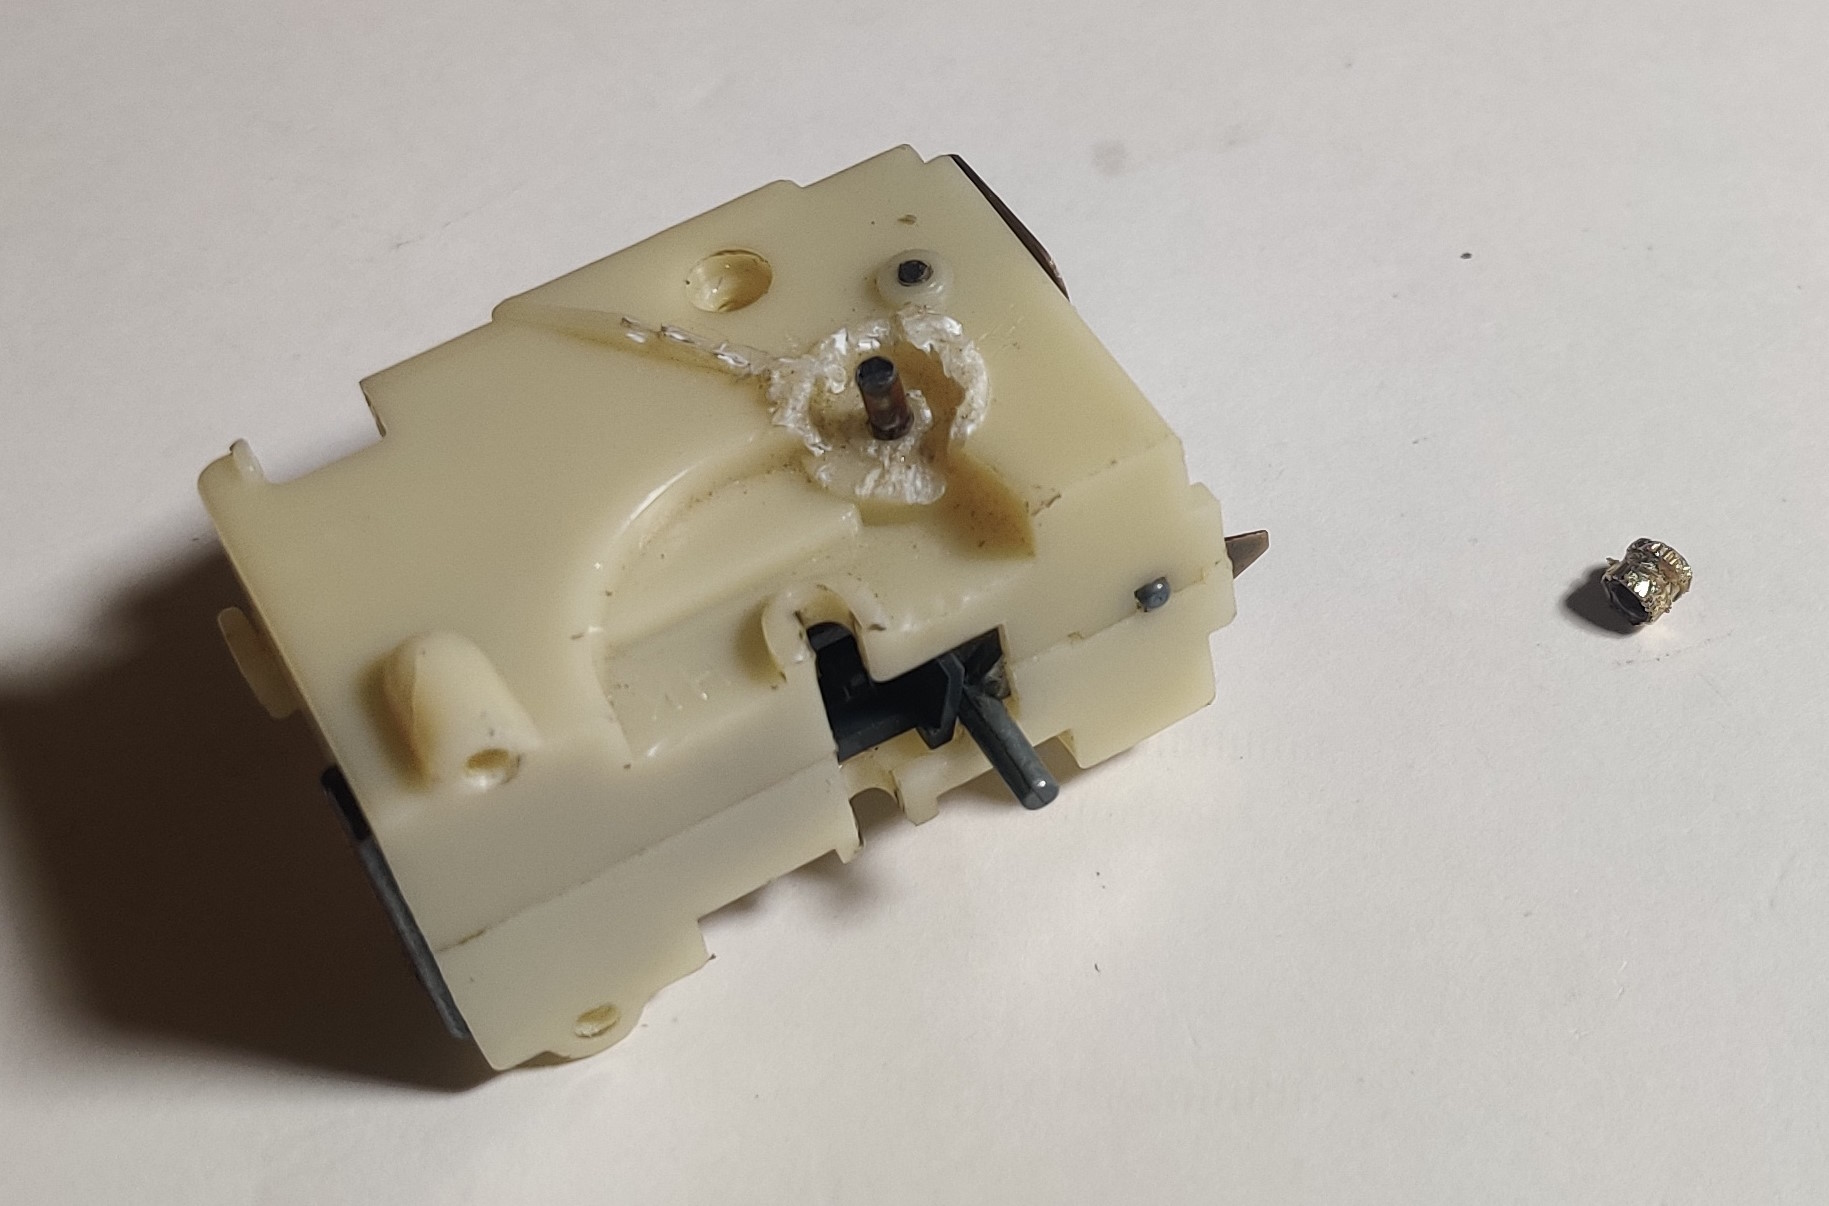
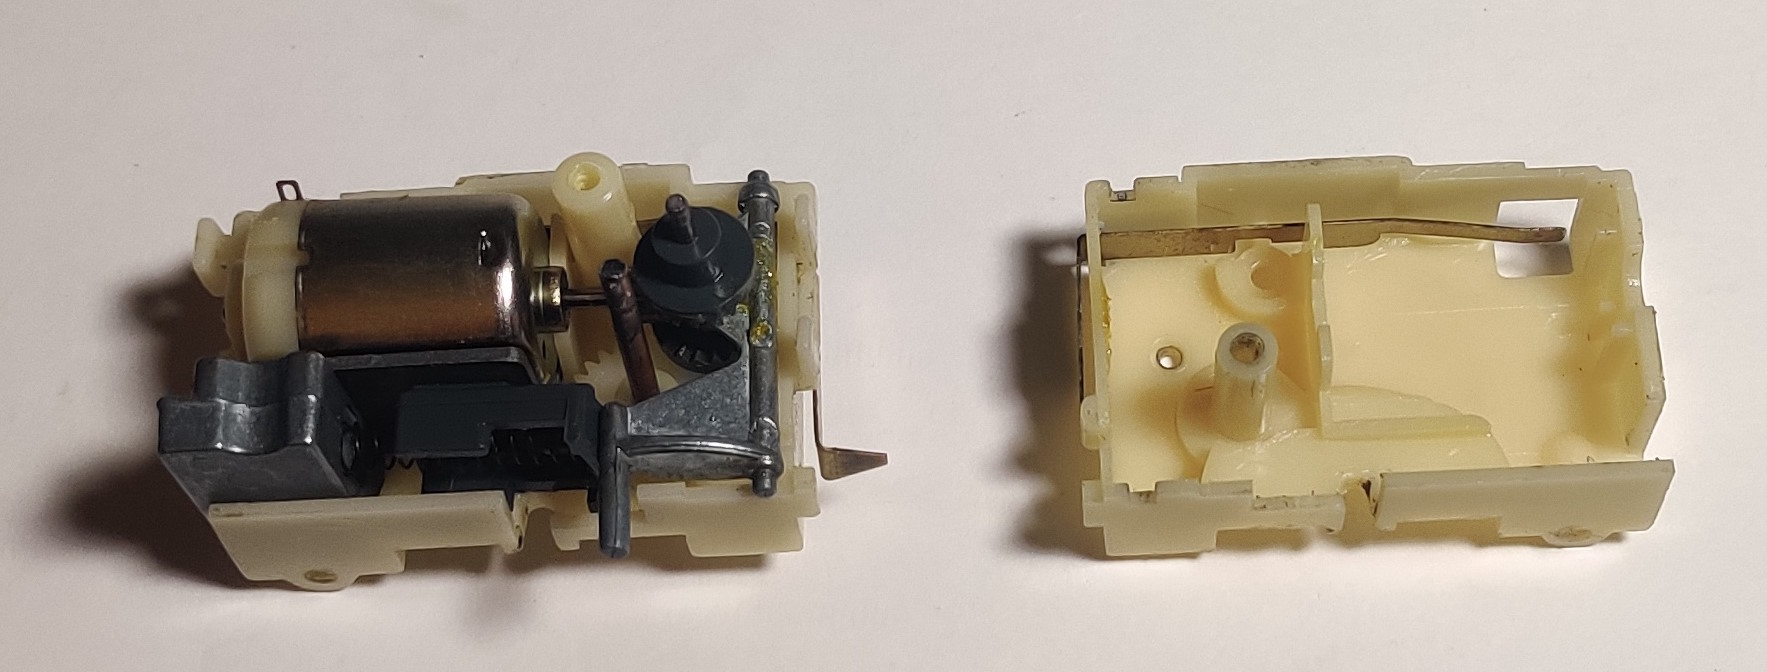
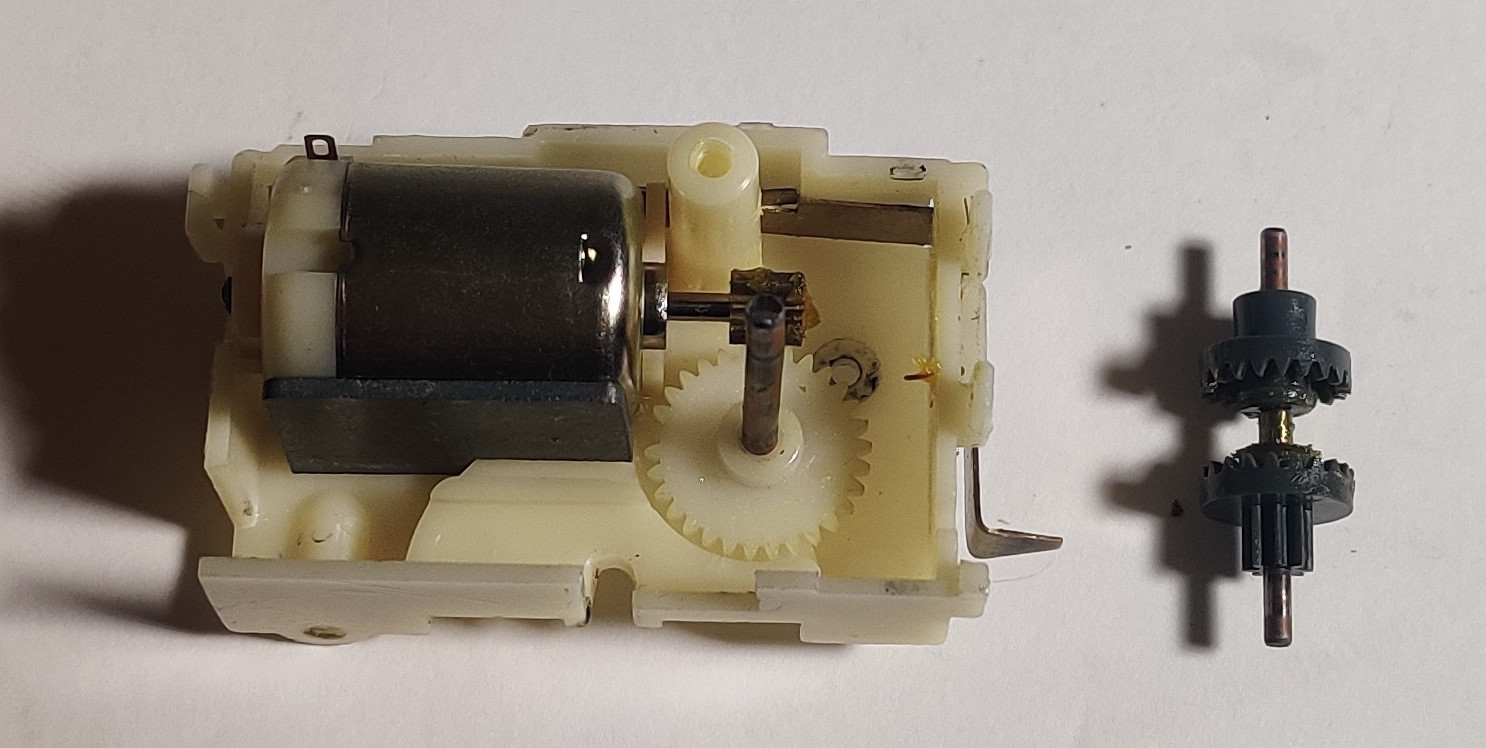
This gearbox relies on two contrate gears on a single shaft which slides back and forth so alternating gears are in contact and reducing from the motor output shaft. A large gear on the output shaft forms a second reduction with a small gear also on the sliding shaft, and the friction drive tires form another reduction with the engine's wheels. A metal "flipper" sits towards the front of the gearbox with a peg that hangs down to hit the reverser rails. A spring-loaded locator puts pressure on the flipper so that it stays to one side or the other but can still be flipped back and forth by the reverser track. The flipper moves the sliding shaft back and forth so that one contrate gear or the other is in contact with the motor. Because the contrate gear's teeth are facing each other, when one is in contact the shaft will rotate in one direction but will reverse direction when the other gear comes in contact. This gives the gearbox its reciprocating motion.
The once-rubber drive tires will need to be repaired or replaced. I have a few methods on the regular old-power gearbox repair page.
When the gearbox is back together with the screw reinstalled, the motor can be resoldered and the strap can be straightened out and reinstalled. Test the engine to make sure it is working well with the gearbox screwed back together and the motor tab pressed up against the contact strip before installing the strap and resoldering the motor, as it is more annoying to un- and re-do these connections over and over.
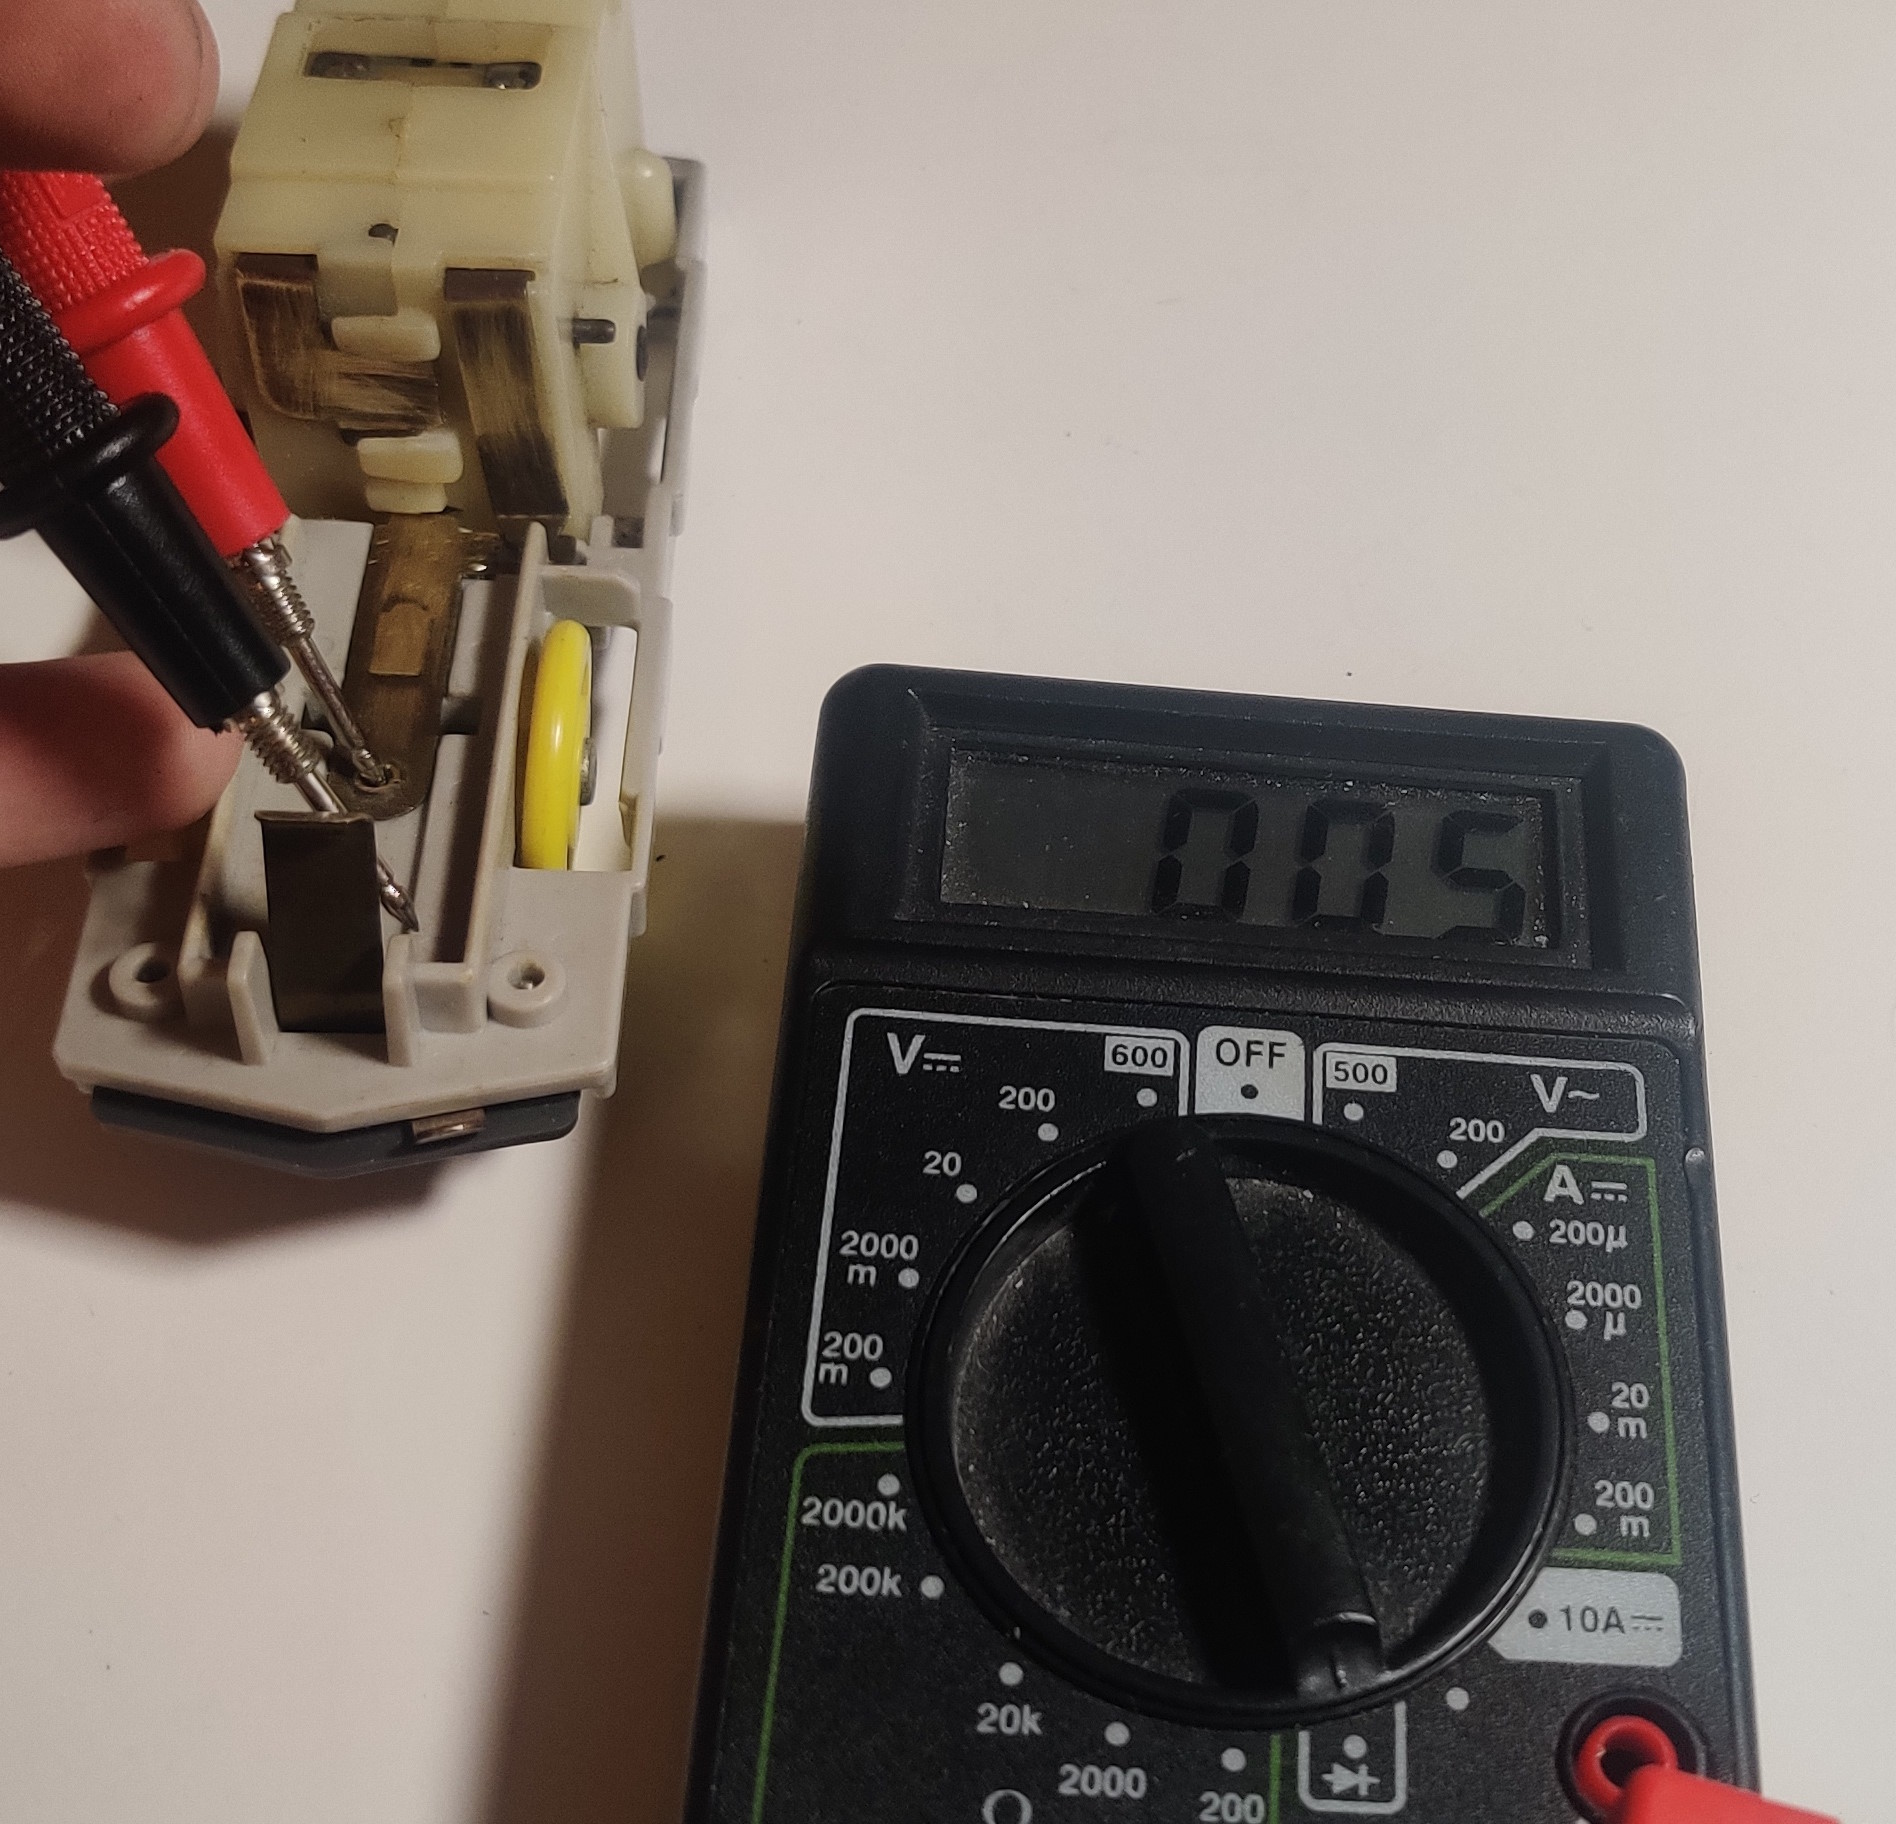
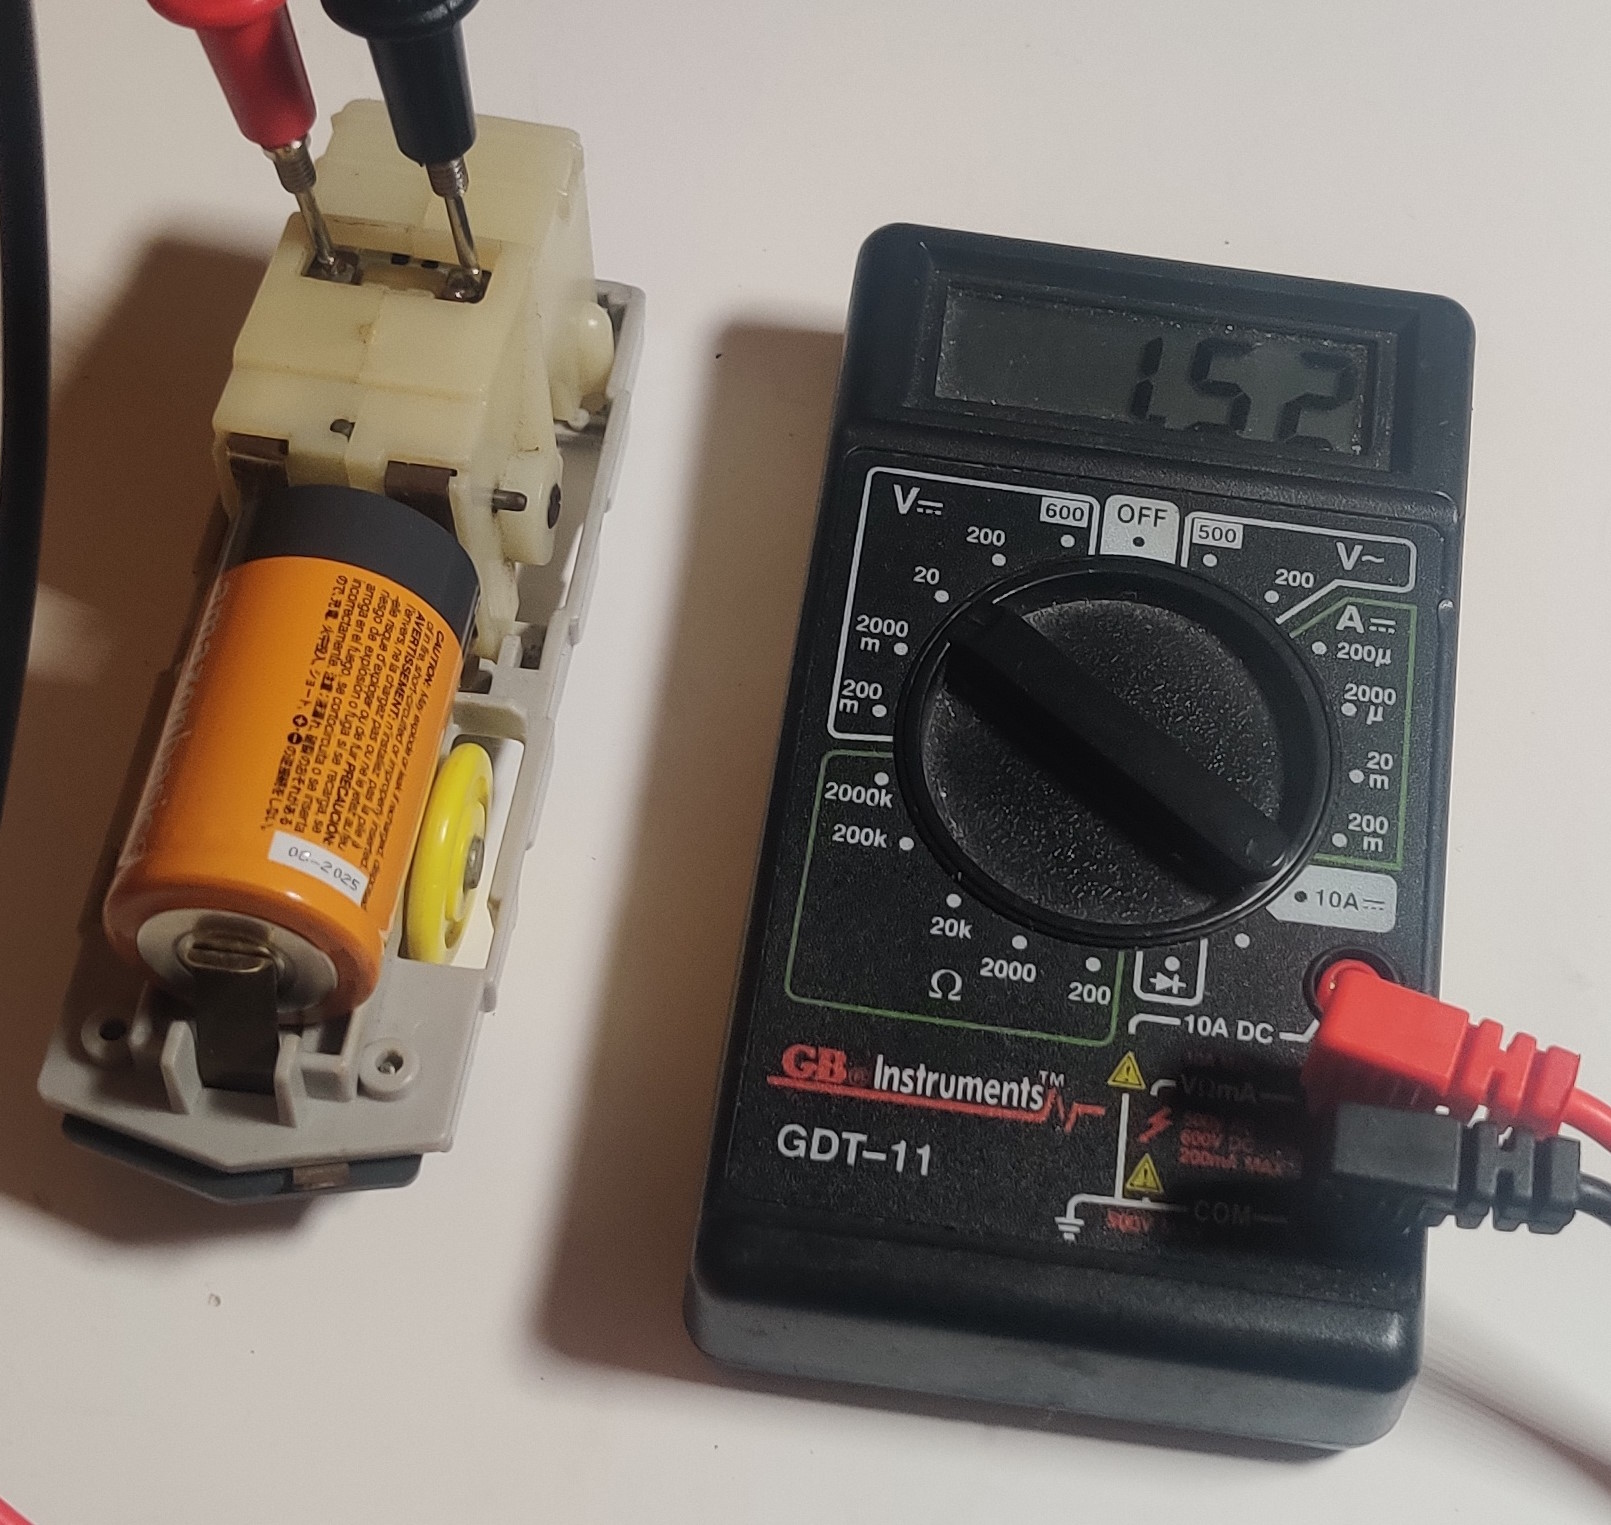
The brass battery contact strips on my older EF66 were tarnished and I cleaned them up with a fiberglass pencil. I used a multimeter to check when the power switch began making good continuity and when the motor was receiving good power.
External drive gearbox
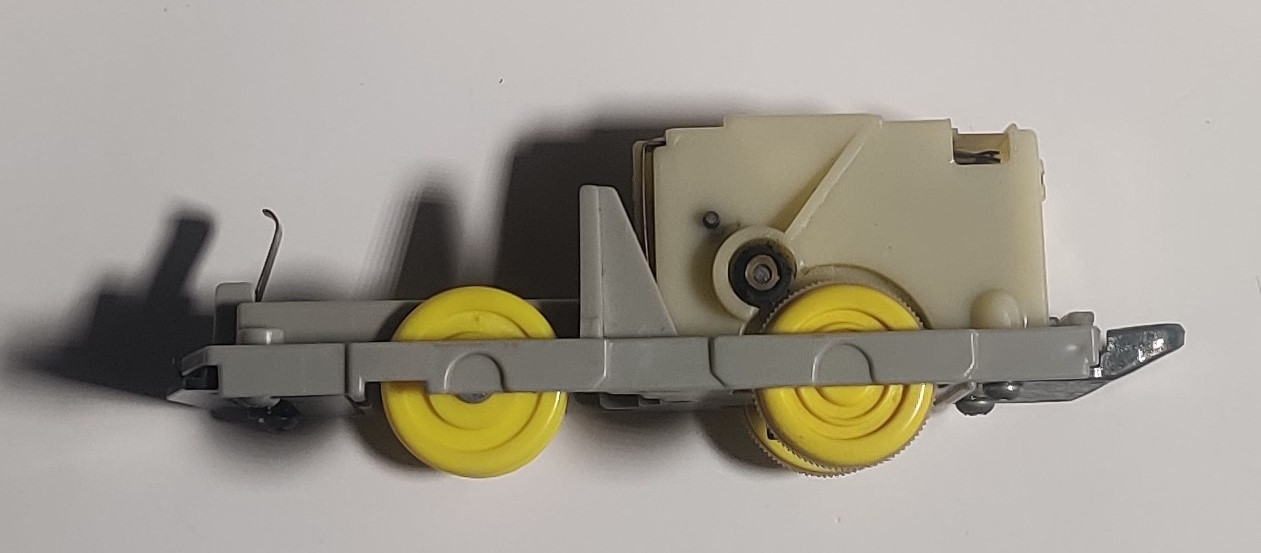
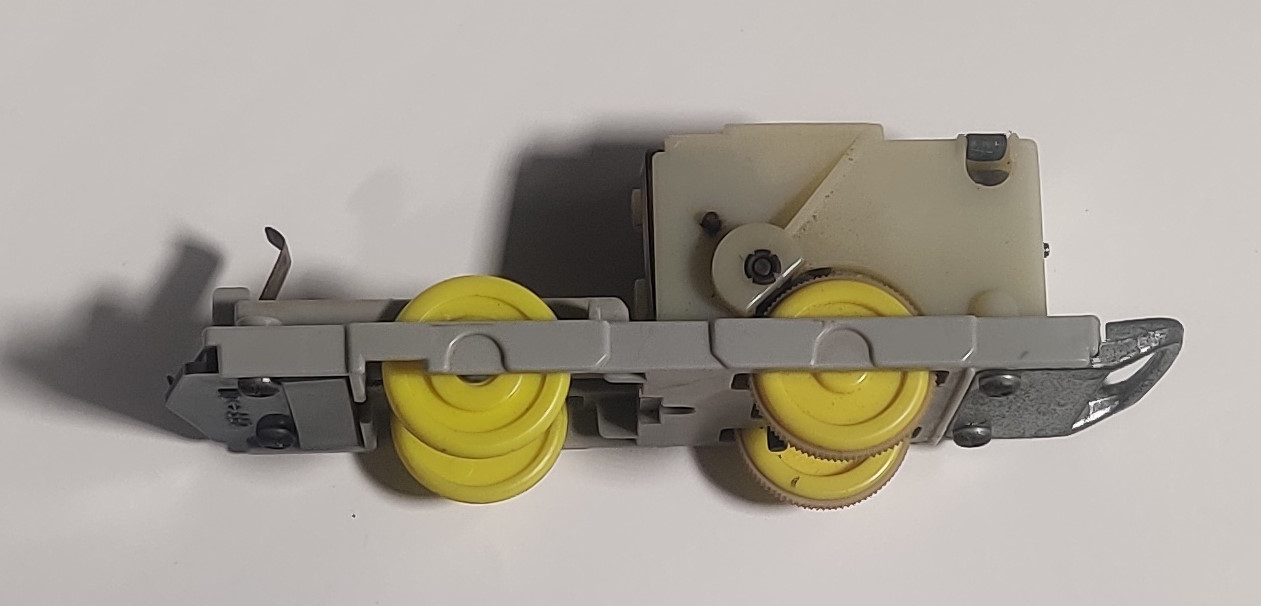
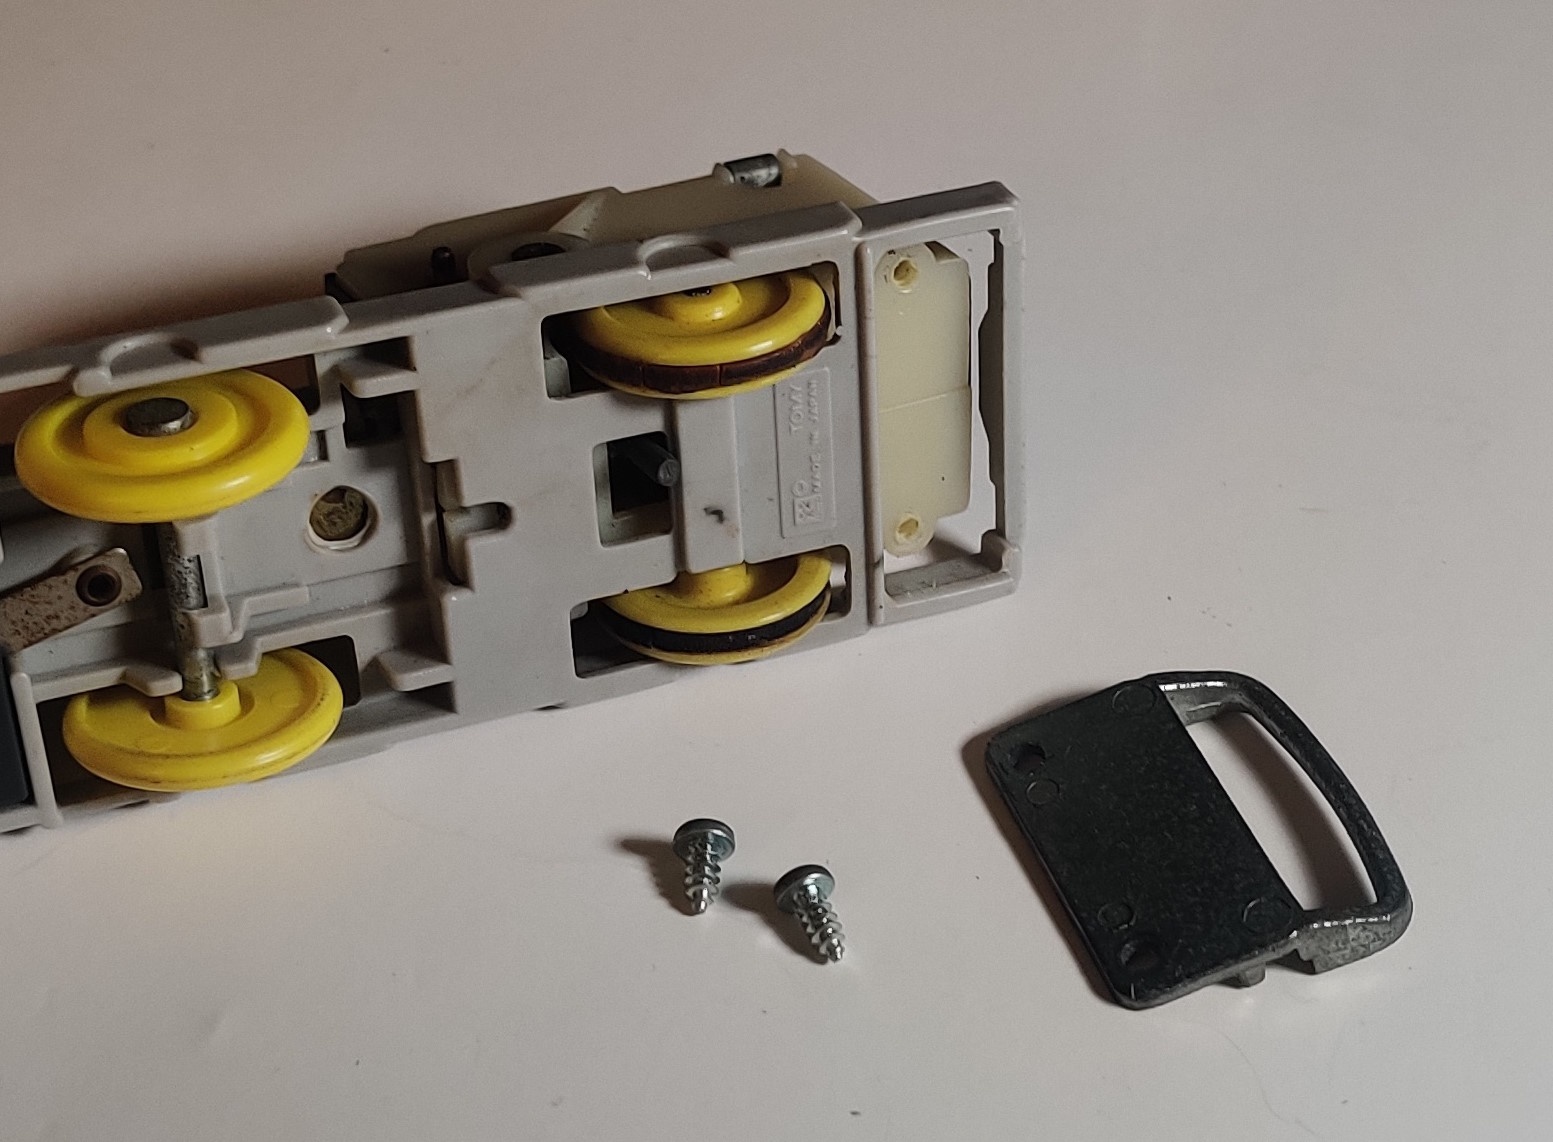
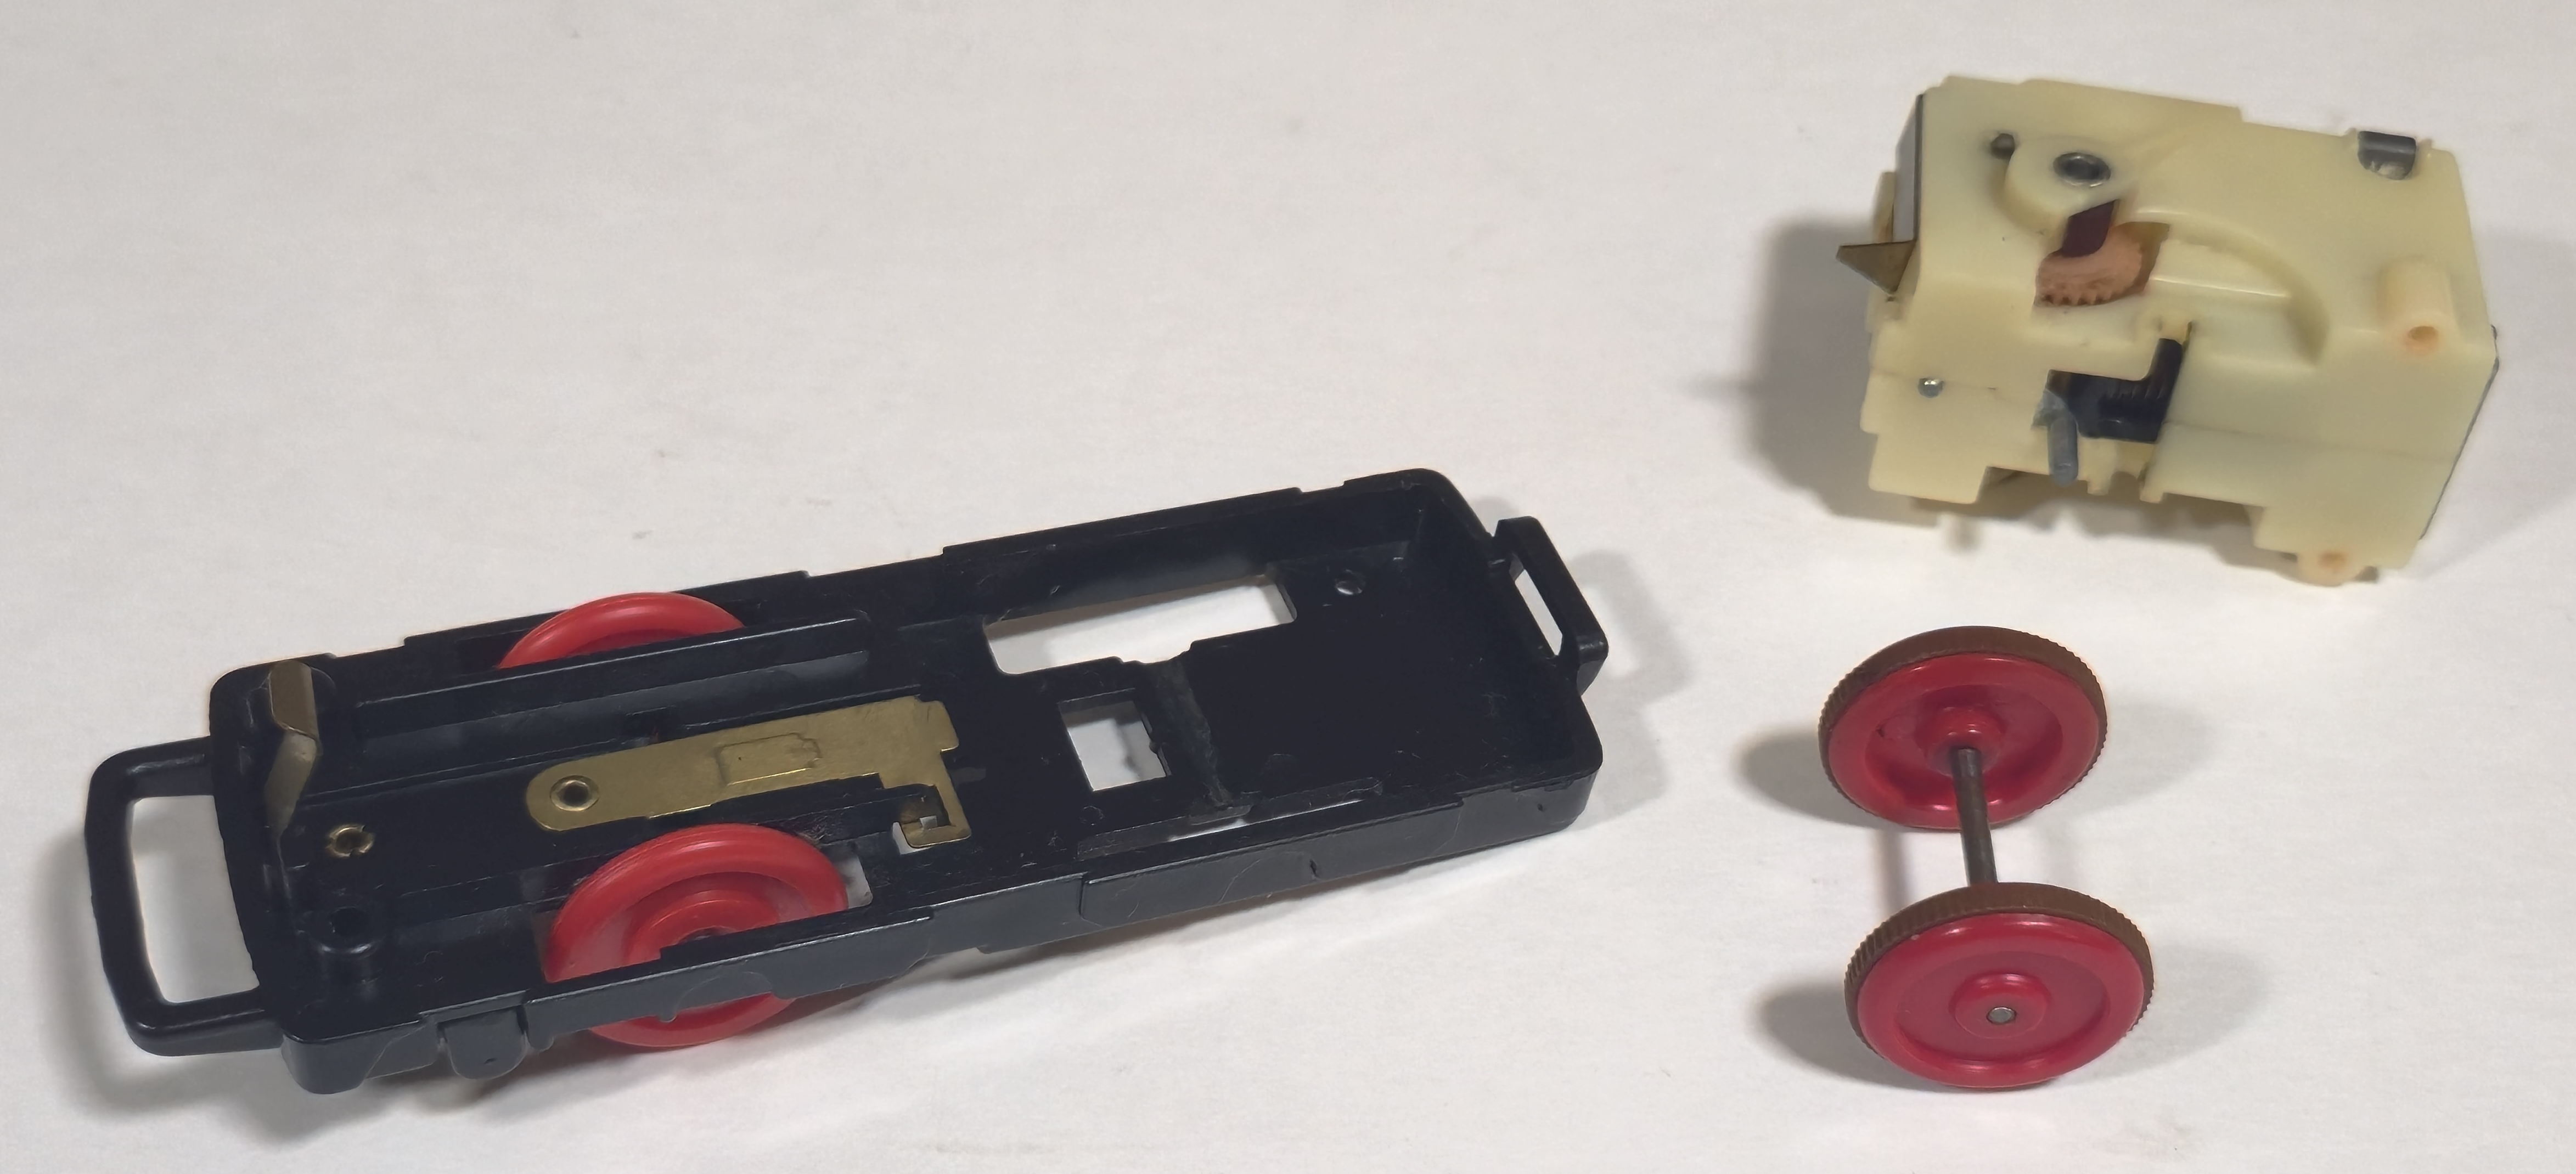
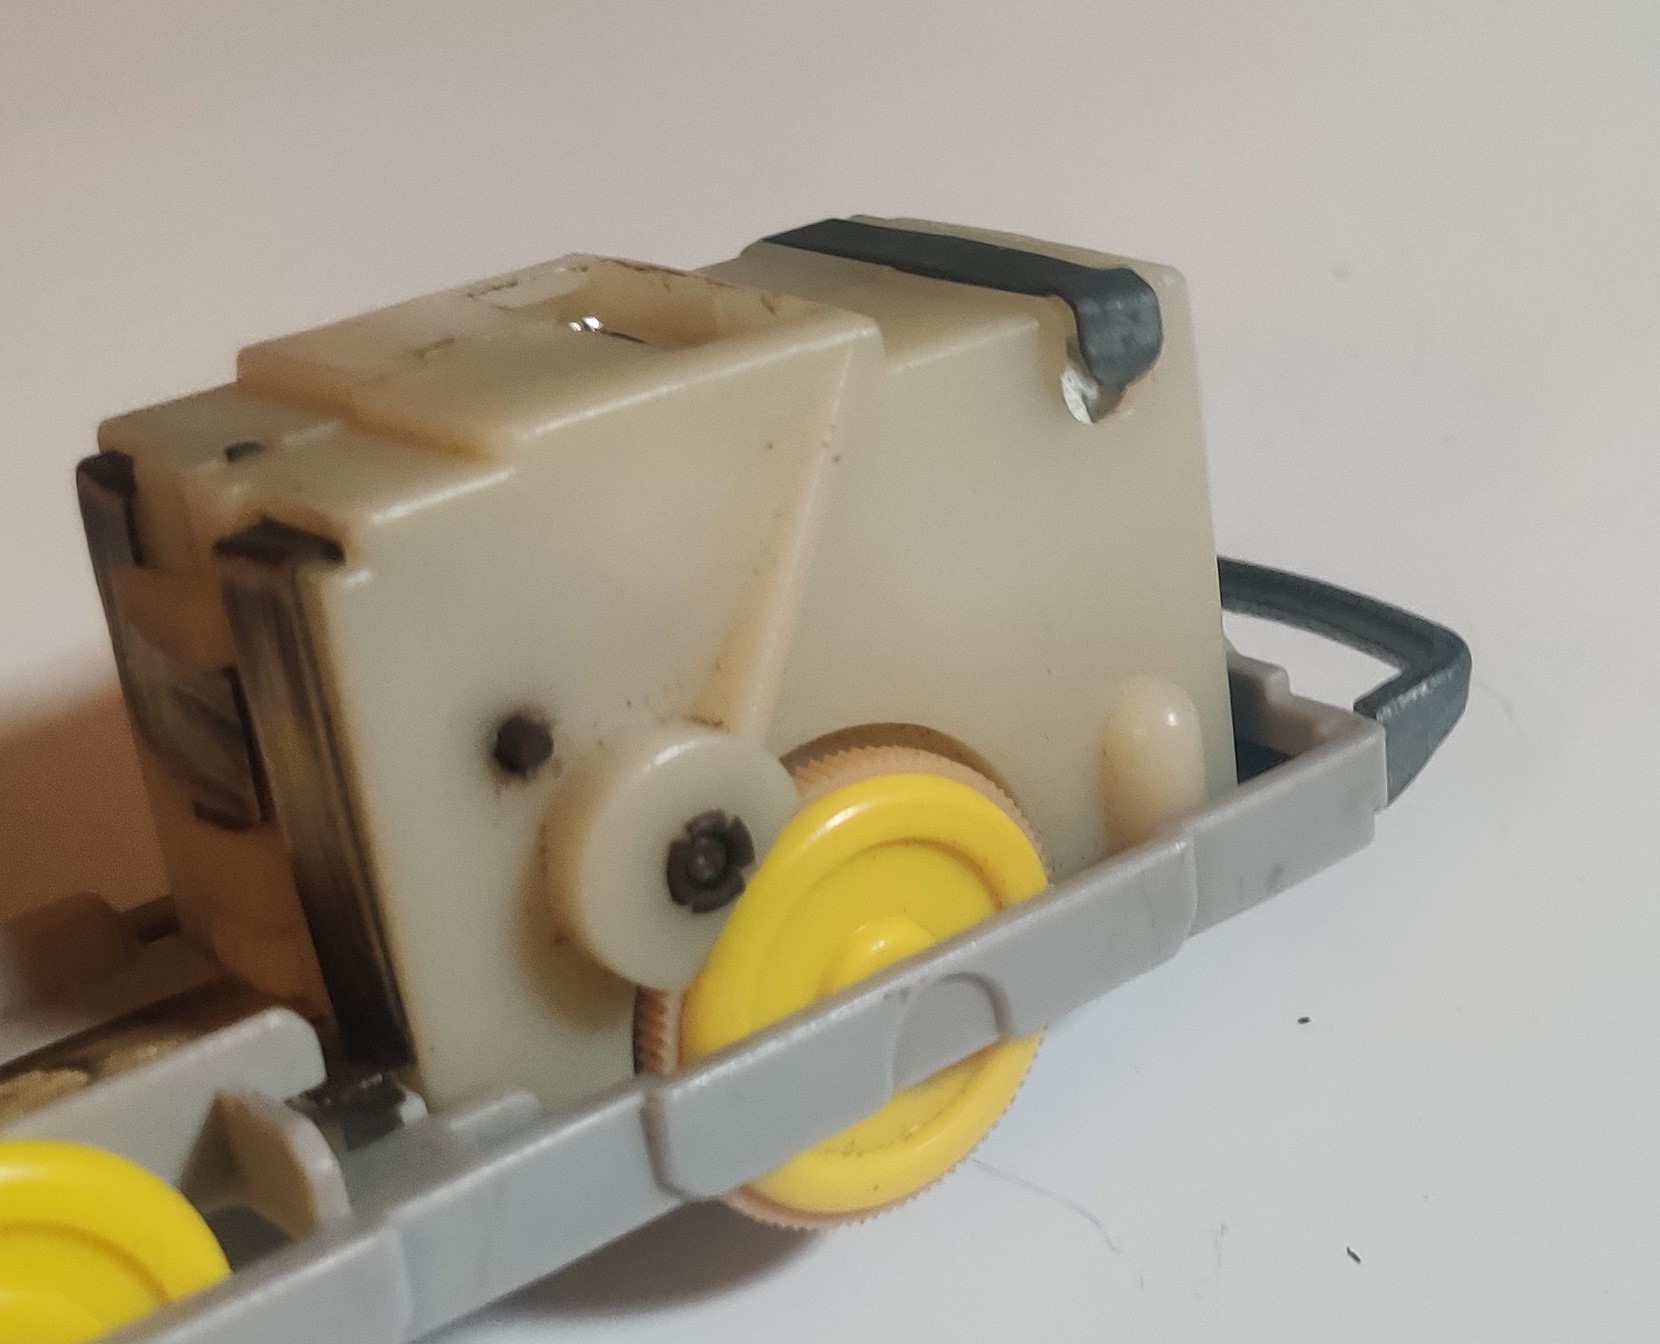
Later on the EF-66 changed to using this version of an old-power gearbox with the drive tires on the outside of the gearbox like most (all?) other friction-drive Plarail gearboxes. This later style of chassis has an additional support, seemingly to help keep the C battery in place inside the locomotive.
The new version of this gearbox is affixed in the same way with two screws through the rear coupling bar. If you only need to replace the rubber friction drive tires they can now be replaced using one of the methods described here or your own suitable procedure. If you need to service the motor or gearbox internals, one screw on the right side will need to be removed.
The hardest part about disassembling this gearbox, like other milky white plastic gearboxes, is removing one of the brass drive spools. The spool on the right side of the gearbox needs to be removed as the gear arrangement and plastic molding will still prevent the gearbox from being disassembled if only the left spool is removed. The "best" way to do this is seemingly to cut some sections of the plastic gearbox away until a pinion or wheel puller can be inserted to pull the bushing off the axle. Interestingly, this later gearbox does not solder the motor tabs and just uses a floating crush-fit against the gearbox contact strips. Opening the gearbox reveals a similar gear layout to the older version, with a spring-loaded tab pushing against a metal flapper which is actuated back and forth by the reverser rails to slide alternating contrate gears into the geartrain, allowing for reversing.
Tips on disassembling and cleaning the small can motors used in Plarail trains can be found on the common repairs page.